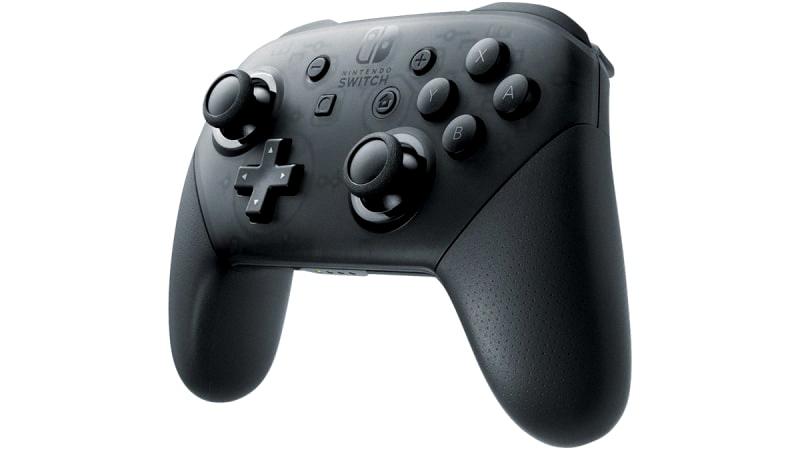
The Switch Pro Controller is an excellent choice for players who prefer a more traditional gaming experience on their Nintendo Switch. With its ergonomic design and responsive buttons, it offers a comfortable and reliable way to play your favorite games.
Connecting your Switch Pro Controller to your Switch is a straightforward process, but you may encounter some issues along the way. In this article, we’ll walk you through the steps to connect your Pro Controller to your Switch.
Method 1 – Wired
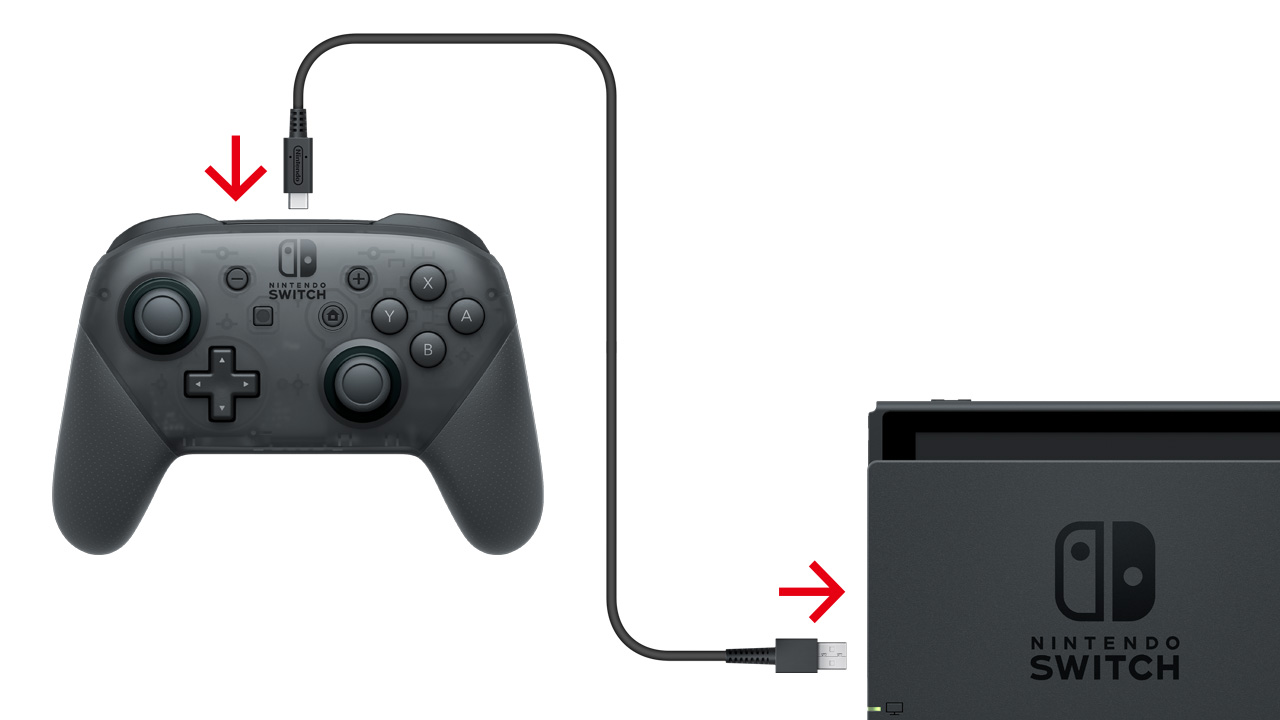
If you prefer a wired connection, you can use the USB charging cable that comes with your Pro Controller to connect it to your Switch dock. Here’s how:
Step 1: Connect the USB charging cable to your Switch dock.
Step 2: Connect the other end of the cable to your Pro Controller.
Step 3: Press the SYNC button on your Pro Controller once, then press any other button to power it on.
Step 4: Your Pro Controller should now be connected to your Switch. If it isn’t, try using a different USB port on your dock or a different USB charging cable.
Method 2 – Wireless
If you prefer a wireless connection, you can pair your Pro Controller to your Switch using Bluetooth. Here’s how:
Step 1: Select Controllers from the row of options along the bottom of the Switch Home menu.
Step 2: Select Change Grip/Order from the right sidebar.
Step 3: Press and hold the SYNC button on your Pro Controller for one second.
Step 4: Your Pro Controller should now be paired with your Switch.
If you’re having trouble pairing your Pro Controller wirelessly, make sure it’s fully charged and try resetting it by pressing the SYNC button once, then pressing any other button to power it on again.
Connecting your Switch Pro Controller to your Switch is a simple process, but it’s important to make sure your Pro Controller is fully charged and that you’re using a reliable USB charging cable or Bluetooth connection. If you encounter any issues, try resetting your Pro Controller or using a different cable or USB port. With these tips, you’ll be able to enjoy your favorite games on your Switch with ease.
Troubleshooting Pro Controller Connection Issues on Nintendo Switch
There could be several reasons why your Pro Controller is not connecting to your Switch. One possible reason is that the Pro Controller is not properly paired with the Switch. To pair the Pro Controller, press and hold the SYNC button on the top of the controller until the LED lights start flashing. Then, go to the Controllers menu on your Switch, select “Change Grip/Order,” and follow the on-screen instructions to pair the Pro Controller.
If the Pro Controller still does not connect, it could be due to low battery levels. Make sure the Pro Controller is charged by connecting it to a USB port on the dock or using a USB charging cable.
Another possibility is that there could be interference from other wireless devices. Move any other wireless devices away from the Switch and the Pro Controller to reduce interference.
If none of these solutions work, try resetting the Pro Controller by pressing the SYNC button once, then press any other button, such as the A button on the controller to power it back on. Additionally, try using a different USB port on the dock or a different USB charging cable to see if that solves the issue.
Connecting a Pro Controller Switch Without a Dock
To connect a Pro Controller to your Switch without a dock, you can use one of two methods:
Method 1 – Wired:
1. Connect the USB charging cable to your Pro Controller.
2. Connect the other end of the USB charging cable to the USB port on the side of your Switch.
3. Your Pro Controller should automatically connect to your Switch.
Method 2 – Wirelessly:
1. Select Controllers from the row of options along the bottom of the Switch Home menu.
2. Select Change Grip/Order from the right sidebar.
3. Press and hold the Sync button on your Pro Controller for one second.
4. The Pro Controller will begin flashing, indicating it’s in pairing mode.
5. Go to your Switch’s Bluetooth settings and select Pro Controller to pair the device.
6. Your Pro Controller should now be connected wirelessly to your Switch.
Note: If you have trouble connecting your Pro Controller wirelessly, make sure it’s charged and try restarting both your Switch and Pro Controller before attempting to pair them again.
Conclusion
The Switch Pro Controller is a high-quality gaming controller that offers a comfortable and responsive gaming experience. It features a sleek design and offers a wide range of customization options, including motion controls and button mapping. Additionally, the Pro Controller can be easily paired with the Nintendo Switch console using either a USB charging cable or wirelessly, providing users with a hassle-free setup process. While occasional connectivity issues may arise, these can typically be resolved by resetting the controller or trying a different USB port or charging cable. the Switch Pro Controller is a must-have accessory for any serious Nintendo Switch gamer looking to enhance their gaming experience.


