Restoring an iPhone 7 can be a simple process if you follow the right steps. Whether you’re setting up a new device or trying to fix a problem, restoring your iPhone can help bring it back to its original state. In this article, we will go over the steps to restore an iPhone 7 and provide some helpful tips along the way.
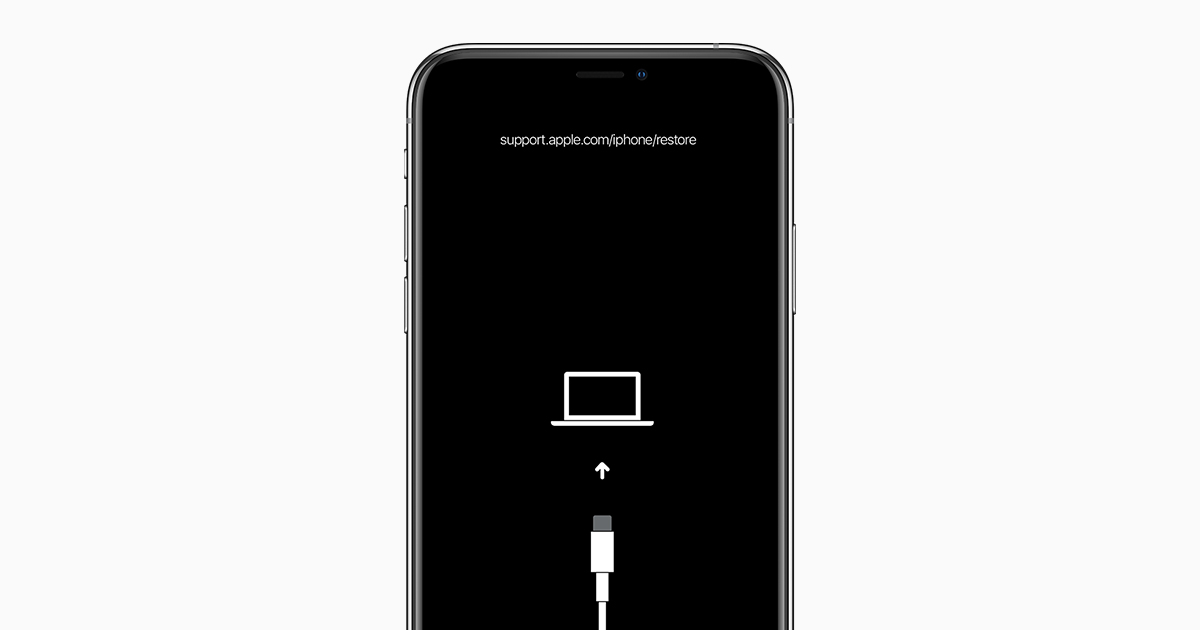
To begin the restoration process, you will need to put your iPhone 7 into recovery mode. This is done by pressing and quickly releasing the volume down button, and then holding the side button until you see the recovery mode screen. Alternatively, if you have an iPhone 7 Plus or iPod touch (7th generation), you can press and hold the top (or side) and volume down buttons at the same time until the recovery mode screen appears.
Once your iPhone is in recovery mode, you can proceed with the restoration. If you are setting up a new or newly erased iPhone, you have a couple of options. You can choose to set up the device manually by tapping “Set Up Manually” and following the onscreen instructions. Alternatively, you can restore your iPhone from an iCloud backup. Simply tap “Restore from iCloud Backup” and follow the prompts to sign in to your iCloud account and select the desired backup.
If you have another iPhone, iPad, or iPod touch with iOS 11, iPadOS 13, or later, you can make use of the Quick Start feature to automatically set up your new device. This feature allows you to transfer your settings, preferences, and content wirelessly from your old device to the new one. Simply follow the onscreen instructions to initiate the Quick Start process.
It’s important to note that restoring your iPhone will erase all data and settings on the device. Therefore, it’s crucial to have a recent backup of your iPhone before proceeding with the restoration. Backing up your iPhone regularly ensures that you can easily restore your data and settings in case of any issues or when setting up a new device.
Restoring an iPhone 7 is a straightforward process that can be done through recovery mode. Whether you’re setting up a new device or restoring from a backup, following the onscreen instructions will guide you through the process. Remember to have a recent backup before restoring to ensure you don’t lose any important data.

How Can You Restore Your iPhone 7?
To restore your iPhone 7, you can follow these steps:
1. Press and quickly release the volume down button. This button is located on the left side of your iPhone.
2. Next, press and hold the side button on the right side of your iPhone. Keep holding it until you see the recovery mode screen.
3. On the recovery mode screen, you will see options to either update or restore your iPhone. To completely restore your iPhone to its factory settings, choose the “Restore” option.
4. Your computer will prompt you to download and install the latest version of iTunes if you haven’t done so already. Make sure your computer has an active internet connection and follow the on-screen instructions to complete the installation.
5. Once you have iTunes installed and open on your computer, you will be prompted to connect your iPhone to the computer using the USB cable that came with your device. Connect your iPhone to the computer.
6. iTunes will recognize your iPhone in recovery mode and display a message asking if you want to restore your iPhone. Click on the “Restore” button to confirm.
7. iTunes will then download the necessary software for your iPhone and restore it to its factory settings. This process may take some time, so be patient and ensure that your computer remains connected to the internet and powered on throughout the process.
8. After the restore process is complete, your iPhone will restart and you can set it up as a new device or restore it from a previous backup.
It’s important to note that restoring your iPhone will erase all data and settings on the device, so be sure to backup any important data beforehand.
How Do You Force Your iPhone to Restore?
To force your iPhone to restore, you can follow these steps:
1. Turn on your new or newly erased iPhone.
2. When prompted, choose the “Set Up Manually” option.
3. Next, tap on “Restore from iCloud Backup.”
4. Follow the onscreen instructions to proceed with the restoration process.
Alternatively, if you have another iPhone, iPad, or iPod touch with iOS 11, iPadOS 13, or later, you can use the Quick Start feature to automatically set up your new device. This method allows for a seamless transition between devices.
Conclusion
Restoring an iPhone 7 is a relatively straightforward process that can be done in a few simple steps. By following the instructions provided, you can easily access the recovery mode screen and initiate the restoration process. Once you have reached this screen, you have the option to set up your iPhone manually or restore it from an iCloud backup. Additionally, if you have another iOS device with the appropriate software version, you can use Quick Start to automatically set up your new device. the restoration process allows you to start fresh with your iPhone 7 or transfer your data from a previous backup, providing you with a seamless and personalized user experience.


