GarageBand is one of the most popular music production and recording programs available today. With its intuitive interface and powerful features, it’s no wonder why so many users have chosen it as their go-to program for creating music. Whether you’re a beginner or a seasoned pro, GarageBand has something to offer everyone.
One of the great features of GarageBand is its ability to slow down a region in your project. This can be useful for learning more complex parts or just taking a break from playing at full speed. In this blog post, we will show you how to slow down a region in GarageBand on Mac.
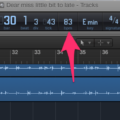
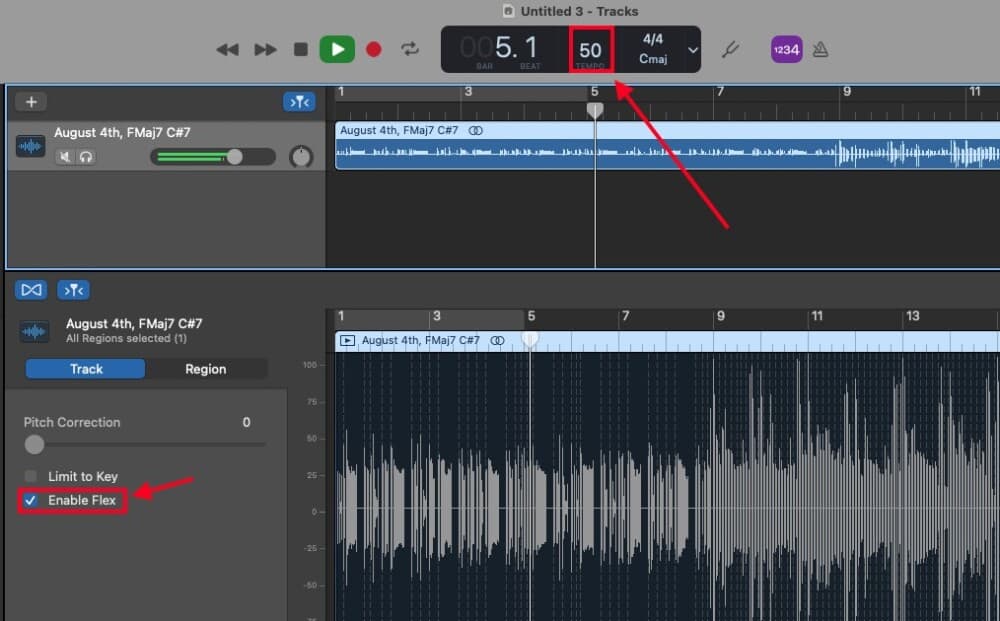
First, click the triangle on the right side of the LCD and choose Beats & Project. Next, you can either click and hold the tempo value and drag it up or down or double-click the tempo value and enter a new value in the Tempo field. You can also open up song settings and tap Tempo to show the tempo controls; then set the tempo by tapping on the tempo bar repeatedly or changing it incrementally with up or down arrows next to the tempo number.
Once you’ve adjusted your tempo to your desired speed, you can trim an audio region in order to shorten it if needed. To do this, place your pointer over either the lower left or lower right edge of the region; then drag it over the part you want to trim until you reach your desired length.
Finally, once you’re finished making changes to your project file, you can export it as an MP3 file by clicking on ‘Export.’ Your new MP3 audio will be downloaded directly onto your device once completed!
We hope this guide has helped shed some light on how to slow down regions in GarageBand on Mac. If you’re looking for more information about GarageBand’s other features or if you need help troubleshooting any issues with your projects, please visit Apple’s official support page for more assistance!
Changing the Speed of a Track in GarageBand
To change the speed of one track in GarageBand on Mac, you’ll need to open the Beats & Project window. To do this, click on the triangle icon located on the right side of the LCD. Once in the Beats & Project window, you can adjust the tempo of a single track by either clicking and dragging up or down on the tempo value, or double-clicking it and entering a new value in the Tempo field.
Slowing Down a Part of a Song in GarageBand on iPhone
To slow down a part of a song in GarageBand for iPhone, you can use the Time Stretch feature. First, open your project and select the part of the song you want to slow down. Tap the scissors icon to split the track at that point. Select the second half of the split track and tap on it. A menu will appear with several options; select ‘Time Stretch’ from this menu. You will be presented with a slider that you can use to adjust how much slower or faster you want to make this part of your song. When you are happy with your selection, tap ‘Done’ at the top right corner of the screen and your changes will be saved.
Editing Individual Regions in GarageBand
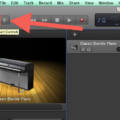
To edit individual regions in GarageBand, first, select the region you want to edit. Then, click “Edit” on the top menu bar. This will open a sidebar with various editing tools, such as fade-in and fade-out, trim, split, and join. You can use these tools to adjust the length of the region or change its fades or other settings. To finish your changes, simply click “Done” on the bottom right of the sidebar. Your edits will be saved automatically.
Using Different Tempos in GarageBand
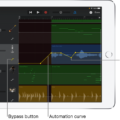
In GarageBand, you can have two different tempos in a song by using the Tempo Track. To do this, open up the Track menu in the toolbar and select Show Tempo Track. The Tempo Track will appear at the top of your project. On this track, you’ll see automation points that represent the tempo of your song. You can then drag these points up or down to create a gradual increase or decrease in tempo. This will allow you to switch between two different tempos in your song.
Slowing Down Music in GarageBand App
To slow down music in the GarageBand app, you can use the Tempo display to lower the overall BPM. To do this, open the Editor (E) and check the Enable Flexbox. Then navigate to the Tempo display and decrease the number to lower the tempo. You can also use the tempo track (? + ? + T) to lower the BPM with automation points. If you want to slow one track separately, you can open a new project and follow these same steps.
Increasing Tempo Gradually in GarageBand
To gradually speed up a tempo in GarageBand, start by selecting the ‘Tempo’ option in the track inspector. Next, click on the area of the tempo line that you’d like to adjust. You’ll see two circles appear – one larger and one smaller. Click and drag the smaller circle above your adjustment point until you have a curve that suits your desired tempo change. Once you’re done, hit play (or spacebar) and Garageband will make the required changes to the tempo (this could take a few seconds). All done!
Increasing Volume in GarageBand Regions
To make a region louder on GarageBand, you’ll need to adjust the volume of the track. To do this, double-click on the track you want to adjust and open its Track Info window. In the Track Info window, you’ll find a section called Volume, which contains a graphical representation of the track’s volume over its timeline. You can adjust this graph by clicking and dragging the control points along the dark blue line. To increase the volume, click and drag each control point up higher. When you’re finished making adjustments, click outside of the Track Info window to close it and save your changes.
Slowing Down Tracks in GarageBand
Yes, you can slow down a track in GarageBand. To do so, open the track in GarageBand and locate the control bar at the top of the editing window. In the control bar, you’ll find a Speed slider which can be dragged to the left to slow down the track. When you’re ready to start playing your slowed-down track, simply click on the Play button. To speed up the track, drag the slider to the right.
Conclusion
In conclusion, GarageBand is a powerful and versatile music production application that allows users to easily create and manipulate audio projects. It is an excellent tool for both experienced musicians and those just starting out with music production. With its intuitive user interface, a wide range of features, and great sound library, GarageBand is a fantastic choice for anyone looking to create professional-quality music.

