Windows capability netfx3 is an essential feature that allows users to install and run applications that rely on the .NET Framework 3.5. This framework is a software development platform created by Microsoft, which provides a range of functionalities for building and running applications on Windows operating systems.
To enable the netfx3 capability, you can follow a few simple steps. First, open the Control Panel on your Windows computer and navigate to the “Programs” section. From there, select “Turn Windows features on or off.” This action will open the Windows feature window, where you can enable the desired features.
In this case, locate and select the option labeled “.NET Framework 3.5 (include .NET 2.0 and 3.0).” Once you’ve made your selection, click on “OK” to initiate the installation process. The system will automatically download and install the necessary files to enable the netfx3 capability on your computer.
If you prefer using Windows PowerShell, you can launch it in the Administrator Command Prompt by typing “powershell” in the search bar. Once PowerShell is open, use the following command to install .NET Framework 3.5 from an installation media located on a network share:
“`
DISM /Online /Enable-Feature /FeatureName:NetFx3 /All
“`
After executing the command, the system will begin the installation process, and you’ll need to wait for it to complete. To verify that the installation was successful, you can run the following command:
“`
Get-WindowsOptionalFeature -Online -FeatureName NetFx3
“`
If the output shows that the feature is enabled, then the installation was successful.
To ensure that the changes take effect, it’s recommended to update the group policy settings. Open a Command Prompt as an administrator and type the following command:
“`
Gpupdate /force
“`
If prompted to reboot, make sure that the system image is still mounted after the reboot is complete.
To confirm that the netfx3 capability is enabled, navigate to the Control Panel, select “Programs and Features,” and click on “Turn Windows features on or off.” Look for the “.NET Framework 3.5” option and ensure it is checked.
Enabling the Windows capability netfx3 is crucial for running applications that rely on the .NET Framework 3.5. By following the steps outlined above, you can easily enable this feature and enjoy the benefits of using applications built on this framework.
How Do You Enable Windows Optional Feature in NetFx3?
To enable the Windows optional feature for .NET Framework 3.5, including .NET 2.0 and 3.0, follow these steps:
1. Open the Control Panel on your Windows operating system.
2. In the Control Panel, locate and click on the “Programs” option.
3. Within the Programs section, you will find an option called “Turn Windows features on or off.” Click on this option.
Now, a window titled “Windows Features” will appear, displaying a list of optional features that can be enabled or disabled on your system.
4. Scroll down the list and look for “.NET Framework 3.5 (include .NET 2.0 and 3.0)”. Check the box next to it to enable this feature.
Please note that enabling .NET Framework 3.5 will also automatically enable .NET Framework 2.0 and 3.0 as they are included within it.
5. Once you have selected the .NET Framework 3.5 option, click on the “OK” button.
Your system will now start enabling the selected Windows feature. This process may take a few minutes, so please be patient.
Once the feature is successfully enabled, you will be able to use applications and programs that require .NET Framework 3.5, 2.0, and 3.0 on your computer.
It is worth mentioning that the Windows optional features can also be enabled or disabled using command-line tools or PowerShell scripts, but the steps mentioned above are the most straightforward and user-friendly method for enabling the .NET Framework 3.5 feature on your Windows system.
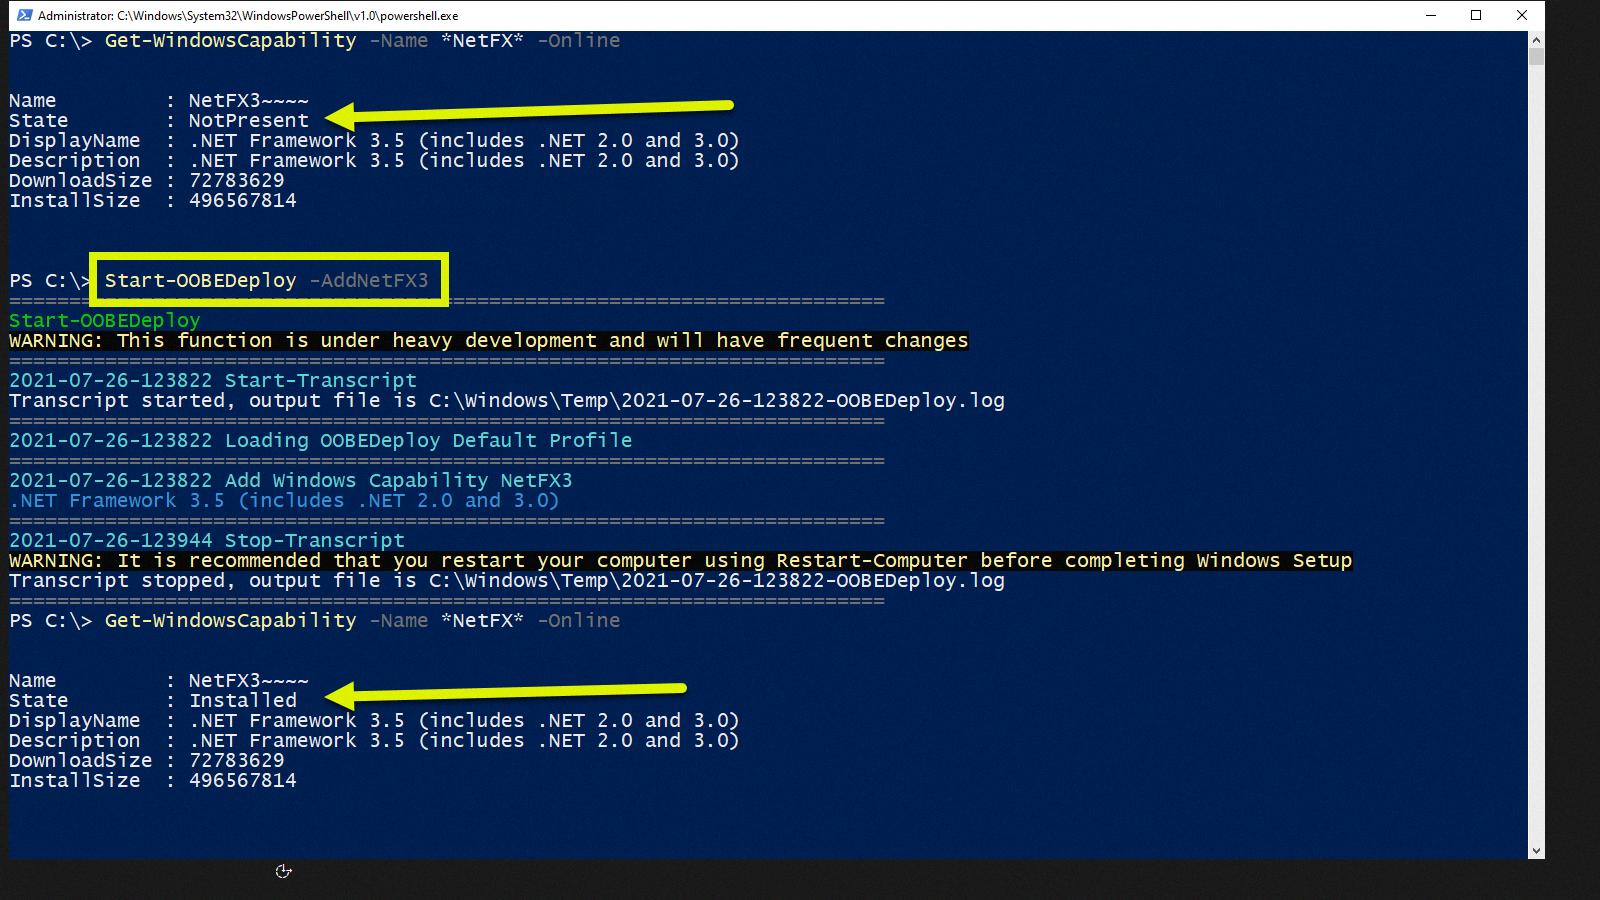
How to Enable .NET Framework 3.5 in Windows 10 Using PowerShell?
To enable .NET Framework 3.5 in Windows 10 using PowerShell, follow these steps:
1. Open the Administrator Command Prompt by typing “Windows Command Prompt” in the search bar and selecting the option to run it as an administrator.
2. In the Command Prompt window, type “powershell” to start Windows PowerShell.
3. To install .NET Framework 3.5 from installation media located on a network share, use the following command:
“`
Install-WindowsFeature -Name NET-Framework-Core -Source \\network\share\sourcemediasxs
“`
Replace “\\network\share\sourcemediasxs” with the actual network share path where the installation media is located.
4. Press Enter to execute the command. PowerShell will then start installing .NET Framework 3.5 from the specified network share.
5. Wait for the installation process to complete. It may take a few minutes depending on your system and network speed.
6. Once the installation is finished, you can verify if .NET Framework 3.5 has been successfully enabled by running the following command:
“`
Get-WindowsFeature -Name NET-Framework-Core
“`
7. Press Enter to execute the command. PowerShell will display the status of the .NET Framework 3.5 feature. If it shows “Installed” under the “InstallState” column, it means that .NET Framework 3.5 is enabled on your Windows 10 system.
How to Enable .NET Framework 3.5 in Windows 10 Without Internet?
To enable .NET Framework 3.5 in Windows 10 without internet access, follow these steps:
1. Open Command Prompt by searching for it in the Start menu or by pressing Win + X and selecting “Command Prompt.”
2. In the Command Prompt window, type the following command: “gpupdate /force” and press Enter. This command will update the Group Policy settings on your computer.
3. If prompted to reboot your computer, make sure to keep the image mounted or open during the reboot process. This is important to ensure that the required files are still accessible.
4. After the reboot, go to the Control Panel by searching for it in the Start menu.
5. In the Control Panel, navigate to “Programs and Features” or “Add or Remove Programs,” depending on your Windows version.
6. In the Programs and Features window, click on “Turn Windows features on or off” located on the left-hand side.
7. A new Windows Features window will open. Scroll down and locate “.NET Framework 3.5 (includes .NET 2.0 and 3.0)” and check the box next to it.
8. Click on the “OK” button to begin the installation process. Windows will now enable the .NET Framework 3.5 feature on your computer.
9. Depending on your system configuration, Windows may require access to the installation media (such as a DVD or ISO file) to complete the installation. If prompted, make sure to provide the necessary files.
10. Once the installation is complete, you can close the Windows Features window.
By following these steps, you can enable .NET Framework 3.5 on your Windows 10 computer even without an internet connection.
How Do You Enable 3.5 Framework in Windows 10 CMD?
To enable the .NET Framework 3.5 feature in Windows 10 using the Command Prompt, follow these steps:
1. Open the Command Prompt as an administrator. You can do this by right-clicking on the Start button and selecting “Command Prompt (Admin)”.
2. In the Command Prompt window, type the following command and press Enter:
“`
DISM /Online /Enable-Feature /FeatureName:NetFx3 /All
“`
3. The Deployment Image Servicing and Management (DISM) tool will start the process of enabling the .NET Framework 3.5 feature. It may take a few minutes to complete.
4. Once the process is finished, you should see a message indicating that the operation was completed successfully.
5. You can now close the Command Prompt window.
Enabling the .NET Framework 3.5 feature in Windows 10 through the Command Prompt involves using the DISM tool with the specified command. This will enable the necessary components for running applications that require the .NET Framework 3.5.
Conclusion
The process of adding the Windows capability NetFx3 involves enabling the .NET Framework 3.5 feature on your Windows operating system. This can be done through the Control Panel by accessing the “Turn Windows features on or off” option in the Programs section. Once there, you can select the .NET Framework 3.5 feature and click OK to enable it.
Alternatively, you can use Windows PowerShell in the Administrator Command Prompt to install .NET Framework 3.5. By typing “powershell” in the Command Prompt, you can open PowerShell and then use the appropriate command to install .NET Framework 3.5. This command may vary depending on whether you are installing from installation media or a network share.
To verify the installation, you can run a command in PowerShell to ensure that the .NET Framework 3.5 feature is successfully installed. Additionally, you can open Command Prompt, type “gpupdate /force” and press Enter to update the group policy. If prompted to reboot, make sure that the image is still mounted after the restart.
It is worth noting that if you encounter any issues during the process, you can try running the command “DISM /Online /Enable-Feature /FeatureName:NetFx3 /All” in an administrator Command Prompt. This command should enable the .NET Framework 3.5 feature.
Adding the Windows capability NetFx3 is essential for running certain applications that rely on the .NET Framework 3.5. By following the steps outlined above, you should be able to successfully enable this feature and ensure compatibility with these applications.


