In today’s digital age, where visual information plays a crucial role, the ability to capture screenshots has become an essential tool for many individuals. Whether you’re a professional designer, a tech-savvy individual, or simply someone who wants to share information with others, a screenshotter is a valuable software application that can simplify your life.
A screenshotter, also known as a screen capture tool, enables users to take quick snapshots of their computer screens or mobile devices. This tool can capture anything displayed on the screen, including windows, selected areas, or the entire screen itself. With just a few clicks or taps, users can effortlessly capture and save screenshots for various purposes.
One popular screenshotter for Windows users is the Snipping Tool. This built-in application allows users to capture screenshots with ease. By pressing the Windows + PrtScn buttons simultaneously, users can instantly capture the entire screen and save it as an image file. The Snipping Tool also offers additional functionalities, such as the ability to capture a selected area or a specific window.
For Mac users, capturing screenshots is also a breeze. By pressing the Command + Shift + 3 keys, users can capture the entire screen and save it as an image file. Similarly, pressing Command + Shift + 4 allows users to capture a specific area of the screen by dragging the cursor around the desired region. These native features make screenshotting a seamless process for Mac users.
But what about mobile devices? Capturing screenshots on smartphones and tablets is equally important, and fortunately, it’s just as simple. On most Android devices, you can capture a screenshot by pressing the Power and Volume Down buttons simultaneously. If this doesn’t work, holding the Power button for a few seconds should bring up a menu that includes the option to capture a screenshot. For iOS users, simultaneously pressing the Power and Home button achieves the same result.
However, if you’re looking for a more versatile screenshotter that works across multiple platforms, InVision is a great option. InVision is a web-based application that also offers mobile apps for iOS and Android. It allows users to not only capture screenshots but also organize and collaborate on various media files.
InVision’s Boards feature provides users with a platform to gather and share screenshots, graphics, videos, and even Photoshop or Sketch files. This means you can not only capture screenshots but also easily collaborate with others on design projects or share visual content with clients or team members.
The ability to capture screenshots is a valuable tool in today’s digital world. Whether you’re a designer, a tech enthusiast, or simply someone who wants to share information visually, a screenshotter is an essential software application. With various options available, such as the native screenshot features on Windows and Mac devices or more versatile tools like InVision, capturing and sharing screenshots has never been easier. So go ahead, explore the screenshotter that suits your needs, and enhance your visual communication today.
What is a Capture Tool?
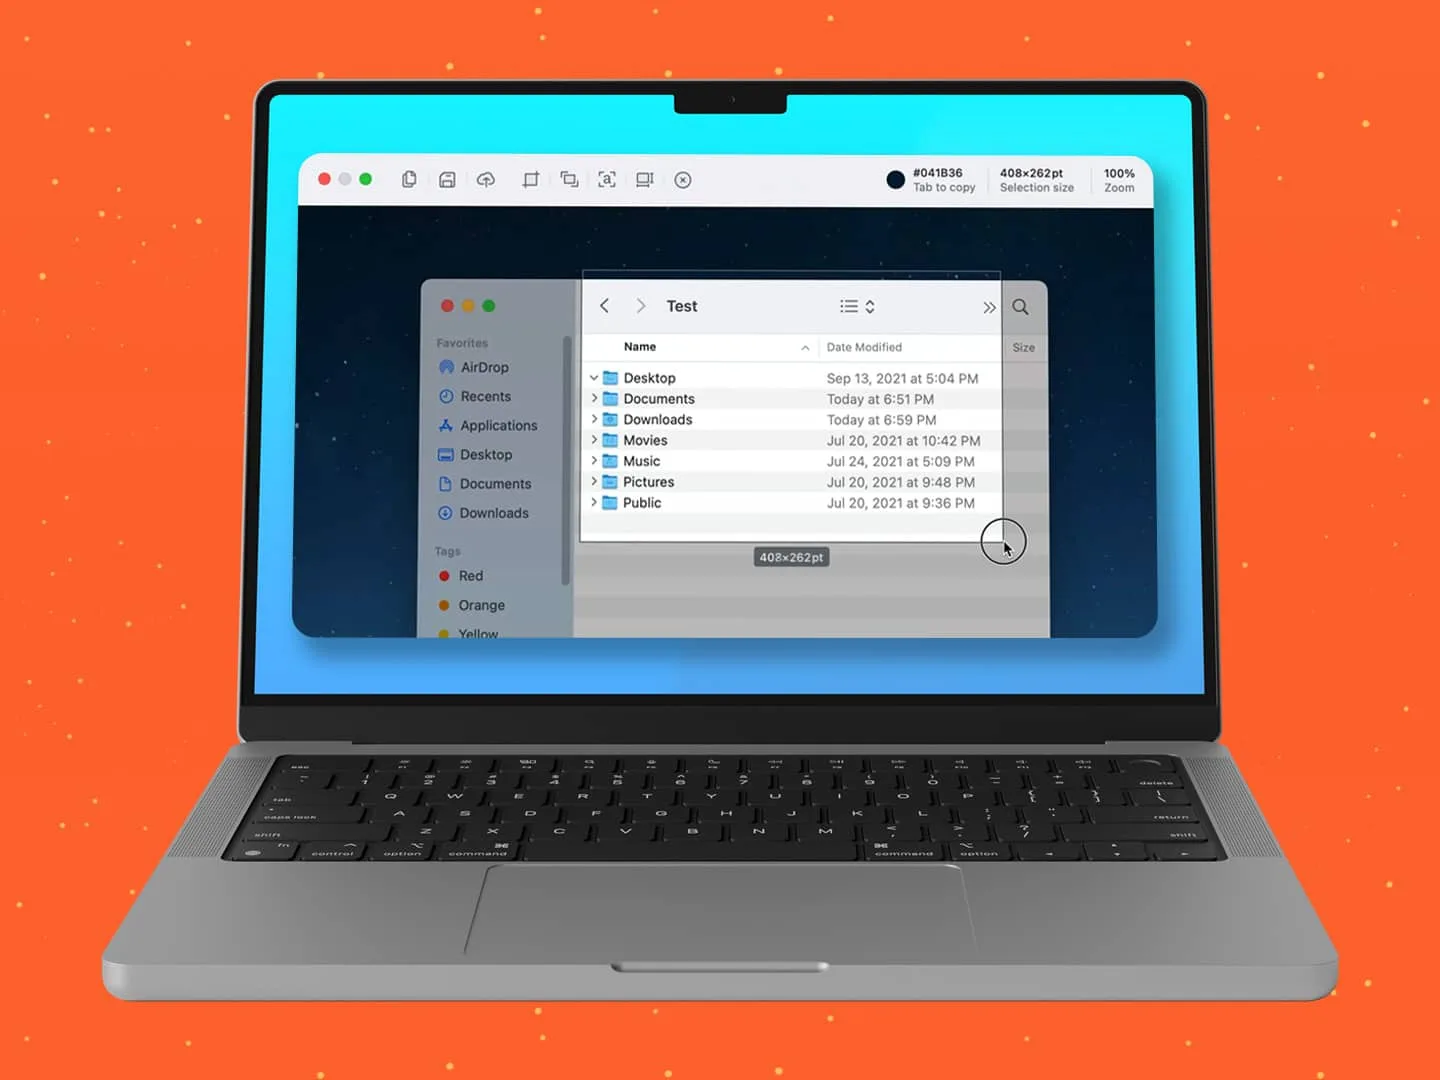
A capture tool, also known as a screenshot or screen capture tool, is a software application that enables users to take snapshots or images of their computer screen. It allows users to capture the contents of a specific window, a selected area, or the entire screen.
Capture tools are commonly used in various contexts, such as software troubleshooting, instructional materials creation, content creation, and documentation. They are particularly valuable in situations where it is necessary to visually convey information or demonstrate a process.
Here are some key features and benefits of capture tools:
1. Window Capture: Capture tools enable users to take screenshots of individual windows, allowing them to focus on specific applications or programs. This is particularly useful when providing technical support or creating tutorials related to a specific software.
2. Area Capture: These tools also allow users to capture a selected area on the screen. This feature is beneficial when users want to highlight a specific portion of a webpage, an image, or any other content on their screen.
3. Full-Screen Capture: Capture tools provide the option to capture the entire screen, allowing users to capture the content displayed on their entire monitor. This is helpful when users need to capture a large amount of information or when they want to share their entire desktop view.
4. Annotation and Editing: Many capture tools offer additional features like annotation and editing capabilities. Users can add text, arrows, shapes, or highlight specific areas on the captured image to provide additional context or emphasize certain details. This feature is particularly useful when creating instructional materials or highlighting specific elements in a screenshot.
5. Sharing and Saving: Capture tools allow users to save the captured images in various formats, such as PNG, JPEG, or GIF. They also often provide options for directly sharing the screenshots via email or social media platforms, making it easy to share information with others.
A capture tool is a software application that enables users to capture screenshots or images of their computer screens. It offers various capturing options, annotation and editing features, and facilitates easy sharing and saving of the captured images.
How Do You Take a Screenshot?
To take a screenshot on most Android devices, you can follow these steps:
1. Locate the Power button and the Volume Down button on your phone. These buttons are usually located on the sides of the device.
2. Press and hold the Power button and the Volume Down button at the same time. Make sure to press both buttons simultaneously and hold them for a couple of seconds.
3. If successful, you should see a visual indication that a screenshot has been taken. This can vary depending on your device, but it’s often a quick animation or a sound effect.
4. Once the screenshot has been taken, you can find it in your phone’s Gallery or Photos app. It will usually be saved in a dedicated “Screenshots” folder.
If the above method doesn’t work on your specific device, you can try an alternative method:
1. Press and hold the Power button on your phone for a few seconds.
2. After holding the Power button, you should see a menu or options appear on your screen. Look for an option called “Screenshot” or an icon that resembles a camera.
3. Tap on the “Screenshot” option or the camera icon, and your device should capture a screenshot.
If neither of these methods work, it’s recommended to visit the support website of your phone manufacturer. They will have specific instructions and troubleshooting steps tailored to your device model.
Taking a screenshot on most Android devices involves pressing the Power and Volume Down buttons simultaneously. If that doesn’t work, you can try holding the Power button and selecting the “Screenshot” option from the menu. If all else fails, consult your phone manufacturer’s support site for assistance.
What is the Tool For Taking Screenshots On Windows?
The tool for taking screenshots on Windows is called the Snipping Tool. It is a built-in feature available on all Windows computers. Additionally, Windows 10 introduced a new tool called Snip and Sketch, which can also be used for taking screenshots.
To use the Snipping Tool, you can follow these steps:
1. Open the Snipping Tool by searching for it in the Start menu or by typing “Snipping Tool” in the Windows search bar.
2. Once the Snipping Tool is open, you can choose from four different snipping modes: Free-form Snip, Rectangular Snip, Window Snip, and Full-screen Snip.
3. Select the snipping mode that best suits your needs by clicking on it.
4. After selecting the snipping mode, your screen will fade, and you can click and drag your cursor to capture the desired area of the screen.
5. Once you release the mouse button, the selected area will be captured and displayed in the Snipping Tool window.
6. You can annotate, highlight, or save the captured screenshot by using the available editing tools in the Snipping Tool.
7. To save the screenshot, click on the “File” menu and select “Save As.” Choose a location on your computer to save the file, and give it a descriptive name.
On the other hand, if you are using Windows 10 or later, you can also use the Snip and Sketch tool. Here’s how to use it:
1. Press the Windows key + Shift + S to open the Snip and Sketch tool.
2. Your screen will fade, and a toolbar will appear at the top of the screen.
3. Choose the desired snipping mode from the toolbar: Rectangular Snip, Freeform Snip, Window Snip, or Fullscreen Snip.
4. Once you select the snipping mode, your cursor will change to a crosshair.
5. Click and drag your cursor to capture the desired area of the screen.
6. After releasing the mouse button, the captured screenshot will be copied to the clipboard.
7. You can then paste the screenshot into an image editing software or any other application where you want to use it.
Both the Snipping Tool and Snip and Sketch provide easy and efficient ways to capture screenshots on Windows computers. Whether you need to capture a specific area, a window, or the entire screen, these tools offer a variety of snipping modes to meet your needs.
What is the App That Organizes Screenshots?
InVision is a versatile app that can effectively organize and manage screenshots. With its web, iOS, and Android versions, InVision provides an intuitive platform for users to store and categorize various media files, including screenshots.
One of the core features of InVision is its ability to create “Boards,” which serve as containers for different types of media. These Boards allow users to collect and organize screenshots, along with other relevant files, such as graphics, videos, and design files from tools like Photoshop and Sketch.
By utilizing InVision’s Boards, users can easily group and categorize their screenshots based on different projects, clients, or any other organizational structure they prefer. This ensures that all screenshots are neatly organized and readily accessible whenever needed.
In addition to its excellent screenshot organization capabilities, InVision also offers a range of collaboration features. Users can share Boards with team members or clients, allowing for seamless feedback and collaboration on screenshots and other media files. This collaborative aspect makes InVision a valuable tool for teams working on design projects or for individuals seeking feedback from others.
Conclusion
Screenshotter is a highly useful tool for capturing screenshots on various devices and operating systems. It offers a convenient way to quickly capture and save images of your screen, whether it be a specific window, selected area, or the entire screen. With its user-friendly interface and simple functionality, taking screenshots has never been easier.
One of the standout features of screenshotter is its ability to capture screenshots on different platforms. Whether you are using a Windows computer, an iOS device, or an Android phone, screenshotter has got you covered. It provides step-by-step instructions on how to take screenshots on each platform, ensuring that you can easily capture and save the images you need.
Additionally, screenshotter offers a range of options for customizing your screenshots. You can choose to capture the entire screen or just a specific area, allowing for more precise and focused screenshots. The tool also allows you to annotate your screenshots with text, arrows, and other shapes, making it easier to highlight important details or provide additional context.
Furthermore, screenshotter provides seamless integration with other applications and platforms. It allows you to quickly share your screenshots via email, messaging apps, or social media platforms, making it easy to collaborate with others or share information with your team. The tool also allows you to save your screenshots in various file formats, ensuring compatibility with different devices and software.
Screenshotter is an invaluable tool for capturing and saving screenshots on different devices and operating systems. Its user-friendly interface, customizable options, and seamless integration with other applications make it a must-have for anyone who frequently needs to capture and share screenshots. With screenshotter, you can effortlessly capture, annotate, and share images of your screen, saving you time and effort in your day-to-day tasks.


