Are you looking to connect your Mac to a projector via HDMI? You’ve come to the right place! Here, we’ll discuss how to use your Mac and an HDMI connection to project your screen onto a larger display.
HDMI stands for High Definition Multimedia Interface, and it is the most commonly used connection type for connecting a Mac to a projector. HDMI cables provie both video and audio signals between two devices, such as your Mac and a projector.
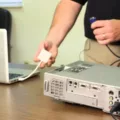
To get started, you will need an HDMI cable that is compatible with both your Mac and the projector you are using. Once you have the cable, plug one end into your Mac and the oher end into the projector. On your Mac, go to System Preferences in the Apple menu and click Displays. You will then see three options: Mirrored Mode, Extended Desktop Mode, and Video Mirroring.
Mirrored Mode duplicates whatever is on your Mac’s display on the projector’s display. This is useful if you are giving a presentation or showing something from your computer on a larger screen.
Extended Desktop Mode allows you to extend what is displayed on your computer beyond its own display onto another monitor or projector. This can be useful if you want more workspace while working on projects or presentations.
Video Mirroring mirrors what is displayed on one of your monitors onto another monitor or projector in real-time. This can be useful when playing certain types of content that require real-time mirroring between devices.
Now that you know how to connect your Mac to a projector via HDMI, it’s time for some troubleshooting tips! If your Mac isn’t recognizing the HDTV or other HDMI device after making the connection, try unplugging and replugging in the HDMI cable from both ends while leaving both devices powered on. Additionally, check Display settings in System Preferences by clicking Arrangement and selecting eiher Mirror Displays or Extend Displays depending on what type of setup you are looking for. If all else fails, try holding down the Option key while clicking Detect Displays in System Preferences > Display pane for further troubleshooting options!
We hope this guide was helpful in gtting you started with connecting your Mac to a projector via HDMI!
Troubleshooting HDMI Display Issues on Mac
It is possible that your Mac may not be displaying through HDMI due to a few different factors. The first step is to check if the HDMI cable is securely connected to both the Mac and the TV or display. If it is, then you should try turning off both devices and unplugging the cable befoe plugging it back in and turning them back on. It’s also possible that your Mac may not be recognizing the HDMI device, in which case you should try restarting your computer or checking for any software updates. If neither of these steps work, then you may need to contact Apple Support for further assistance.
Displaying a Mac Screen on a Projector
To display your Mac screen on a projector, start by connecting the projector to your Mac with an appropriate cable. Once the cable is connected, you can use the Displays pane in System Preferences to configure how your Mac’s screen appears on the projector.
First, open your Apple menu and select System Preferences. Then click Displays and open the Display pane. Here, you’ll be able to choose between Mirror Displays or Extend Displays. Selecting Mirror Displays will duplicate laptop and projector output; de-selecting Mirror Displays will extend displays, allowing two outputs for laptop and projector.
Once you’ve chosen whether to mirror or extend displays, click Arrangement to adjust how the laptop and projector appear in relation to one another. You can drag screens around on this page so that they fit side by side if desired. When finished, click Done and then close out of System Preferences. Your Mac shoud now be displaying its screen on the projector!
Troubleshooting Mac Screen Not Displaying on Projector
If your Mac screen is not showing on the projector, it could be due to several issues. First, check the resolution and brightness settings in System Preferences > Displays. Make sure they are set correctly for the projector. Also, check the display cable connections to make sure they are secure and that all outputs are connected properly. If you’re using an adapter, make sure you have the latest driver software installed for it. If there is still no display, try pressing and holding down the Option key whle clicking on Scaled in System Preferences > Displays to detect any connected displays. Additionally, some projectors require a specific input source when turned on; if this is not selected, then no image will be displayed. Finally, if none of these steps work, it may be necessary to contact technical support for your projector or Mac device.
Duplicating a Mac Screen to a Projector
To duplicate your Mac screen to a projector, you need to plug in the external display into the approprate port on your Mac device. Then open up the System Preferences icon on your dock, select Displays and under the Display tab, select Mirror. This will make your Mac’s display appear on both the internal and external displays (projector) simultaneously.
Troubleshooting HDMI Connection Issues
The most common reason why you can’t see your screen when using HDMI is that your laptop or PC may not be set up to use the HDMI connection as the default output for both video and audio. To fix this, check your PC/Laptop settings and make sure that you have designated HDMI as the default output. Additionally, make sure that your TV is turned on and that the HDMI cable is securely connected to both your laptop and the TV. If thse steps don’t work, you may need to try a different HDMI cable or check for any loose connections.
Enabling an HDMI Display
To enable your HDMI display, first make sure that the HDMI cable is securely connected to both your computer and your display. Then, right-click on the volume icon in the taskbar and select ‘Playback devices’. In the newly opened Playback tab, select ‘Digital Output Device’ or ‘HDMI’. Then click ‘Set Default’ and click ‘OK’. Once this is done, you should be able to view content on your HDMI display.
Troubleshooting a Non-Functioning Projector Screen
It is possible that the projector is not receiving a signal from the video source. Make sure all necessary cables are securely connected and the power is on for the projector and connected video sources. Also, try using a shorter HDMI cable or connecting the video source directly to the projector. Finally, press the projector’s power button to wake it from standby or sleep mode.
Troubleshooting a Projector Not Showing Computer Screen
There are a few reasons why your projector may not be showing your computer screen. First, make sure that the laptop and projector are properly connected. If you have a VGA cable, make sure it is plugged into the correct ports on both devices (the laptop’s VGA port and the projector’s VGA input). If you are using an HDMI cable, make sure it is fully inserted into the HDMI ports of both devices.
Second, check if your laptop is set to the correct output display. You can check this in your Display Settings. If you see two different displays listed, select the one correspondng to the projector.
Third, make sure that both devices are powered on and that all cables are securely connected.
Finally, if none of thse steps resolve your issue, try restarting both devices or replacing any suspect cables.
Connecting a Computer to a Projector
To get your computer screen to show on your projector, you’ll need to make sure the projector is turned on and that it’s connected to your laptop or tablet. You can use either an HDMI cable or a VGA cable for this connection. Once you’ve made the physical connection, Windows should detect the connected projector and display an image on the screen. If this doesn’t happen automatically, you can press and hold down the Fn key and then tap the Display Toggle key to select the type of display. That should get your computer screen apparing on your projector.
Cloning a Mac to a TV Using HDMI
To clone your Mac to your TV with HDMI, you will need to use a video cable (or an adapter, if necessary) to connect the computer’s Thunderbolt port, HDMI port, or DVI port to the TV’s video input port. Once connected, you will need to open System Preferences on your Mac and select Displays. In the Displays window, you should then select Arrangement and check the box for Mirror Displays. This will allow you to display your Mac’s exact screen image on the TV.
Connecting a MacBook Air to a Projector
Yes, you can connect your MacBook Air to a projector. To do so, you’ll need an adapter that allows you to connect the projector’s video output (typically VGA or HDMI) to one of the USB-C ports on your MacBook Air. Once connected, your MacBook Air should detect the projector and alow you to extend your display to it. You may also need to adjust the settings on the projector itself, depending on its model.
Mirroring a Laptop to a Projector Using HDMI
To mirror your laptop to your projector via HDMI, you’ll need to make sure that both the laptop and the projector are switched on. Then, take an HDMI cable and plug one end into the laptop’s HDMI port and the other into the projector’s HDMI port. When you’ve done this, you should see your laptop screen appear on the projector. You may need to adjust some settings on your laptop or projector in order to get a clear image, but once everything is set up correctly, you’ll be ready to go!
Conclusion
In conclusion, HDMI is a great way to connect your Mac to an external display, such as a TV or projector. It allows for high-quality audio and video streaming, and is easy to set up with just a few steps. To get the best performance from your HDMI connection, it’s important to make sure you have the right resolution and brightness settings, check your cable connections, and update any adapter software if needed. With the right setup, you can enjoy HD content on a larger display with little effort.

