Are you looking to change the location of your Windows libraries? Whether you want to move your Documents, Pictures, Music, or other library folders to a different drive or directory, Windows provides a straightforward method to make this change. By following a few simple steps, you can customize the location of your libraries to suit your needs.
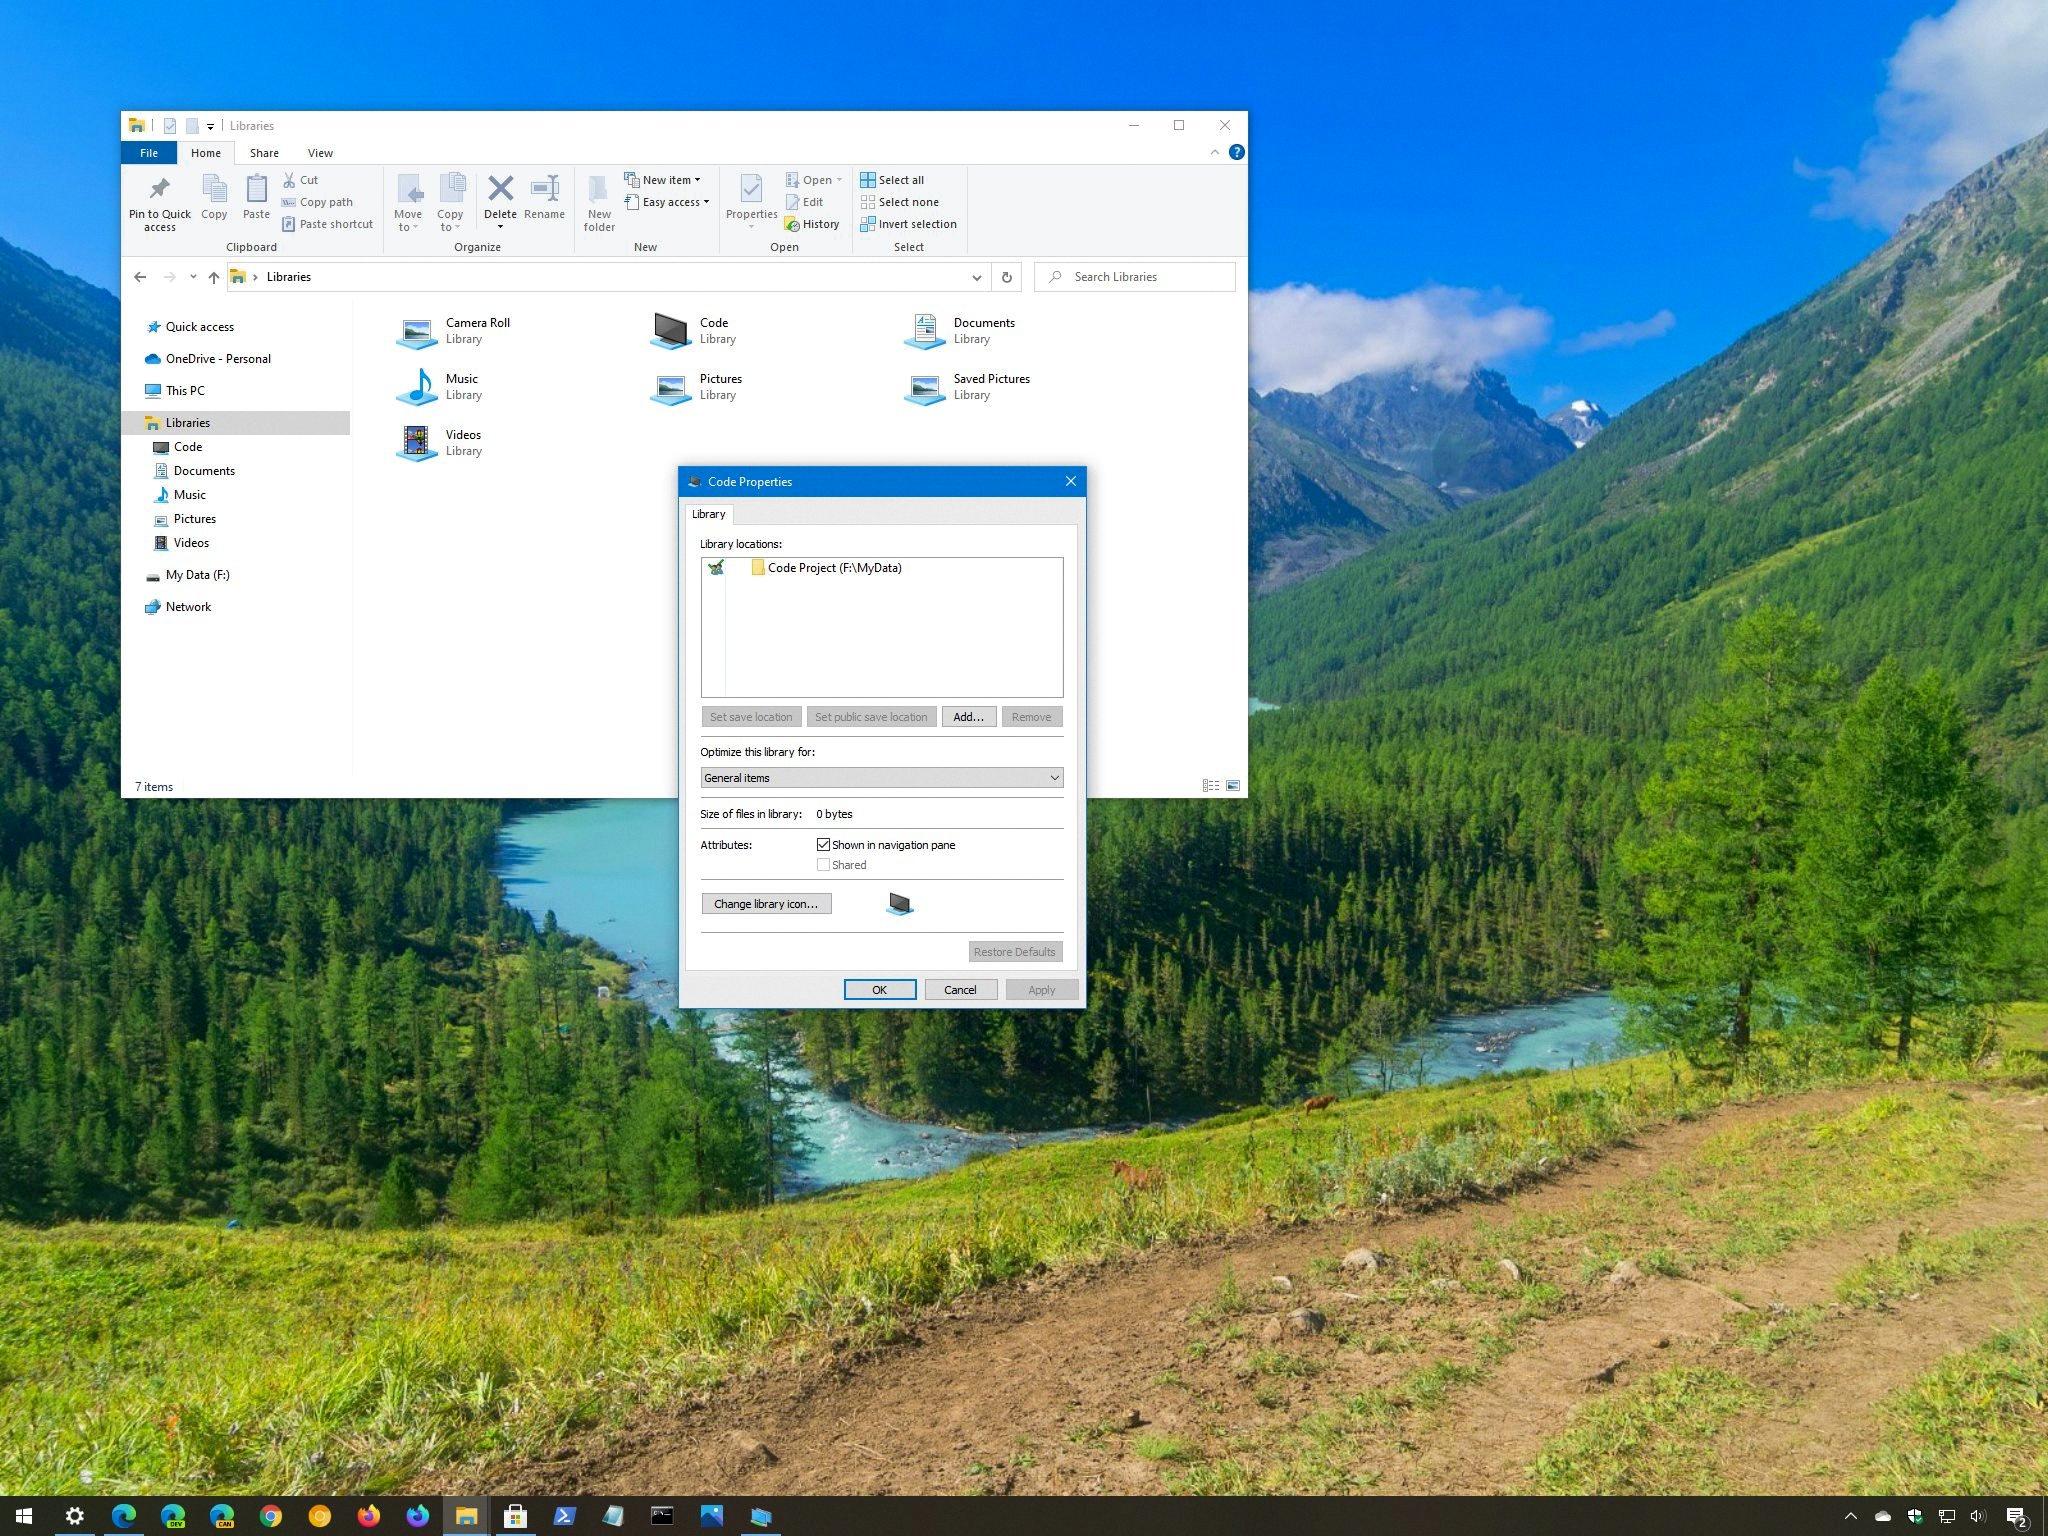
To begin, open File Explorer and navigate to the Libraries section. If you don’t see Libraries listed, scroll to the bottom of the window, right-click on a blank area, and select “Show libraries.” Once you have accessed the Libraries section, you can choose the specific library folder you wish to modify.
Let’s say you want to move your Documents library. Right-click on the Documents folder and select Properties. In the resulting dialog box, you will see a “Location” tab. Click on this tab, and then click the “Move” button.
A new dialog box will appear, allowing you to specify the new location for your Documents library. Suppose you want to move it to drive X. Navigate to the Libraries folder on drive X and create a new folder inside it called “Documents.” Select this new folder as the destination for your Documents library.
After selecting the new location, click OK to save the changes. Windows will prompt you to confirm whether you want to move all the existing files from the old location to the new one. If you choose to move the files, Windows will automatically transfer them to the new folder. If you prefer not to move the files, they will remain in the original location but will no longer be included in the library.
You can follow the same process to change the location of other libraries such as Pictures, Music, Videos, and Downloads. Simply right-click on the respective folder, select Properties, go to the Location tab, click Move, choose the new destination, and save the changes.
By customizing the location of your Windows libraries, you can better organize your files and access them more efficiently. Whether you want to store your documents on a separate drive or simply prefer a different directory structure, Windows provides the flexibility to make these adjustments with ease.
Take advantage of this feature to optimize your file organization and improve your overall Windows experience. Enjoy the convenience of having your libraries exactly where you want them, tailored to your specific needs.
How Do You Change the Library Path in Windows?
To change the library path in Windows, you can follow these steps:
1. First, open the “Advanced System Settings” on your Windows computer. You can do this by right-clicking on the “Computer” or “This PC” icon on your desktop and selecting “Properties”. Alternatively, you can search for “System” in the start menu and open the “System” control panel.
2. In the System window, click on the “Advanced system settings” link on the left-hand side. This will open the System Properties dialog box.
3. In the System Properties dialog box, click on the “Environment Variables” button. This will open the Environment Variables dialog box.
4. In the Environment Variables dialog box, you will see two sections: User variables and System variables. To change the library path for all users on the computer, click on the “New” button in the System variables section. If you only want to change the library path for your user account, click on the “New” button in the User variables section.
5. In the “New System Variable” or “New User Variable” dialog box, enter a variable name for your library path. For example, you can use “LIBRARY_PATH” or “LD_LIBRARY_PATH”.
6. In the “Variable value” field, enter the path to the directory containing the client libraries. Make sure to provide the full path, including the drive letter (e.g., C:\path\to\libraries). If there are multiple directories, you can separate them using a semicolon (;).
7. Click OK to save the changes and close the dialog boxes.
By following these steps, you have successfully changed the library path in Windows. This will allow your applications to locate and use the specified libraries during runtime.

How Do You Change the Location of Your Library in Windows?
To change the location of a library in Windows, you can follow these steps:
1. Open File Explorer by clicking on the folder icon in the taskbar or by pressing the Windows key + E on your keyboard.
2. By default, the Libraries section may not be visible in the navigation pane. To display it, right-click on a blank area in the navigation pane and select “Show libraries” from the context menu.
3. Once the Libraries section is visible, you will see a list of default libraries such as Documents, Music, Pictures, and Videos. Choose the library you want to modify by clicking on it.
4. With the library selected, you will see the library’s contents displayed in the main window. At the top of the window, click on the “Library Tools” tab and then click on the “Manage” button in the “Library Tools” group.
5. This will open the library’s properties window. In the properties window, you will see a list of library locations under the “Library locations” section. By default, there is only one location listed, which is the current location of the library.
6. To change the location, click on the “Add” button and browse to the new location where you want to move the library. Select the folder and click on the “Include folder” button.
7. If you want to remove the previous location, select it from the list and click on the “Remove” button.
8. You can also change the default save location for the library by selecting a different folder from the “Set save location” drop-down menu.
9. Once you have made the necessary changes, click on the “Apply” button and then on the “OK” button to save the changes.
By following these steps, you can easily change the location of your library in Windows. This allows you to organize and access your files in a way that suits your needs and preferences.
How Do You Move My Library in Windows 10?
To move your library in Windows 10, follow these steps:
1. Start by right-clicking on the Documents folder and selecting Properties. This will open a dialog box with various options.
2. In the Properties dialog box, click on the Location tab. This tab allows you to change the location of the folder.
3. Once you are on the Location tab, click on the Move button. This will open another dialog box to select the new location for your library.
4. In the new dialog box, navigate to the drive where you want to move the library. Let’s say you want to move it to drive X:.
5. Inside the Libraries folder on drive X:, create a new folder called Documents. You can do this by right-clicking in the Libraries folder, selecting New, and then choosing Folder. Name the folder “Documents”.
6. After creating the Documents folder in the desired location, select it in the dialog box and click the Select Folder button.
7. You will now be back on the Location tab in the Properties dialog box. The field should now show the new path to the Documents folder on drive X:.
8. click the Apply button and then the OK button to save the changes and move your library.
By following these steps, you should be able to successfully move your Documents library to a new location in Windows 10.
How Do You Move Your Library Location in Windows 11?
To move your library location in Windows 11, follow these steps:
1. Open Windows Settings by clicking on the Start button and selecting the gear icon.
2. In the Settings window, click on the “System” category.
3. From the left-hand side menu, select “Storage”.
4. Under the “Storage” section, click on the “Change where new content is saved” option.
Bullet list:
– This option allows you to specify the default save location for different types of content, including documents, music, pictures, videos, and apps.
5. A new window will open with the heading “Change where new content is saved”.
6. You will see a drop-down menu next to each content type, such as documents, music, pictures, videos, and apps.
7. Click on the drop-down menu for the content type you want to move, such as “Documents”.
8. Select the desired location where you want to move the folder, for example, the D drive or any other location of your choice.
Bullet list:
– If you want to create a new folder in the selected location, click on the “New folder” button and give it a name.
– Alternatively, you can choose an existing folder by navigating to it in the file explorer.
9. After selecting the new location, click on the “Apply” button to save the changes.
10. You can repeat steps 7 to 9 for other content types if you want to move them as well.
11. Once you have made all the desired changes, you can close the Settings window.
By following these steps, you can easily move your library locations in Windows 11 to a different drive or folder of your preference.
Conclusion
Changing the Windows library location is a simple process that can be done through the Windows Settings or by editing the PATH system environment variable. By modifying the library location, you can easily organize your files and access them more efficiently. Whether you want to move the Documents library or any other library, the steps are similar. By following the instructions provided, you can easily move the library to a different drive or location of your choice. This can be particularly useful if you want to free up space on your primary drive or if you prefer to keep certain files separate from others. changing the Windows library location gives you more control over how you organize and access your files, making it a convenient feature for users.


