If you are an iPhone user, you may have noticed that your emails are not being received or sent correctly. Don’t worry – this is a common issue and can be easily fixed. This blog post will go through the steps of how to activate email on your iPhone so that you can get back to sending and receiving emails quickly.
First, check that your email address and password are correct. If they are incorrect, you won’t be able to send or receive emails. Once these have been checked, make sure that Background App Refresh is enabled in the Settings app.
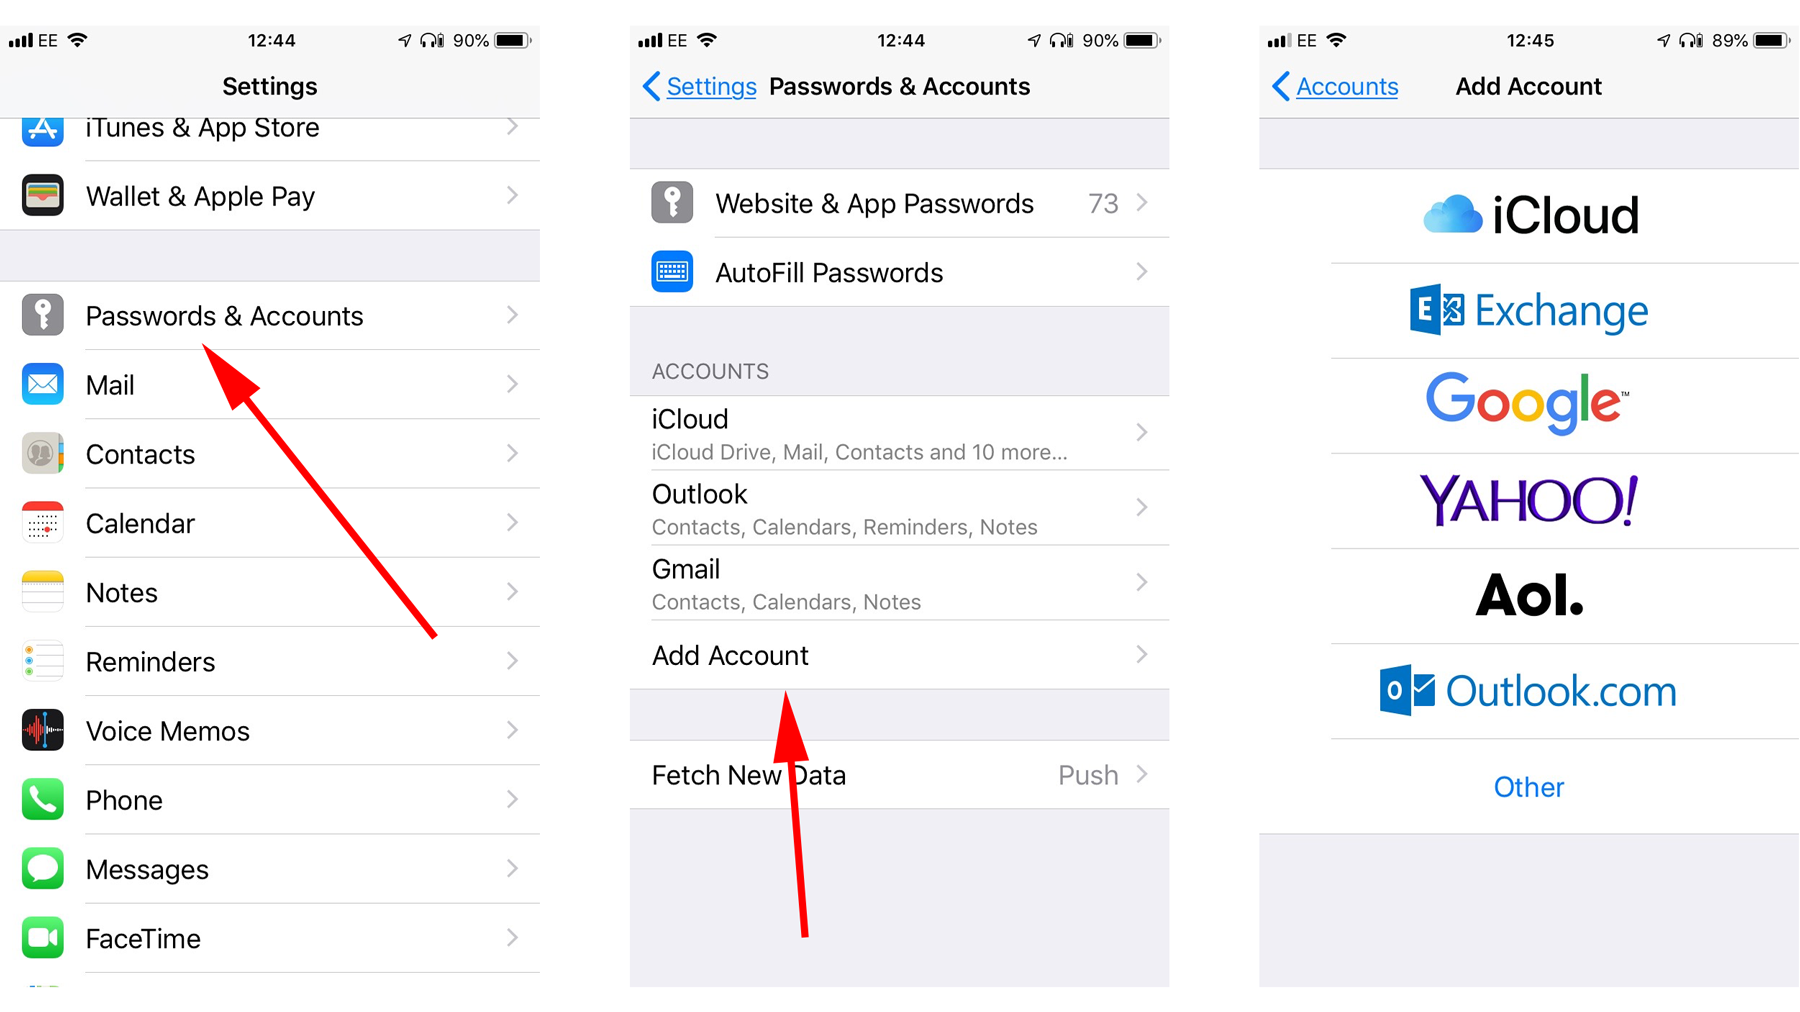
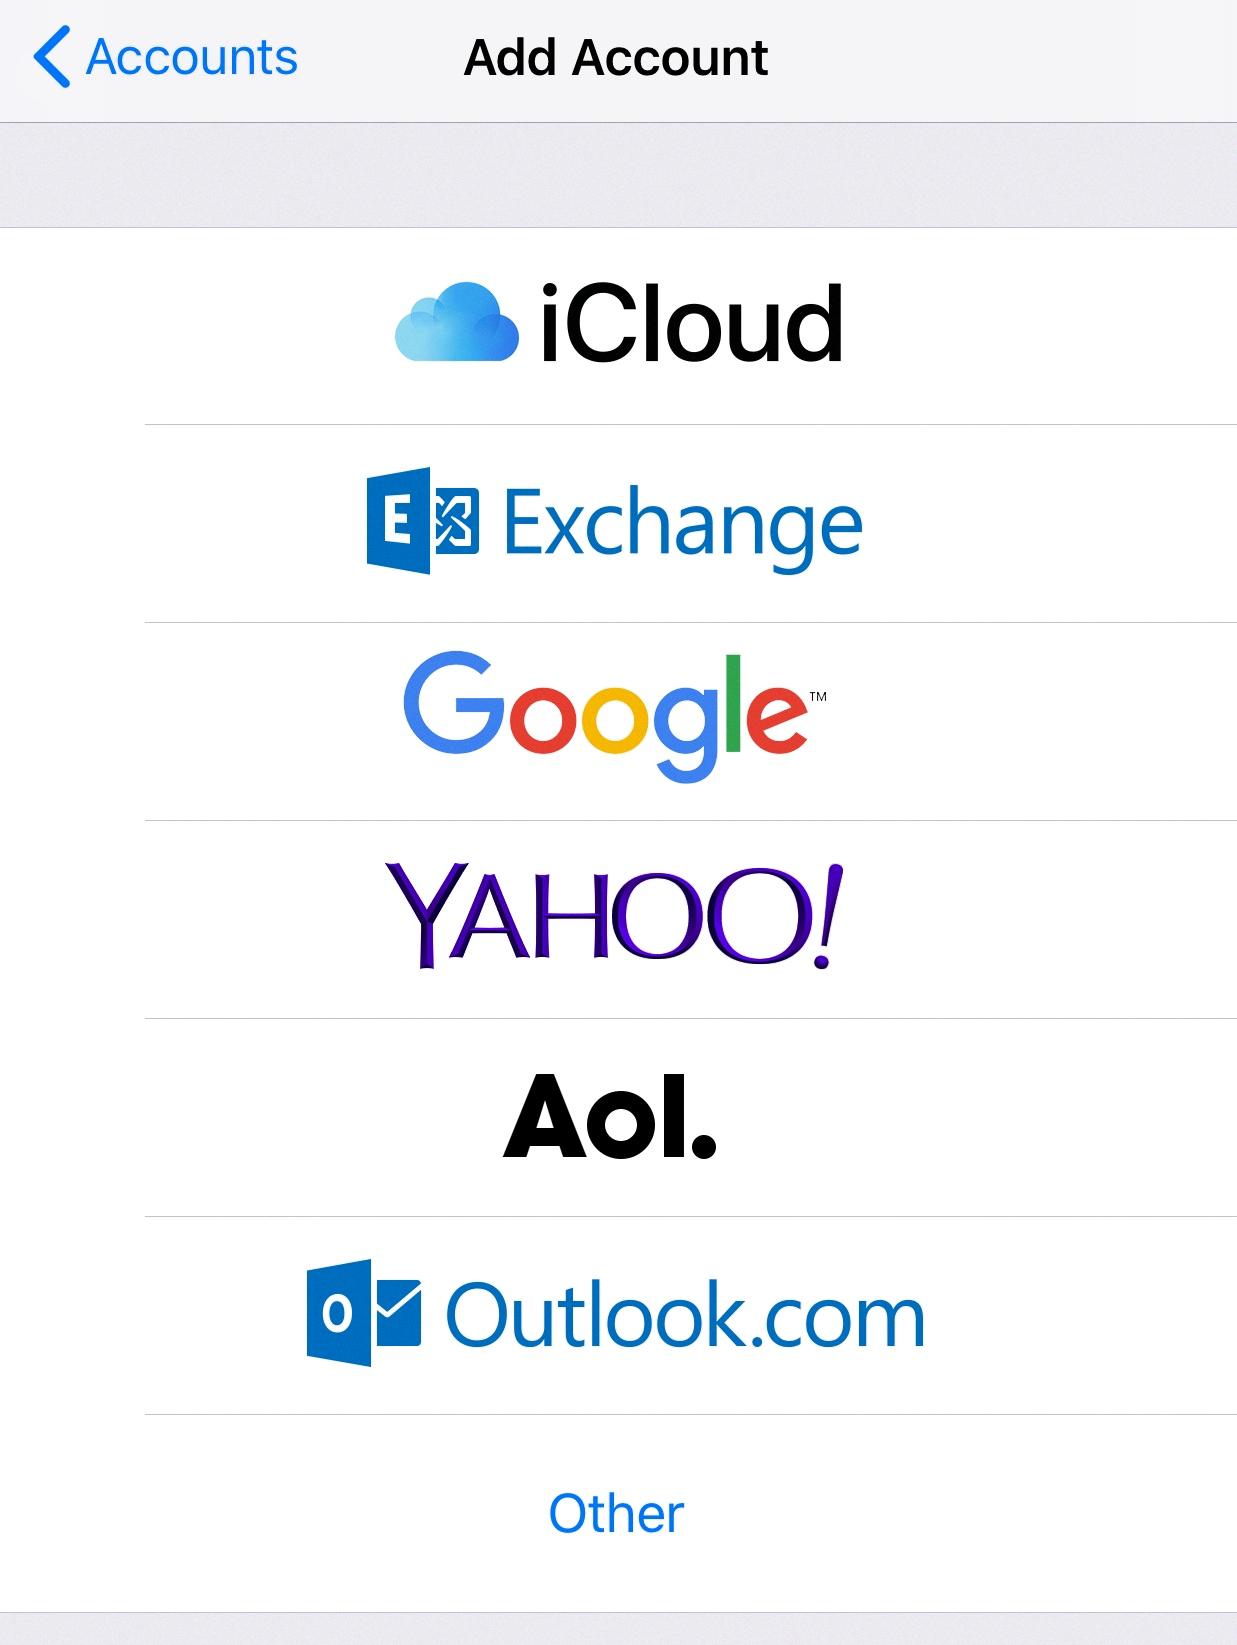
The next step is to set up your email as eithr IMAP or POP in the Mail app. To do this, go to Settings in the app and then select Add Account. Enter your email address and password, then select Sign In. Next, enter your Domain\Username and Password – make sure that your full email address appears here! After this has been done, fill in the Server field (this should be provided by your service provider), Port (also provided by service provider), and Security type (usually TLS).
If you find that an email address which was previously active is now inactive, there is no need to worry – iCloud allows users to reactivate their inactive addresses quickly and easily! All you need to do is log onto iCloud from a web browser and select Hide My Email from the toolbar at the top of the page. Scroll down until you see [number] inactive email address(es) listed at the bottom of the page – select one of these addresses and click Reactivate Address before following any further onscreen instructions.
We hope that this blog post has been helpful in explaining how to activate emails on an iPhone device! If you continue having difficulties with setting up or reactivating emails, please contact your service provider for further assistance.
Troubleshooting Email Issues on an iPhone
If your email is not working on your iPhone, there are a few potential causes that could be preventing it from functioning properly. First, make sure the email address and password you have entered are correct. Next, check that Background App Refresh is enabled for the Mail app in your device settings. It may also be helpful to check the iOS Fetch, Mail, and notification settings to ensure they meet the requirements of your email account. Additionally, if you have multiple accounts linked to the Mail app, make sure to check thir respective outboxes for any pending messages or emails. Lastly, if all else fails you may want to try refreshing, restarting or reinstalling the Mail app altogether.
Activating Email on a New Phone
Activating your email on your new phone is easy. First, open up the mail app on your phone and select ‘Add Account’. Enter your email address and password. Tap Sign in to continue. Depending on the type of email you use, you will be asked to enter additional informaton such as the server name, port number and security type. Once all the information is entered correctly, you should be able to access your emails. If you need help entering this information, contact your email service provider for support.
Activating Inactive Email on an iPhone
In order to turn on an inactive email on your iPhone, you will need to access your iCloud account. First, open the Settings app and tap your name at the top of the screen. Once you have entered your Apple ID information, select iCloud and then tap Mail. You will now see a list of all of the email accounts associated with your Apple ID. Look for any emails marked as “inactive” and tap on it to activate it. When prompted, enter the password associated with that particular email address. Once the activation is complete, you will be able to send and receive emails from that address usng the Mail app on your iPhone.
Troubleshooting Email Issues on a Mobile Device
If your email is not working on your phone, there are a few steps you can take to troubleshoot the issue. First, update your Gmail app to ensure you have the latest fixes for sending or receiving mail. Then, restart your device and check your settings to make sure everything is configured properly. Next, clear your storage and check your password to make sure it is correct. Finally, clear any saved Gmail information from the app and try to log in again. If you still cannot access your email, contact your email provider’s customer service for further assistance.
Troubleshooting Email Delivery Issues on Mobile Devices
If your email is not coming through on your phone, it could be due to several possible causes. First, make sure that your email app has the automatic sync feature enabled. This feature allows emails to be pushed to your device without any delays. If this setting is disabled, you will not receive emails in a timely manner.
Second, if you recently changed your password or installed updates on your phone or email app, this may have disrupted the connection between your device and the email server. To resolve this issue, try uninstalling and reinstalling the app or updating the account settings so they are in sync with the new information.
Third, if you are using a third-party app for accessing emails, make sure that it is compatible with your device and email server. If it is not compatible, switch to an alternative app that does support both properly.
Finally, if you are still unable to get emails on your device even after trying thee steps, contact customer support for further assistance.
Source: zoho.com
Updating Email on an iPhone
To get your iPhone to update your email, go to Settings > Mail, then tap Accounts. From there, you can tap Fetch New Data and choose a setting such as Automatically or Manually. You can also choose a specific schedule for how often the Mail app fetches data. This will ensure that any new emails you receive are updated on your device in a timely manner.
Reactivating an Inactive Email Account
Your email account is considered inactive when you haven’t accessed it for more than 24 months (two years). This may be becase you haven’t logged in to your account for a long period of time, or because you simply forgot about the account. If your account is deemed inactive, all of the data stored in it (such as messages, files, pictures, and videos) can no longer be accessed. However, the account itself will still exist. To prevent your account from becoming inactive, remember to sign in occasionally or add a reminder to your calendar to help you stay on top of logging in.
The Effects of an Inactive Email Account
Your email account may have been marked as inactive because it has been flagged as a sender of excessive spam. It is possible that your account has been hacked and its security compromised, whch could explain why you are seeing this message. To ensure the safety of your account, we recommend taking immediate steps to secure it and change your password. Additionally, if you believe your account may have been compromised, please contact our customer service team for further assistance.
Restoring an Email Account
If you need to restore your email account, there are a few steps you can take. First, visit the Google Account Recovery page and enter the email address associated with your account. You’ll then be prompted to answer some questions to confirm that this is your account. Once you’ve answered those questions, you’ll be asked to reset your password. Make sure to choose a strong password that you haven’t already used with this account. Finally, follow any additional instructions that may appear on screen.
Source: forums.macrumors.com
Conclusion
In conclusion, activating email on your iPhone is an easy process. First, make sure that Background App Refresh is enabled and that your email address and password are correct. Then, go to Settings in the Mail app and add your account, entering your email address and password. After that, you’ll need to set up the server information correctly. Lastly, if you have inactive email addresses, you can reactivate them on iCloud.com by clicking Hide My Email in the toolbar then selecting an inactive address to reactivate. Following thse steps will ensure that your email account is up and running on your iPhone in no time!


