Are you an avid Mac user looking for an easy way to resize your videos? If so, you’re in luck because there are several great video resizer apps available for Mac users. Whether you need to make a video smaller or larger, these apps can help. Let’s take a look at some of the best video resizers for Mac users.
The first video resizer we recommend is iMovie. This popular Apple software is incredibly user-friendly and offers several different ways to resize your videos. You can change the resolution of your video, crop out unnecessary parts, and even add effects like slow motion or time-lapse. It’s also completely free to download from the App Store.
Another great option is QuickTime, which comes pre-installed on many Mac computers. With QuickTime, you can export your videos in a variety of file formats and sizes with just a few clicks. However, the options are somewhat limited compared to other apps.
If you’re looking for something more powerful and versatile, then consider downloading VideoProc Converter. This app is packed with features like batch processing and resolution optimization that allow you to quickly resize multiple videos at once while maintaining high-quality standards. It also has a built-in editor that allows you to crop out unwanted sections or add visual effects like filters or transitions.
Finally, Kapwing is also worth checking out if you need more control over how your videos look after they’ve been resized. This online tool offers several different tools for cropping and adjusting aspect ratios as well as adding subtitles or text overlays to your videos before sharing them online with friends and followers. Best of all, it’s completely free to use!
Whether you’re an experienced videographer or just getting started with video editing on Mac computers, one of these apps should make it easy for you to quickly resize any video without having to worry about quality loss or compatibility issues. So give one of them a try today!

Resizing Videos on Mac
To resize a video on Mac, you can use the iMovie app. First, open the iMovie app and select the video that needs to be resized. Then import it into the app. Next, go to Share > Export to QuickTime > Options button. Under the Video section, click on the Size button and select the desired resolution from the list of available resolutions. Finally, click on the Export button and your video will be saved with the new resolution.
Finding the Best Video Resizer
The best video resizer depends on your individual needs. If you’re looking for a free solution, some of the top options include Windows Movie Maker, iMovie, Avidemux, Lightworks, and VSDC Free Video Editor.
Windows Movie Maker is a free program from Microsoft that allows you to edit and create videos. It includes basic editing tools such as trimming and cropping as well as features like transitions and text overlays. It also has a built-in video resizer, making it a great option for those who don’t need more advanced video editing features.
iMovie is a free video editor from Apple that is available for Mac users. It includes basic video editing tools such as trimming, splitting, and cropping as well as more advanced features like transitions, themes, and titles. The software also has a built-in video resizing feature that can be used to quickly resize videos without losing quality.
Avidemux is an open-source video editor with basic functions such as cutting, encoding, and filtering videos. It also includes a built-in resizing feature that makes it easy to resize videos to different sizes without losing quality.
Lightworks is a professional-grade non-linear video editor that allows you to edit and create high-quality videos with powerful tools like chroma keying (green screen), color correction, audio mixing, and more. The software also includes an easy-to-use video resizing tool that lets you quickly adjust the size of your videos without losing quality or compromising the resolution of the original file.
VSDC Free Video Editor is another great option for those looking for free solutions for their video editing needs. It offers basic tools like trimming, splitting, and cropping as well as more advanced features like transitions, special effects, and audio mixing capabilities. The software also has an intuitive interface with a built-in video resizer feature so you can quickly resize your videos without any hassle or loss in quality.
Resizing a Video for Instagram on Mac
To resize a video for Instagram on Mac, you can use VideoProc Converter. First, double-click VideoProc Converter on your computer desktop and click “Target Format” > “General Profiles”, then set the output format to MP4. Next, go to the editing panel and click “Crop” > “Enable Crop”. After that, you can drag the sides of the frame to adjust the video size according to your needs. Finally, you can go to the official website of Kapwing and find “Resize Video” in its tool category. There you can input the desired resolution and save it as an MP4 file.
Resizing a QuickTime Video
To resize a QuickTime video, open the app from your Applications folder and click File > Open File to load your video. From there, click File > Export As to open the export dialog box. In this box, you can choose from some preset options such as Small, Medium, Large, and Custom. If you choose Custom, you can manually adjust the width and height of your video. Once you have made your selections, click Save to finish resizing your video.
Resizing a Video in VLC on Mac
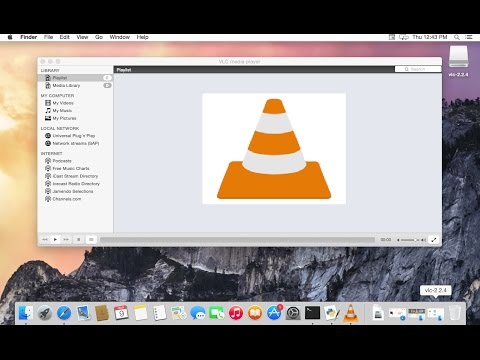
To resize a video in VLC on Mac, open the VLC application and go to the Preferences menu. On the left-hand side, under Show settings, click on the All button. Next, go to Video > Filters > Croppadd. Here you will find various parameters that can be adjusted to resize your video. You can specify the size of the output video by either entering exact pixel values or by adjusting the zoom level. You can also adjust the cropping of the video frame by specifying how many pixels should be cropped from each edge of the frame. Once done, click on Save and then Close to save your settings and start playing your resized video.

Reducing Video Size on Mac Without Losing Quality
To reduce the size of a video on a Mac without losing quality, you can use the built-in compression tools. First, open the video file in QuickTime Player. Go to File > Export As and choose the format you want your video to be saved in. This will give you several options to customize the resolution, quality, and compression speed of your video. Change these as needed to reduce the file size while still retaining quality. Finally, click Save and wait for your compressed video to be ready.
Resizing a .mov File on a Mac
To resize a .mov file on a Mac, you can use the QuickTime Player app. Open the file in QuickTime Player, then click File > Export As. Next, select the video format, resolution, and quality. You can also manually change settings like resolution, bit rate, frame rate, and encoder if you want. When you’re done making your adjustments, click Save to save your resized movie file.
Reducing File Size of an MP4 in QuickTime
In order to make an mp4 smaller in Quicktime, you will need to open the video file you want to compress. Once opened, go to File > Export As and select the desired option for your compression. If you choose a 1080p option, you can tick the “Use HEVC” option (it is a compression using codec .h265) for better results. After that, select the desired video quality level (lowest is recommended if you want to make an mp4 smaller) and press Export. The new compressed version of your video should now be available!
Conclusion
To conclude, video resizers for Mac are a great way to quickly and easily make your videos smaller for sharing. From iMovie to QuickTime, there are a variety of options available depending on the type of video you want to resize and the platform you need it for. For the absolute best results, we recommend using VideoProc Converter as it offers users the most options and features for resizing videos. Whether you need to reduce the file size or adjust resolution, VideoProc Converter is an excellent choice for Mac users who want to make their videos smaller.


