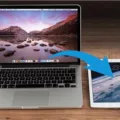
Apple’s iPad has revolutionized the way we consume and transfer files. With its sleek design, powerful performance, and user-friendly interface, the iPad has become a popular choice for individuals looking for a portable device to store and access their files. One of the most convenient ways to transfer files to your iPad is through WiFi. In this article, we will explore how to send files to your iPad via WiFi.
WiFi file transfer is a simple and efficient solution that allows you to share files between devices connected to the same WiFi network. This means that your iPad and the device you want to transfer files from, such as your computer or iPhone, need to be connected to the same WiFi network. This method eliminates the need for cables or external storage devices, making file transfer hassle-free and wireless.
To send files to your iPad via WiFi, follow these steps:
Step 1: Ensure that both your iPad and the device you want to transfer files from are connected to the same WiFi network. This can be your home network or any other WiFi network that both devices can connect to.
Step 2: On your iPad, open the app that contains the files you want to transfer. This could be the Photos app for images, the Files app for documents, or any other app that allows file sharing.
Step 3: Select the files you want to transfer. You can do this by tapping on the files or using the “Select” option within the app.
Step 4: Once you have selected the files, look for the “Share” button within the app. This button is usually represented by an arrow pointing upwards or a box with an arrow coming out of it. Tap on this button.
Step 5: From the sharing options that appear, choose the option for AirDrop. AirDrop allows you to transfer files wirelessly between Apple devices.
Step 6: A list of available devices will appear on your iPad’s screen. Look for the name of the device you want to send the files to and tap on it. Make sure the receiving device has AirDrop enabled and is discoverable.
Step 7: On the receiving device, a notification will appear asking if you want to accept the files. Confirm the transfer by clicking on “Accept” or a similar prompt.
Step 8: The files will now be transferred from the sending device to your iPad via WiFi. The transfer speed will depend on the size of the files and the strength of your WiFi connection.
It’s important to note that the steps to send files to your iPad via WiFi may vary slightly depending on the apps and devices you are using. However, the general process remains the same – select the files, choose AirDrop as the sharing option, and confirm the transfer on the receiving device.
WiFi file transfer provides a convenient and efficient way to send files to your iPad without the need for cables or external storage devices. Whether you want to transfer photos, documents, videos, or any other type of file, WiFi file transfer allows you to do so quickly and wirelessly. So next time you need to send files to your iPad, give WiFi file transfer a try and enjoy the convenience of wireless file sharing.
How Do You Transfer Files Directly to Your iPad?
To transfer files directly to your iPad, you can use iTunes and the File Sharing feature. Here’s a step-by-step guide:
1. Open iTunes on your computer and connect your iPad using a USB cable.
2. In iTunes, select your iPad icon located near the top left corner of the window.
3. Click on the “File Sharing” option in the left sidebar.
4. A list of apps installed on your iPad that support file sharing will appear in the main window.
5. Select the app you want to transfer files to. For example, if you want to transfer PDF documents, choose an app that supports PDF file management.
6. Drag and drop the files you want to transfer from a folder or window on your computer onto the Documents list in the iTunes window. Alternatively, you can click on the “Add” button and locate the files on your computer to add them.
7. The files will begin copying to your iPad. The transfer progress will be displayed next to each file.
8. Once the transfer is complete, you can disconnect your iPad from your computer.
It’s important to note that not all apps on your iPad support file sharing. Only apps that have enabled this feature will appear in the File Sharing section in iTunes. Make sure you have a compatible app installed on your iPad to transfer files directly.
By following these steps, you can transfer files directly to your iPad using iTunes and the File Sharing feature.

Can You Send Files Through Wi-Fi?
You can send files through Wi-Fi. Wi-Fi allows for wireless communication between devices connected to the same network. To send files over Wi-Fi, you can use various methods and apps depending on the devices and operating systems involved. Here are a few popular options:
1. File Transfer Apps: There are numerous apps available for both Android and iOS devices that enable file transfer over Wi-Fi. These apps create a local network on your device, allowing you to share files with other devices connected to the same network. Some popular file transfer apps include SHAREit, Xender, and Zapya.
2. Cloud Storage Services: Cloud storage services like Google Drive, Dropbox, and OneDrive also allow you to send files over Wi-Fi. You can upload the files to your cloud storage account and then share them with others by sending them a link. They can then download the files from the cloud using their own Wi-Fi connection.
3. Email: Another way to send files over Wi-Fi is by attaching them to an email. Most email providers have a file attachment option that allows you to send files to other email addresses. Simply compose an email, attach the file, and send it to the recipient’s email address. Both the sender and receiver need to be connected to Wi-Fi for this method.
4. Wi-Fi Direct: Some devices support Wi-Fi Direct, which allows for direct file transfer between devices without the need for a router. With Wi-Fi Direct, you can connect two devices directly and transfer files at high speeds. This method is particularly useful when you don’t have access to a Wi-Fi network.
It’s important to note that the speed of file transfer over Wi-Fi can vary depending on the devices involved, the Wi-Fi network’s capabilities, and the file size. Additionally, ensure that you have proper permissions and the necessary security measures in place when sharing files over Wi-Fi to protect your data.
How Do You Transfer Files From Your iPhone to Your iPad Wirelessly?
To transfer files wirelessly from your iPhone to your iPad, follow these steps:
1. Ensure that both your iPhone and iPad are connected to the same Wi-Fi network.
2. On your iPhone, open the app that contains the files you want to transfer. This could be the Photos app for photos and videos, the Files app for documents, or any other relevant app.
3. Locate the specific files you wish to transfer and select them. If you want to transfer multiple files, you can tap on each file individually, or look for options like “Select All” or “Select Multiple” to choose multiple files at once.
4. Once you have selected the files, look for the “Share” button. It is usually represented by an arrow pointing upwards and is located at the bottom left or right corner of the screen. Tap on it.
5. In the sharing options, you should see an option called “AirDrop.” Tap on it.
6. A list of nearby devices that are compatible with AirDrop will appear. Look for your iPad in the list and tap on its name.
7. On your iPad, a notification will appear asking if you want to accept the files from your iPhone. Tap on “Accept” to initiate the transfer.
8. The files will now start transferring from your iPhone to your iPad. The time taken for this process depends on the size of the files and the speed of your Wi-Fi connection. Make sure both devices remain in close proximity until the transfer is complete.
9. Once the transfer is finished, you can access the transferred files on your iPad. They should be available in the corresponding app or location where you intended to transfer them.
Note: AirDrop requires both Bluetooth and Wi-Fi to be enabled on both devices for successful file transfer. Additionally, make sure that both devices are running on the latest version of iOS to ensure compatibility and smooth file transfer.
Can You AirDrop From PC to iPad?
It is possible to AirDrop files from a PC to an iPad. AirDrop is a feature on Apple devices that allows you to wirelessly transfer files between compatible devices. While AirDrop is primarily designed for transferring files between Apple devices, there is a workaround that allows you to use AirDrop between a PC and an iPad.
To AirDrop files from a PC to an iPad, you will need to follow these steps:
1. Ensure that both your PC and iPad are connected to the same Wi-Fi network.
2. On your PC or laptop, locate the file that you want to transfer to your iPad.
3. Click on the iPad icon on your PC or laptop. This will open the AirDrop window.
4. From the available file types, select the appropriate option based on the file you want to transfer. You can choose from “Take Photo”, “Video”, “Photo Library”, or “Browse” to locate the file on your PC.
5. Once you have selected the file, click on the “Download” or “Accept” button when prompted. This will initiate the transfer process.
6. The file will be wirelessly transferred via AirDrop to your iPad.
It is important to note that AirDrop may have limitations when transferring files from a PC to an iPad. Not all file types may be compatible, and there may be restrictions on file sizes. Additionally, the AirDrop feature is only available on Apple devices running iOS 7 or later.
By following these steps, you can successfully AirDrop files from your PC to your iPad. This wireless transfer method provides a convenient way to share files between different devices without the need for cables or additional software.
Conclusion
The iPad is a versatile and powerful device that offers a wide range of features and capabilities. From its sleek design and high-resolution display to its intuitive user interface and impressive performance, the iPad is a top choice for both work and play.
With its extensive app ecosystem, the iPad allows users to customize their device to suit their specific needs and interests. Whether you’re looking to be productive with work-related apps, enhance your creativity with design and editing tools, or simply enjoy entertainment through games, movies, and music, the iPad has you covered.
One of the standout features of the iPad is its seamless integration with other Apple devices, such as iPhones and MacBooks. This allows for effortless file sharing and synchronization, making it easy to transfer files, photos, and videos between devices. Whether you’re a professional on the go or a student needing to access documents for class, the iPad ensures that your files are always within reach.
Additionally, the iPad offers a range of connectivity options, including WiFi and Bluetooth, allowing for easy internet access and device pairing. This makes it convenient to stay connected and share files with other devices, whether it’s through email, messaging apps, or cloud storage services.
The iPad is a reliable and versatile device that offers a seamless user experience, powerful performance, and a wide range of features. Whether you’re using it for work, education, or entertainment, the iPad provides a user-friendly and efficient platform for all your needs. With its sleek design, impressive capabilities, and extensive app ecosystem, the iPad continues to be a popular choice among consumers.


