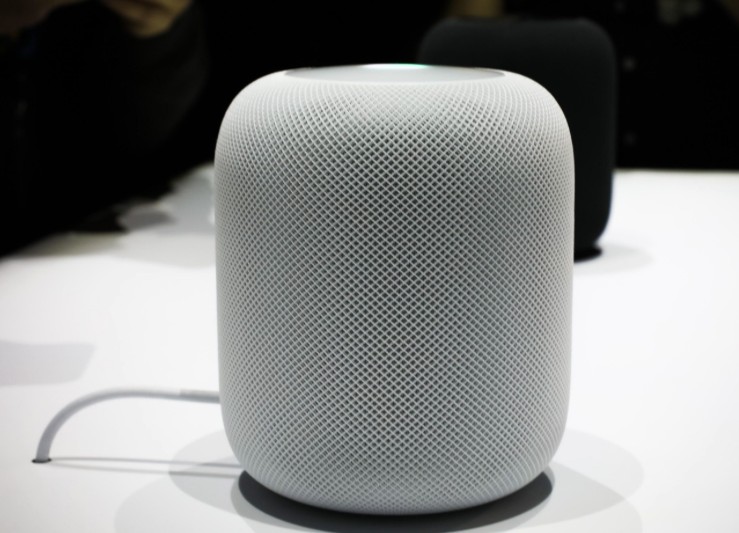
Rick4512, CC BY-SA 4.0, via Wikimedia Commons
For those looking to get the most out of their HomePod, connecting the HomePod to a 5GHz Wi-Fi network might be the way to go if you are experiencing interference. 5GHz networks offer much higher speeds and greater stability than 2.4GHz networks, and that makes them ideal for streaming music or making voice calls on your HomePod. HomePod 5Ghz Wi-Fi benefits include faster speeds and fewer interruptions.
In this guide, we’ll show you how to do an advanced HomePod Wi-Fi setup so that it connects to 5Ghz.
Understanding 5GHz Wi-Fi
5GHz Wi-Fi technology is another wireless band for Wi-Fi. Most Wi-Fi routers have traditionally used the 2.4Ghz band by default, but 5Ghz is no longer a modern invention and has become mainstream as well. Still, a lot of routers use the 2.4Ghz band by default.
What’s the difference between 2.4Ghz vs. 5Ghz? The 5Ghz high-speed Wi-Fi band tends to be stronger and faster. However, it doesn’t travel as far.
2.4Ghz is a bit slower, but it travels further, and it does a better job of traveling through walls. Because it travels further, there tends to be more interference (from neighbors using 2.4Ghz and from other devices that use this frequency, including Bluetooth and microwaves).
By switching your HomePod to 5Ghz, you can often increase speeds and reduce interference.
Step-by-Step Guide to Connect HomePod to 5GHz
KKPCW, CC BY-SA 4.0, via Wikimedia Commons
This HomePod 5GHz connection guide will show you how to set up your HomePod Wi-Fi configuration to connect to 5Ghz.
Your HomePod automatically connects to the Wi-Fi network your iPhone is using. Therefore, to get your HomePod to use 5Ghz, you need to connect your iPhone to 5GHz.
To do that, you need to configure your settings in your router. Some routers allow you to switch to 5GHz, and others allow you to set up two different SSIDs, one for 2.4GHz and one for 5GHz. If your Wi-Fi router allows you to set up two different SSIDs, connect to the 5GHz one on your iPhone. If your router allows you to switch to 5GHz, adjust the band so that it runs on 5GHz only.
Since the interface is different for every router, I can’t give you specific steps. However, generally, there will be a section for network settings or Wi-Fi settings, where you can adjust the band. You can consult your owner’s manual or call the manufacturer of the router for help with your specific model.
If you haven’t yet paired your HomePod with your iPhone, hold your iPhone next to your HomePod (when your HomePod is powered on) and wait for a prompt on your screen to set up your HomePod.
Ensuring HomePod Stays Connected to 5GHz
To maintain the HomePod’s 5GHz Wi-Fi connection, you will need to select “forget this network” for your 2.4GHz SSID on your iPhone to ensure your iPhone and HomePod use the dedicated SSID you have for 5GHz. If you don’t have separate SSIDs for 2.4GHz and 5GHz, check if your router allows you to force the network to stay on 5GHz.
You can troubleshoot HomePod Wi-Fi connection issues by checking your router settings. Usually, your router will have a web login interface (which is usually accessible through a dedicated URL or IP address printed on the back of your router), which allows you to log in and control your router settings.
Can HomePod Connect to 5GHz Wi-Fi Networks?
FASTILY, CC BY-SA 4.0, via Wikimedia Commons
Yes. HomePod offers 5GHz Wi-Fi compatibility. The HomePod Mini also works on 5GHz. If you have a dual-band router for your HomePod, you can connect to 5GHz. Most modern routers are dual-band and can use either 2.4GHz or 5GHz.
Advanced Wi-Fi Configuration for HomePod
Unfortunately, there’s no option for HomePod static IP setup. HomePod uses dynamic IP addressing by default. Some people have also reported difficulties using the HomePod with mesh networks.
For more advanced HomePod Wi-Fi settings, you will need to check which advanced configurations your Wi-Fi router supports. Some Wi-Fi routers allow you to ban certain MAC addresses from connecting to 2.4GHz, for example. In that case, you may be able to detect and find your HomePod’s MAC address and ban it from 2.4GHz to force it to stay on 5GHz.
Switching from 2.4GHz to 5GHz on Your Devices
Windows has some advanced options in the Device Manager to switch the Wi-Fi card from 2.4GHz to 5GHz. For 5GHz setup on Windows, find Network Devices or Network Adapters in Device Manager. Then, find the Wi-Fi card of your device (the card that allows your laptop or computer to connect to Wi-Fi) and click on Properties. Then, in the Advanced tab, search for Preferred Band and switch it to 5GHz.
Unfortunately, most other devices, like iPhones, don’t offer built-in dual-band Wi-Fi configuration options. The settings will usually be in your router instead.
Optimizing HomePod Wi-Fi Performance
Here are some HomePod performance tips for optimizing your HomePod’s Wi-Fi:
- Keep your HomePod as close to the router as possible.
- If you are experiencing interference, switch to 5GHz on your router.
- If you can’t switch to 5Ghz, avoid interference from microwaves, Bluetooth devices, and other Wi-Fi hotspots that may interfere on the 2.4GHz band. That can lead to a Wi-Fi signal improvement.
Conclusion
HomePod 5GHz benefits include faster speeds and less interference. In this article, we’ve discussed some advanced HomePod Wi-Fi settings for HomePod network optimization. We hope you enjoy using your HomePod!


