In today’s digital age, we are often faced with the need to convert physical documents and images into digital formats. One common task is scanning a picture and saving it as a PDF file. PDF, or Portable Document Format, is an ideal format for preserving the original quality and layout of an image, making it easily shareable across different devices and platforms.
The process of scanning a picture to PDF has become much simpler and more accessible thanks to advancements in technology. Gone are the days of bulky scanners and complicated software. Now, all you need is your smartphone or a digital camera, along with the Google Drive app, to quickly and effortlessly convert your picture into a PDF.
To begin, simply open the Google Drive app on your device and navigate to the option for scanning documents. This feature is conveniently located within the app and can be easily accessed with just a few taps. Once you’re ready, position your camera or smartphone over the picture you wish to scan, ensuring that it is properly aligned and well-lit.
Using the camera function within the app, take a photograph of the picture. The app will automatically detect the edges of the image and enhance it for optimal quality. Once the scanning process is complete, you will have the option to review and adjust the scanned image if necessary.
Next, save the scanned image as a PDF file. The Google Drive app allows you to choose the format in which you want to save your document, and PDF is a highly recommended option due to its versatility and compatibility. By opting for PDF, you can ensure that the image will appear the same way across all devices and platforms.
After saving the scanned picture as a PDF, it will be stored in your Google Drive account. This cloud-based storage solution offers numerous benefits, such as easy access from any device with an internet connection and the ability to share the document with others. You can also organize and categorize your scanned pictures within Google Drive to keep them neatly arranged and easily retrievable.
The conversion of a picture to PDF provides a multitude of advantages. Firstly, it allows you to preserve the original quality of the image, ensuring that no details are lost during the scanning process. This is particularly important for documents or photographs with significant historical or sentimental value. Additionally, PDF files are generally smaller in size compared to other formats, making them easier to store and share.
Furthermore, PDF documents are universally compatible, meaning that recipients can view the scanned picture regardless of the device or operating system they are using. This eliminates the need for installing specific software or worrying about compatibility issues. Whether you are sharing family photos, important documents, or even artwork, converting them to PDF ensures that they can be easily accessed and viewed by anyone.
Scanning a picture to PDF is a convenient and efficient way to preserve and share images in the digital age. With the Google Drive app and your smartphone or digital camera, you can effortlessly convert physical documents and photographs into PDF files. PDF format provides compatibility, maintains the original quality, and offers easy sharing and storage options. So, next time you come across a picture you want to digitize, remember the simplicity and benefits of scanning it to PDF.
Can You Scan An Image And Save it as a PDF?
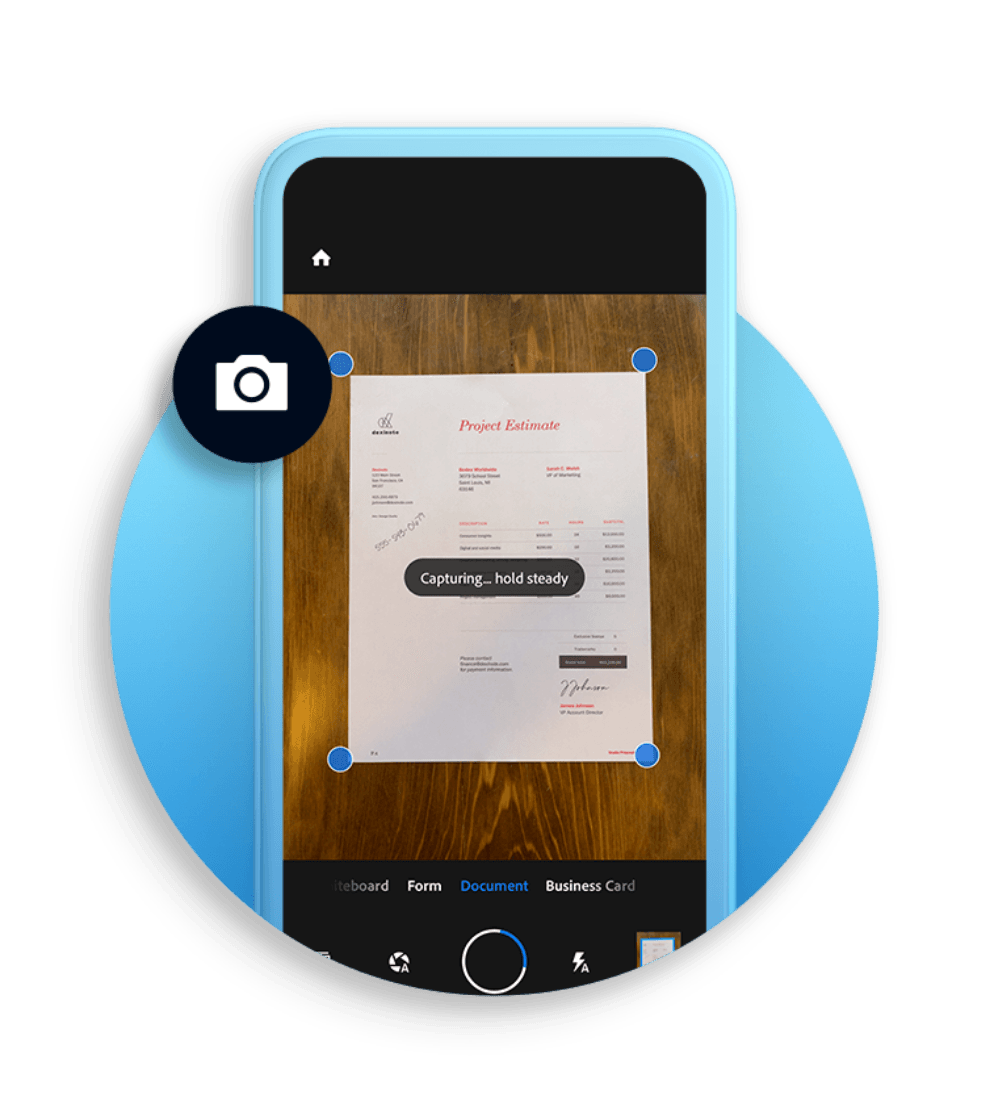
You can scan an image and save it as a PDF. Google Drive offers a convenient method to scan documents using your device’s camera through its app. By following these steps, you can easily convert your image into a PDF:
1. Install the Google Drive app on your device if you haven’t already.
2. Open the Google Drive app and sign in to your Google account.
3. Locate the “+” (plus) button at the bottom right corner of the screen and tap on it.
4. In the menu that appears, select “Scan.”
5. Position your device’s camera over the image you want to scan. Ensure that the image is well-lit and properly aligned within the camera frame.
6. The app will automatically detect the corners of the document and capture the image.
7. If needed, you can manually adjust the corners by dragging them to accurately fit the edges of the document.
8. Once you are satisfied with the scan, tap on the shutter button to capture the image.
9. After capturing the image, you can review it and make any necessary adjustments or retakes.
10. If everything looks good, tap on the checkmark or “Save” button to proceed.
11. You will be prompted to choose the format for saving the scanned image. Select “PDF” as the format.
12. provide a name for your scanned document and choose the location within your Google Drive where you want to save it.
13. Tap on “Save” or the checkmark to complete the process.
Your scanned image will now be saved as a PDF in your Google Drive, making it easy to access and share whenever needed.
How Do You Scan a Picture Into a Document?
To scan a picture into a document, you can follow these step-by-step instructions:
1. Prepare your image: Make sure your image is in a digital format and saved as a standard image file such as .JPEG, .PNG, or .GIF. If you have a physical copy of the picture, you can use a scanner to convert it into a digital format.
2. Open Microsoft Word: Launch the Word application on your computer. If you don’t have Word installed, you can use any other word processing software that supports image insertion, such as Google Docs or OpenOffice Writer.
3. Position the cursor: Place your cursor in the document where you want to insert the scanned picture. This could be at the beginning, in the middle, or at the end of the document.
4. Insert the picture: On the top menu of Word, click on the “Insert” tab. From the options available, click on “Pictures.” This will open a file browser window.
5. Locate and select the scanned image file: In the file browser window, navigate to the location where you saved your scanned image. Once you find it, click on the file to select it, and then click on the “Insert” button.
6. Adjust the picture size or position (optional): After the image is inserted into your document, you can resize or reposition it if needed. Click on the image to select it, and then use the resizing handles to adjust the size. You can also drag and drop the image to a different location within the document.
7. Save your document: Once you have inserted the scanned picture and made any necessary adjustments, be sure to save your document. Click on the “File” tab and choose “Save” or press Ctrl + S on your keyboard. Give your document a name and choose a location to save it.
That’s it! You have successfully scanned a picture into your document using Microsoft Word. Remember to save your document regularly to avoid losing any changes.
Can You Scan And Convert it to PDF?
It is certainly possible to scan and convert documents into PDF format. Scanning refers to the process of converting a physical document, such as a paper or a photograph, into a digital image. This can be done using a scanner, which captures the document and creates a digital file.
Once the document is scanned and saved as a digital image, it can be easily converted into a PDF format. PDF, or Portable Document Format, is a file format that is widely used for presenting and sharing electronic documents. It preserves the layout and formatting of the original document, ensuring that it appears the same way on all devices.
To convert a scanned document into a PDF, you can use various software or online tools specifically designed for this purpose. These tools allow you to import the scanned image and save it as a PDF file. Some scanning software may even have built-in options to directly save the scanned document as a PDF.
Converting a scanned document to PDF has several advantages. Firstly, PDF files are universally compatible, meaning they can be opened and viewed on any device or operating system without any issues. Additionally, PDFs can be easily shared via email or other electronic means, making it convenient for sending important documents.
Scanning and converting documents into PDF format is a straightforward process that allows you to create digital copies of physical documents while preserving their original layout. This can be done using scanning software or online tools, and the resulting PDF files can be easily shared and viewed on any device.
Conclusion
The ability to scan a picture and convert it into a PDF format provides numerous benefits and convenience. By utilizing the Google Drive app and your device’s camera, you can easily capture and store scanned documents in Drive as PDFs.
The PDF format is ideal for preserving the intended layout of the scanned picture, ensuring that it appears the same way across all devices. This is particularly useful when sharing documents electronically, as it eliminates any potential formatting issues.
Additionally, converting scanned pictures to PDFs allows for easy storage and organization. With the ability to name and categorize the PDF files, you can quickly locate and access specific scanned documents whenever needed.
Furthermore, PDFs are widely compatible and can be opened and viewed on various devices and operating systems. This versatility ensures that the scanned picture can be easily shared and accessed by others without any compatibility issues.
The process of scanning a picture and converting it to a PDF format is a simple and efficient way to digitize and preserve important documents. Whether for personal or professional use, this method provides a reliable and accessible means of storing, sharing, and viewing scanned pictures.


