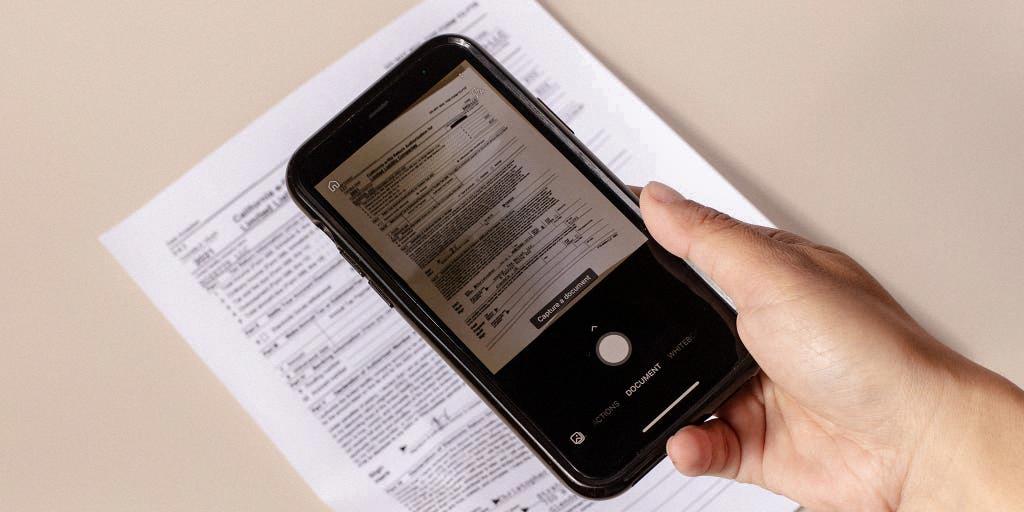
In this digital age, the need to convert paper documents into electronic files is becoming increasingly important. One popular format for preserving the original document’s integrity and layout is PDF (Portable Document Format). In this article, we will explore the process of scanning a document to PDF and provide you with a step-by-step guide to help you accomplish this task seamlessly.
Step 1: Prepare Your Scanner and Document
Before you begin the scanning process, ensure that your scanner is properly connected to your computer, either through a cable or wirelessly. Once connected, make sure your scanner is powered on and ready to use. Next, gather the document or documents you wish to scan and ensure they are clean, free of any staples or paper clips, and properly aligned.
Step 2: Launch Adobe Acrobat
To initiate the scanning process, open Adobe Acrobat on your computer. If you don’t have Adobe Acrobat installed, you can download and install it from the official Adobe website. Once the software is launched, you will be greeted with a user-friendly interface.
Step 3: Select the Scanning Option
In Adobe Acrobat, navigate to the “File” menu and select “Create” followed by “PDF from Scanner.” This option will enable your scanner to communicate with Adobe Acrobat and initiate the scanning process. A scanning dialog box will appear, allowing you to customize various settings.
Step 4: Choose Document Presets
Within the scanning dialog box, you will find several document presets to choose from. These presets determine the quality, resolution, and file size of the scanned document. Select the preset that best suits your needs. For example, if you want a high-quality scan, choose a preset with a higher resolution.
Step 5: Adjust Scanning Settings
To further refine your scanning settings, click on the “Options” button within the scanning dialog box. This will open a new window where you can customize settings such as color mode, document size, and image enhancement. Take the time to review and adjust these settings according to your preferences.
Step 6: Scan the Document
Once you have selected your desired presets and adjusted any additional settings, click on the “Scan” button within the scanning dialog box. Your scanner will begin the scanning process, capturing the document’s content and converting it into a digital format.
Step 7: Review and Save the Scan
After the scanning process is complete, Adobe Acrobat will display a preview of the scanned document. Take a moment to review the scan and make sure it meets your expectations. If you are satisfied with the scan, select the “Save” button to save the document as a PDF file.
Step 8: Repeat if Necessary
If you have more pages to scan, you can choose “Scan More Pages” within the scanning dialog box to continue scanning additional documents. This option allows you to create a multi-page PDF document by scanning each page sequentially.
And there you have it! By following these simple steps, you can easily scan your documents to PDF using Adobe Acrobat. Remember to save your scanned documents in a location that is easily accessible and organized for future reference.
Scanning documents to PDF offers numerous benefits, such as preserving the original document’s formatting, making it easily shareable, and reducing physical storage requirements. Whether you need to digitize important records, create electronic copies of contracts, or simply organize your paperwork, scanning to PDF is a convenient and efficient solution.
So why not give it a try? Start scanning your documents to PDF today and enjoy the convenience of a paperless workflow. The possibilities are endless!
How Can You Scan a Document And Save It As a PDF?
To scan a paper document and save it as a PDF, you can follow these steps:
1. Open the document scanning software on your Windows computer. Most scanners come with their own scanning software, but you can also use the built-in Windows scanning software.
2. Place the document you want to scan on the scanner bed. Make sure it is aligned properly and there are no wrinkles or creases that may affect the scan quality.
3. Open the scanning software and choose the appropriate document preset for scanning to PDF. This preset is usually labeled as “PDF” or “Document” and ensures that the scanned document is saved as a PDF file.
4. Click on the “Scan” button to start the scanning process. The scanner will capture an image of the document and convert it into a digital format.
5. If your document has multiple pages, after scanning the first page, you will be prompted to either scan more pages or indicate that the scanning is complete. Choose the appropriate option depending on the number of pages you have.
6. Once the scanning process is complete, the scanning software will save the scanned document as a PDF file automatically. You may be prompted to choose a location to save the file or it may be saved in a default location.
7. If desired, you can preview the scanned PDF document to ensure it looks accurate and legible. Some scanning software allows you to make adjustments to brightness, contrast, or orientation if needed.
8. give the scanned PDF file a name and choose a location on your computer to save it. It’s a good practice to choose a descriptive name that helps you easily identify the document later.
By following these steps, you can scan your paper document and save it as a PDF file using a preset in Windows. It’s a convenient way to digitize physical documents and make them easily accessible and shareable in a digital format.

Why Can’t You Scan a Document As a PDF?
There could be several reasons why you are unable to scan a document as a PDF. Here are some possible explanations:
1. Scanner limitations: Some scanners may not have the capability to save scanned documents as PDF files. Check the specifications of your scanner to ensure that it supports PDF format.
2. Software limitations: The software that came with your scanner may not have the functionality to save scans as PDF. Some scanners come with basic software that only allows saving scans in image formats like JPEG or PNG. In this case, you would need to use a different software or application that supports PDF conversion.
3. Adobe Reader limitations: Adobe Reader, the free software for viewing PDFs, does not have the ability to create PDF files. It is primarily designed for reading and interacting with existing PDF documents. To create PDFs, you would need Adobe Acrobat, which is a separate software and not available for free.
4. File format settings: It is possible that your scanner’s software or settings are configured to save scans in a different file format by default. Check the settings options in your scanner’s software and make sure that PDF is selected as the desired file format for scanning.
The inability to scan a document as a PDF could be due to limitations in your scanner, software, or the free Adobe Reader software. To resolve this issue, you may need to upgrade to a scanner that supports PDF scanning or use alternative software that allows PDF conversion.
How Do You Scan a Document As a Readable PDF?
To scan a document as a readable PDF, you can follow these steps:
1. Ensure that you have a scanner connected to your computer and that it is turned on.
2. Place the document you want to scan on the scanner bed, making sure it is aligned properly.
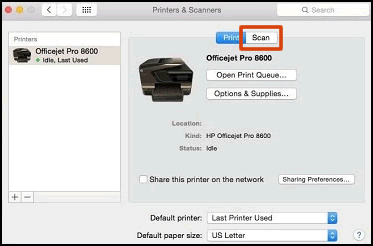
3. Open a scanning application on your computer. Many scanners come with their own software, but you can also use built-in scanning features in operating systems like Windows or macOS.
4. In the scanning application, select the option to scan a document or image.
5. Choose the appropriate settings for your scan, such as resolution, color mode, and file format. For a readable PDF, it is recommended to select a higher resolution and color mode if the document contains color.
6. Preview the scan to ensure it is aligned properly and that the content is clear and legible.
7. Once you are satisfied with the preview, initiate the scan process. This may involve clicking a “Scan” or “Start” button in the scanning application.
8. After the scan is complete, the scanned document will usually be saved as an image file, such as JPEG or TIFF.
9. To convert the scanned document into a readable PDF, you will need to use Optical Character Recognition (OCR) software. OCR software recognizes the text in the scanned image and converts it into editable and searchable text.
10. Open an OCR software program, such as Adobe Acrobat, ABBYY FineReader, or Google Drive.
11. In the OCR software, select the option to open or import the scanned image file.
12. Once the scanned image file is opened, initiate the OCR process. This will analyze the image and extract the text from it.
13. After the OCR process is complete, you can save the document as a searchable PDF. In Adobe Acrobat, for example, you can go to File > Save As > PDF and choose the appropriate settings.
14. Give the PDF a meaningful name and select a location to save it.
15. Click Save, and your scanned document will now be saved as a readable PDF.
Remember to proofread the OCR-generated text in the PDF to ensure accuracy, as OCR can sometimes introduce errors.
How Do You Convert a Paper Document to a PDF?
To convert a paper document to a PDF, you can utilize Adobe Acrobat, a reliable software widely used for creating and managing PDF files. The process involves connecting your scanner to your computer and following a few simple steps. Here’s a detailed guide:
1. Connect your scanner: Make sure your scanner is properly connected to your computer via cable or set up wirelessly. Ensure that the scanner is powered on and ready to use.
2. Prepare the paper document: Load the paper or papers you want to convert into your scanner. Ensure that the documents are properly aligned and free from any folds or creases that may hinder the scanning process.
3. Open Adobe Acrobat: Launch Adobe Acrobat on your computer. If you don’t have it installed, you can download it from the official Adobe website and follow the installation instructions.
4. Start the scanning process: In Adobe Acrobat, click on the “File” menu located at the top left corner of the window. Then, select “Create” and choose “PDF from Scanner” from the drop-down menu. This action will prompt a scanning interface to appear.
5. Configure scanner settings: In the scanning interface, you will see various options to customize the scanning process. Select your scanner from the drop-down list if multiple scanners are connected. Adjust settings like scan resolution, color mode, and paper size according to your preferences. You can also choose to scan multiple pages into a single PDF or create separate PDF files for each page.
6. Preview and adjust settings (optional): If available, you may have the option to preview the scanned document before finalizing the conversion. This allows you to make any necessary adjustments such as rotating pages, cropping unwanted areas, or enhancing image quality.
7. Begin scanning: Once you are satisfied with the settings, click on the “Scan” button to initiate the scanning process. Adobe Acrobat will communicate with your scanner and begin scanning the paper document(s).
8. Save the PDF file: After the scanning is complete, Adobe Acrobat will automatically convert the scanned pages into a PDF document. You will be prompted to save the file to a location of your choice on your computer. Choose an appropriate file name and destination folder, and click “Save.”
9. Review and edit (if necessary): Once the PDF file is saved, you can open it in Adobe Acrobat to review the scanned document. If needed, you can further edit the PDF by adding or removing pages, rearranging content, or applying OCR (Optical Character Recognition) to make the text searchable.
10. Share or store the PDF: With the paper document now converted to a PDF file, you can easily share it electronically via email, upload it to cloud storage services, or store it on your computer for future reference.
By following these steps, you can efficiently convert paper documents into digital PDF files using Adobe Acrobat. This enables you to conveniently store, share, and manage your documents in a digital format.
Conclusion
Scanning a document to PDF is a convenient and efficient way to digitize paper documents. By using a scanner and Adobe Acrobat software, you can easily convert physical documents into electronic files that can be easily stored, shared, and accessed.
The process of scanning a document to PDF is straightforward. Simply connect your scanner to your computer and load the paper documents into the scanner. Then, open Adobe Acrobat and select the option to create a PDF from the scanner. You can choose from different document presets and customize settings according to your needs.
Scanning documents to PDF offers several benefits. Firstly, it eliminates the need for physical storage space, as all your documents can be stored digitally on your computer or cloud storage. This not only saves physical space but also reduces the risk of document loss or damage.
Additionally, scanned PDF documents are easily searchable. By using OCR (Optical Character Recognition) technology, Adobe Acrobat can recognize and extract text from scanned documents, making them searchable and allowing for easy retrieval of information.
Scanned PDF documents also offer the advantage of being easily shareable. You can easily send the scanned PDF files via email or share them through cloud storage services. This makes collaboration and sharing of documents much more convenient and efficient.
Scanning a document to PDF using Adobe Acrobat is a simple and effective way to convert physical documents into digital files. It offers benefits such as space-saving, easy retrieval of information, and convenient sharing. By embracing this digital transformation, you can streamline your document management processes and enhance your productivity.


