Welcome to the world of Mac, where you can enjoy a powerful and reliable computing experience. Installing macOS on a new SSD is an easy and straightforward process, and this post will help guide you through the steps.
First, you should make sure your SSD is compatible with your Mac computer. If it is compatible, then you need to erase your drive (even if there’s no data on it). To do this, press Opt+Cmd+R to open Recovery Tools, select Disk Utility, and erase your drive.
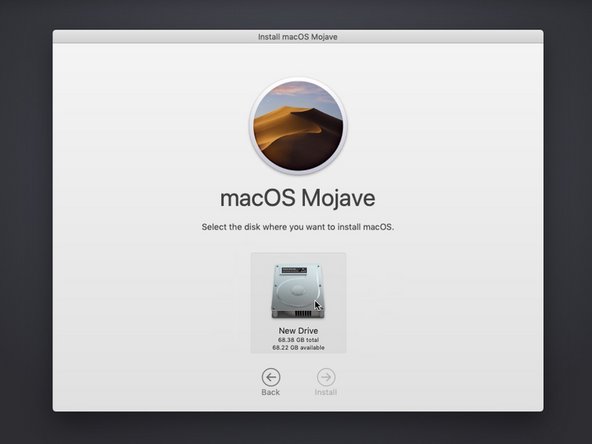
Once your drive has been erased, you can now reinstall macOS. To do this, go back to Recovery Tools and select Reinstall macOS. This will start the installation process which can take some time depending on the speed of your computer and your internet connection. Once the installation process is complete, you’re ready to start using macOS on your new SSD!
If you’re having trouble finding your SSD in Disk Utility, make sure that it doesn’t have any hardware problems that are preventing it from being listed. If that’s not the case then the drive might be physically damaged. In this case, the best option would be to get a new SSD and install MacOS from scratch.
If you’re running an older version of MacOS (not Catalina or later), then there’s a specific process for installing a new drive: start-up or restart your Mac while holding down the Option key (also known as Alt). Then choose to install your chosen version of macOS from the external drive. You can also connect your old boot drive externally so that all of your data will transfer over properly.
We hope this post has helped give you an understanding of how to install macOS on a new SSD for a smooth transition from an old system to a newer one. If you have any other questions about getting started with MacOS or any other topics related to Apple products please don’t hesitate to reach out!
Installing Mac OS on a New SSD
To install MacOS on a new SSD, you’ll need to first open Recovery Tools by pressing Opt + Cmd + R. Once you’re in the Recovery Tools, select Disk Utility and use the Erase function to erase your drive (even if there’s no data on it). Once you’ve finished erasing your drive, quit Disk Utility and select Reinstall macOS. Follow the on-screen instructions to complete the installation. After the installation is complete, your new SSD should be ready for use!
How to Get Mac to Recognize SSD
If your Mac is not recognizing your SSD, the first step is to check if the SSD is found in Disk Utility. To do this, open Finder, and select Applications > Utilities > Disk Utility. If you can see the SSD listed in Disk Utility, then it most likely means that the drive does not have any hardware problems and you should be able to mount and repair the SSD in Disk Utility. To do this, select the SSD from the left-hand side menu, click Mount on the top toolbar, then click Repair disk permissions or Run First Aid on the bottom toolbar.
If you can’t find your SSD listed in Disk Utility then it is possible that your Mac is not recognizing it due to a hardware issue. If this is the case, then it might be necessary to physically inspect the drive for any signs of damage or faults. Additionally, you could try connecting it to a different computer to rule out any potential compatibility issues between your Mac and your SSD.
Installing Fresh macOS on a New Hard Drive
To install a fresh version of macOS onto a new hard drive, you will first need to connect the hard drive to your Mac. Once it is connected, restart or start up your Mac while holding down the Option key (also known as Alt). This will bring up a menu with several options. Select “Install macOS” from the external drive option, and then select Disk Utility from the list of choices. You will then be able to select the new hard drive as the target disk for installation. Finally, follow the on-screen instructions to complete your installation. Afterward, your Mac should be ready to use with a fresh version of macOS installed onto it.
Transferring a Macbook Pro to a New SSD
Transferring your Macbook Pro to a new SSD is a straightforward process, but there are some important steps you’ll need to take to ensure the transition is successful.
First, you’ll need to choose the correct SSD for your computer. Make sure that the drive has enough storage capacity and meets the requirements of your operating system.
Second, make sure you have a way of transferring your data from the old drive to the new one. You can use an external hard drive or cloud storage service for this step.
Third, it’s essential that you have a current backup of all of your files and folders. This will ensure that you don’t lose any data during the transfer process.
Fourth, make sure that you have the means of installing your chosen OS onto the new drive. This could be either a physical disc or an internet download.
Fifth, install your new drive into the Macbook Pro by following any instructions included with it or those given by Apple support. Once this is complete, connect your old drive externally via USB or Thunderbolt cable so that it can be accessed in order to transfer over any files or settings you wish to keep.
Finally, once all of these steps are complete, use Migration Assistant or another similar tool to migrate all of your data from the old drive onto the new one. Once this is done, restart the Macbook Pro and enjoy using it with its new SSD!


