Are you havng trouble getting your Macbook to connect to AirDrop? If so, you’ve come to the right place! AirDrop is a great tool for quickly transferring files between Mac computers, iPhones, iPads and other Apple devices. It allows you to send pictures, videos and other large files without using email or a cloud storage service. Here’s how you can turn on AirDrop on your Macbook:
1. Open Finder.
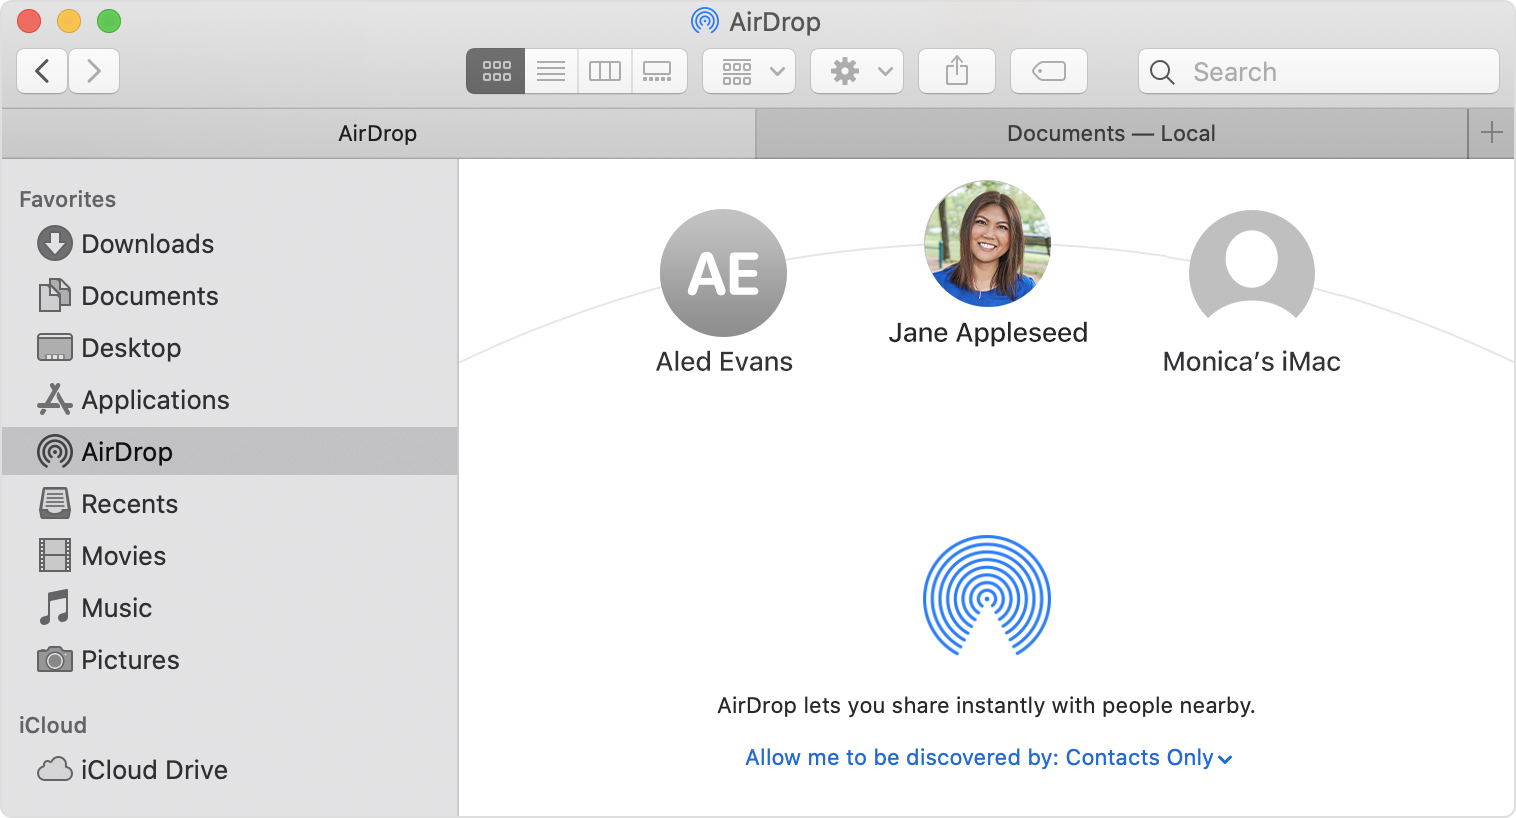
2. Select Go > AirDrop from the menu bar at the top of your screen.
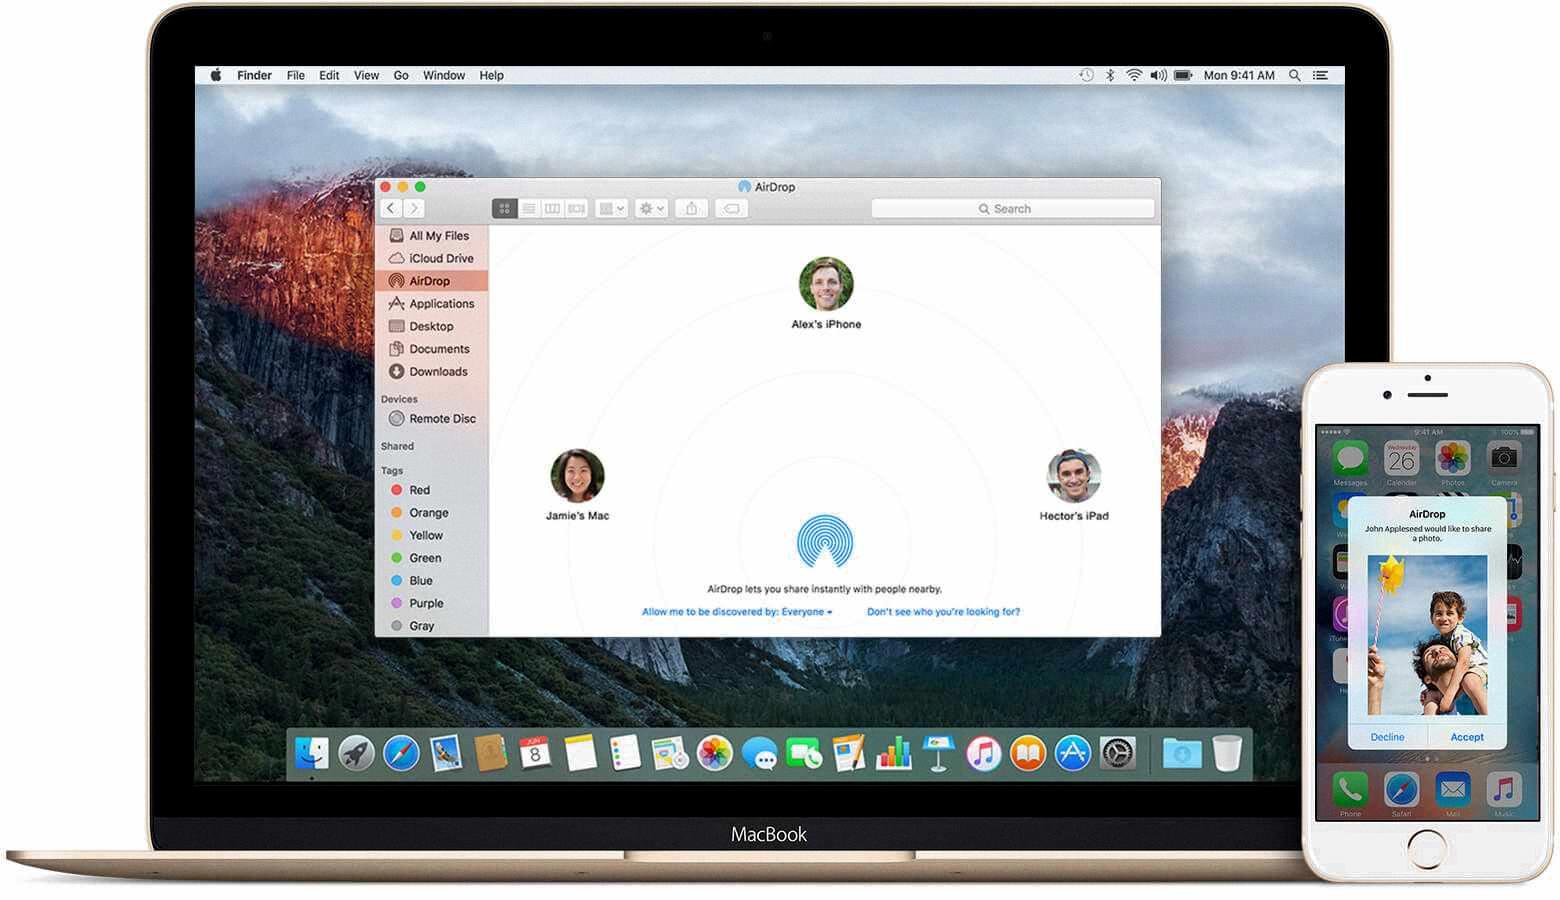
3. An AirDrop finder window will open and wait a moment for nearby devices to appear.
4. You can now drag and drop files into the window to share them with oher nearby devices that have AirDrop enabled.
5. To make sure that your device is discoverable by other nearby devices with AirDrop, select “Allow me to be discovered by” in the bottom left corner of the window and choose “Everyone” or “Contacts Only” depending on who you want to be able to see your Macbook when they use AirDrop to search for nearby devices.
Once you have turned on AirDrop, you can start sharing files with ease! Just remember that if someone wants to send a file to your Macbook using AirDrop, they will need to make sure their device is also discoverable in order for it apear in the list of available devices when they search for nearby devices using AirDrop.

Troubleshooting AirDrop Issues on Mac
If you are having difficulty turning on AirDrop on your Mac, it could be becaue of several different factors. First, make sure that your Bluetooth is turned on and that both devices are discoverable. You may also need to adjust your firewall settings in order to get AirDrop working properly. Additionally, you may need to check if your Mac is compatible with AirDrop by checking the Apple system requirements. Finally, if the issue persists, you may need to restart your device or update the software on your Mac.
Enabling AirDrop on a Macbook Air
To get AirDrop on your Macbook Air, frst make sure your device is running OS X Yosemite or later. Then open Finder and choose Go > AirDrop from the menu bar at the top of your screen. An AirDrop finder window will open. Wait a moment for nearby devices to appear in the window, then you’re ready to start AirDropping files!
Turning On AirDrop
To turn AirDrop on, go to your Home screen on your Apple® iPhone®, navigate to Settings > General. If an app isn’t avalable on your Home screen, swipe left to access the App Library. Tap AirDrop and select the AirDrop setting Receiving On. This will enable AirDrop so you can share content with other nearby Apple devices.
Getting Mac to Recognize iPhone
In order to get your Mac to recognize your iPhone, you need to ensure that both devices are connected and unlocked. On your Mac, open the Finder tool and select Preferences from the Finder menu bar. In the preferences window, click the Sidebar tab at the top of the window and make sure that “CDs, DVDs, and iOS Devices” is ticked. Once these steps have been completed, your Mac should be able to recognize your iPhone.
AirDropping from an iPhone to a Computer
To AirDrop from your iPhone to your computer, firt open the Photos app on your iPhone and select the photos you wish to transfer. Then, tap the Share icon located on the bottom left of the screen. In the Share Sheet, scroll down and tap on Save to Files. On the new screen, select a save location for your files and tap Save. Finally, open Finder on your computer and click AirDrop in the sidebar. When prompted, click Accept on both devices to transfer the photos.

Source: imyfone.com
AirDropping Photos From iPhone to Mac
To AirDrop photos from your iPhone to your Mac, you’ll need to first open the Control Center on your iPhone and select Network Settings. Once you’ve enabled this, open Finder on your Mac and look for AirDrop in the sidebar. On your iPhone, select the photos that you’d like to transfer, then click ‘Share’ and choose AirDrop. Your Mac will then prompt you to accept the image, at which point it will be transferred over. Make sure that both devices are connected to the same Wi-Fi network in order for this to work.


