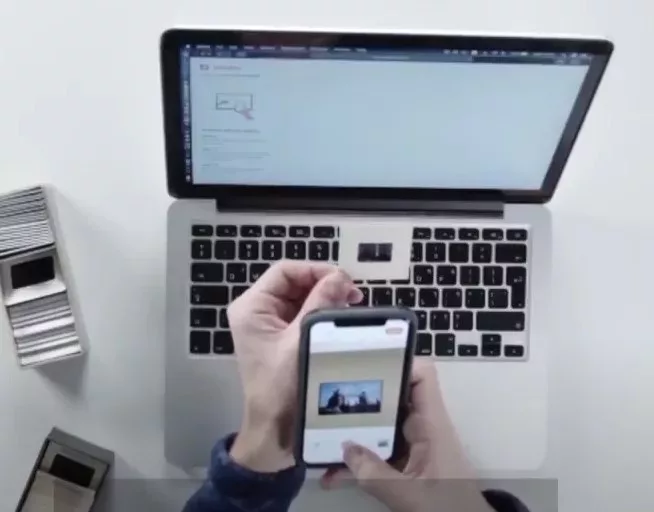
The need to digitize slides and preserve memories held in old photos has never been more pressing. With physical slides prone to deterioration over time, capturing these moments on your iPhone through a slide-scanning app ensures they remain vivid and accessible for future generations.
This guide provides a straightforward approach to using your iPhone to safeguard these precious memories, offering a practical solution to maintain the quality and sentiment behind each slide.
SlideScan: The Easy Solution
SlideScan is your go-to slide-scanning app that transforms your iPhone into an efficient photo scanner. This free app not only saves you time but also guarantees high-quality scans of your old slides with just a few taps.
Using SlideScan, you can bypass the usual hassles associated with traditional scanning methods, making it a truly time-saving solution for digitizing your cherished memories.
Step-by-Step Guide to Using SlideScan
Scanning slides with your iPhone can be a straightforward process if you have the right tools and know-how. In this step-by-step guide, we’ll walk you through using the SlideScan app to digitize your old slides effectively. Whether you’re preserving family memories or professional archives, follow these clear instructions for app setup, slide placement, image capture, and customization.
1. App Setup
First, download and install the SlideScan app from the App Store. Once installed, launch the application and allow it permission to utilize your camera and photos. This setup will allow you to capture images directly from your slides and save them conveniently.
2. Slide Placement and Backlight
For the best results, you’ll need a uniform backlight to illuminate your slides. You can use a commercial slide viewer or create a DIY backlight by using a white screen on a tablet or another phone.
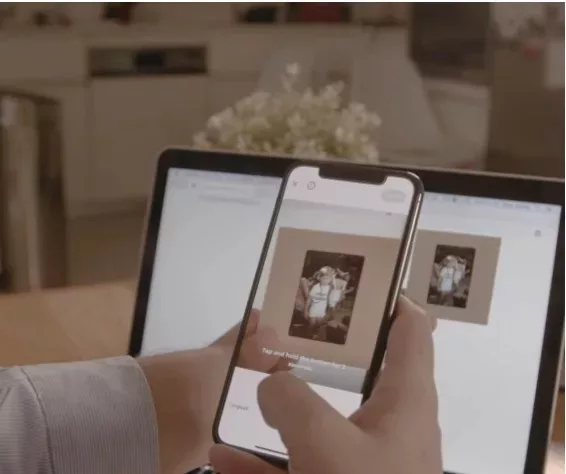
Place the slide in front of the backlight, ensuring the light evenly covers the entire slide without any hotspots or shadows.
3. Image Capture and Slide Adjustment
Align your iPhone’s camera with the slide. Use the slide adjustment features in the SlideScan app to position the slide perfectly within the frame. The app might automatically detect the edges and suggest the best crop. Use manual focus or the auto-focus feature to ensure that the details are crisp and distinct.
4. Brightness Control and Editing Tools
After capturing the image, use the brightness control to adjust the exposure. Slides can often appear too dark or too bright, depending on their original condition and age. The app’s editing tools allow you to enhance the image further by adjusting contrast, saturation, and sharpness to bring your old memories back to life.
5. Saving and Sharing Options
Once you’re happy with the image, go ahead and save it on your phone. The SlideScan app offers various sharing options, allowing you to share these newly digitized memories with friends and family via social media, email, or cloud storage.
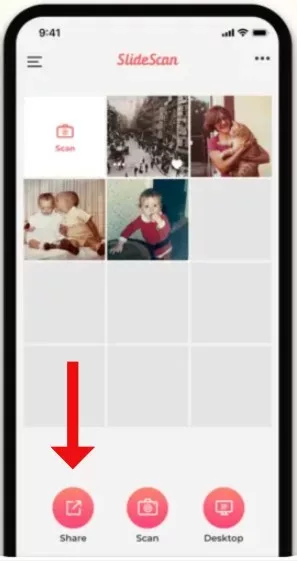
It’s an excellent method for maintaining connections with family history.
Can You Scan Slides With an iPhone? Absolutely!
Absolutely! Scanning slides with your iPhone is a straightforward and effective DIY project that doesn’t require specialized equipment. With your iPhone, you can easily scan slides iPhone style by leveraging the camera’s high resolution and clarity.
This DIY slide scanning method involves using a simple setup: a light source, your slides, and your iPhone. First, position the slide against a bright light source, like a lamp or by a window.
Then, position your iPhone so the camera lens is directly over the slide, ensuring the slide fills the camera frame as much as possible. Snap your photo, and voila! You’ve digitized your old memories using nothing but your iPhone, making slide scanning accessible to everyone with no technical expertise required.
Is There a Free SlideScan App Available? Yes!
Is there a free SlideScan app available for your iPhone? Absolutely! The free slide-scanning app lets you easily digitize old slides directly from your smartphone. While this free version is quite handy, it does have its limitations—such as a cap on the number of slides you can scan without charge.
For those who find themselves needing more, the app offers premium features through in-app purchases. These upgrades often include unlimited scanning, higher resolution outputs, and additional editing tools. This makes it simple to expand the app’s capabilities if you find the basic offerings too restrictive.
Using an App to Scan Photo Slides: The Benefits
Using an app to scan photo slides with your iPhone offers several advantages over traditional scanners, particularly in terms of portability, cost, and ease of use.
Traditional slide scanner comparison often highlights their bulkiness and higher cost, whereas a portable scanner app on your iPhone can be used anywhere, eliminating the need for a dedicated scanning device.
This saves space and makes the scanning process more spontaneous and accessible anytime. Additionally, affordable digitizing becomes a reality with such apps; they often come at a fraction of the cost of conventional scanners, making converting your old slides into digital formats easier and more economical.
Reimagining Old Family Slides: What Can I Do With Them?
Reimagining old family slides offers a unique opportunity to preserve cherished memories while engaging in creative projects. Scanning slides with your iPhone allows you to transform these vintage images into vibrant digital formats, setting the stage for slide preservation.
Imagine turning these revitalized photos into beautiful family keepsakes, like custom photo albums that narrate your family’s history or digital slideshows for reunions that bring the past to life on screen. You can also craft personalized gifts, such as printed canvases or photo books, giving a personal touch to birthdays and holidays with memories that tell a story.
Backlight Options for Scanning Slides
When scanning slides with your iPhone, creating an effective backlight for slides is crucial for capturing clear images.
One practical option is to use a lightbox, which provides a consistent, diffuse light source ideal for this purpose.
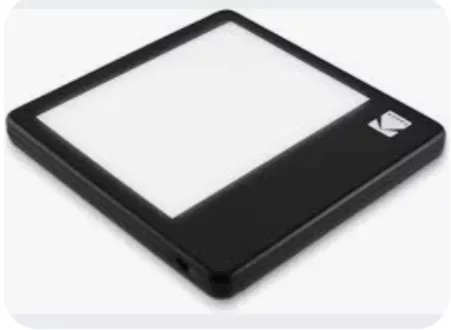
If you don’t have a lightbox, you can improvise a DIY backlight using a tablet or computer screen; set a blank white image to full brightness to serve as your screen as a backlight.
Alternatively, for a natural option, arrange your slides near a window to capitalize on the natural light available. Each method will help you achieve optimal results by illuminating your slides evenly and enhancing the quality and colors in your scans.
Tips for Best Scanning Results
When scanning slides with your iPhone, achieving high-quality results hinges on a few practical steps.
Start by ensuring your clean slides are free of fingerprints and dust; a gentle wipe with a microfiber cloth can effectively handle dust removal. Proper slide orientation is crucial—align the slide correctly in the scanning device or holder to avoid any need for repositioning later.
Aim for optimal light conditions to reduce glare and enhance clarity when capturing the image. Use your scanning app’s image enhancement tools judiciously to adjust brightness and contrast, and apply cropping to frame your image perfectly, ensuring only the most relevant details are highlighted.
Conclusion
Preserving cherished memories is more straightforward than ever. With just your iPhone, you can download SlideScan and immediately start scanning your old slides, easily transforming them into digital keepsakes.
This app allows you to unlock memories that have been dormant for years, breathing new life into them and ensuring they are part of your legacy for generations to come. SlideScan is designed to be user-friendly, enabling anyone to capture the essence of their past without the need for complicated equipment or procedures.



I really appreciate this post. I’ve been looking all over for this! Thank goodness I found it on Bing. You have made my day! Thanks again!