Are you ready to take your iPhone scanning capabilities to the next level? If so, you’ve come to the right place. Here, we’ll provide a detailed look at how to scan documents on iPhone and send them via email.
For starters, you’ll need an appropriate scanning app for your iPhone. There are many options available both in the App Store as well as from third-party developers. A few of our favorites include Scanner Pro and Tiny Scanner, both of which are available for free.
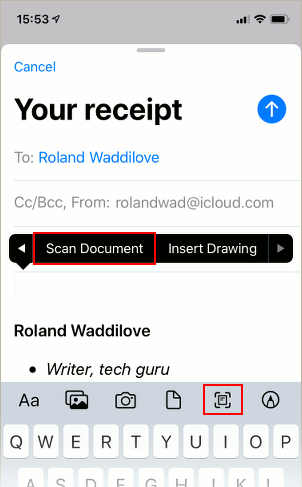
Once you have a scanning app installed, it’s time to begin scanning documents on your iPhone. To do this, simply open the app and select “Scan Document” from the main menu. Then, position your phone so that the document is centered in the viewfinder. The app will automatically capture an image of the document and save it to your device. If necessary, you can retake or keep multiple scans before saving them all at once.
Next up is sending these scans via email. This process is relatively straightforward – simply open your scanning app and locate the scanned document(s). Then, right-click on each one (or tap and hold if using a touchscreen device) and select “Share > Mail” from the menu that appears.
At this point, an email window will appear with your scan attached as an image file (most likely in PDF format). Compose a message and press “Send” when complete – then wait for a response!
And then you have it – now you know how to scan documents on your iPhone and send them via email with ease! With just a few taps or clicks of your finger, you can quickly turn physical documents into digital copies that can be shared with anyone around the world in minutes or even seconds!
Sending Scanned Data to an Email from an iPhone
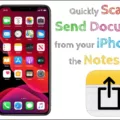
To send scanned data to an email from your iPhone, you will need to use the built-in scanning feature in the Notes app. First, open the Notes app and tap on the plus sign in the upper right corner of your screen. Next, select Scan Documents from the menu that appears. Position your iPhone so that it is directly over the document you want to scan and then click the shutter button at the bottom of your screen. The document should now appear on your screen; tap Retake if you want to re-scan it or Keep Scan if you are happy with it. Once you are satisfied with your scan, tap Save in the top right corner of your screen. Finally, tap on the share icon at the bottom of your screen and select Mail to open a new email with your scanned document attached.
Why Is It Not Possible to Email a Scan from an iPhone?
There could be several reasons why you can’t email a scan from your iPhone.
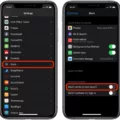
First, make sure that the Apple Mail app is installed and properly configured on your device. To do this, open the Settings app, tap on Passwords & Accounts, and then tap on Add Account to add your email account if it isn’t already listed. Once your account is set up correctly, you should be able to send emails from Scanner.
If you are already using the Mail app and have successfully added your email account to the iPhone, check the Outbox folder in the Mail app to see if any emails are stuck there. If emails are stuck in the Outbox folder, delete them and try sending them again.
If you have done all of these steps and still cannot send a scan via email from Scanner, contact your email provider for further assistance.
Sending a Scanned Document via Email
To send a scanned document to someone’s email, you’ll need to start by scanning the document. Depending on your scanner, this can be done either digitally or by using a physical scanner. Once the document has been scanned, you’ll need to save it to your computer.
Next, open up your email client and compose a new message to the recipient. To attach the scanned document, you can use the drag and drop method: select the document or documents that you’d like to attach, then drag them into the body of the email. You can also use the “Attach” button or icon in your email client for this step.
Once you’ve attached any relevant documents, finish composing your message and hit “Send”. The recipient should now be able to view and download your attachment from their inbox.
Scanning Documents Easily on an iPhone
The easiest way to scan a document on your iPhone is by using the built-in Notes app. First, open the Notes app and either select an existing note or create a new one. Next, tap the Camera button and then tap Scan Documents. Place your document in view of the camera – if your device is in Auto mode, it will automatically scan it. Finally, tap Save or add additional scans to the document. With this easy method, you can quickly and easily scan documents on your iPhone!
The Challenges of Emailing a Scanned Document
It is possible that you are unable to email a scanned document because the file size of the document is too large for your email account. Most email accounts have a maximum file size limit for successfully sending emails, and if your scanned document exceeds this limit, it will not be able to be sent. Additionally, some services may require an additional step to attach files that are larger than their maximum limits. To ensure the successful delivery of your scanned document, consider reducing its file size or using an alternative method for delivering it.

