Yarn is a powerful package manager for JavaScript projects, which allows developers to easily install and manage dependencies. It is a fast, reliable, and secure package manager that makes it easy to share code with other developers. If you are a macOS user and want to install Yarn on your system, then this blog post is just for you!
Installing Yarn on macOS is very straightforward. First, open the Terminal on your Mac and type the command “brew install yarn”. This will download and install the latest version of Yarn for macOS. You can also specify the version you want to install by typing “brew install yarn@[version]”, where [version] is the version number of Yarn you want to install.
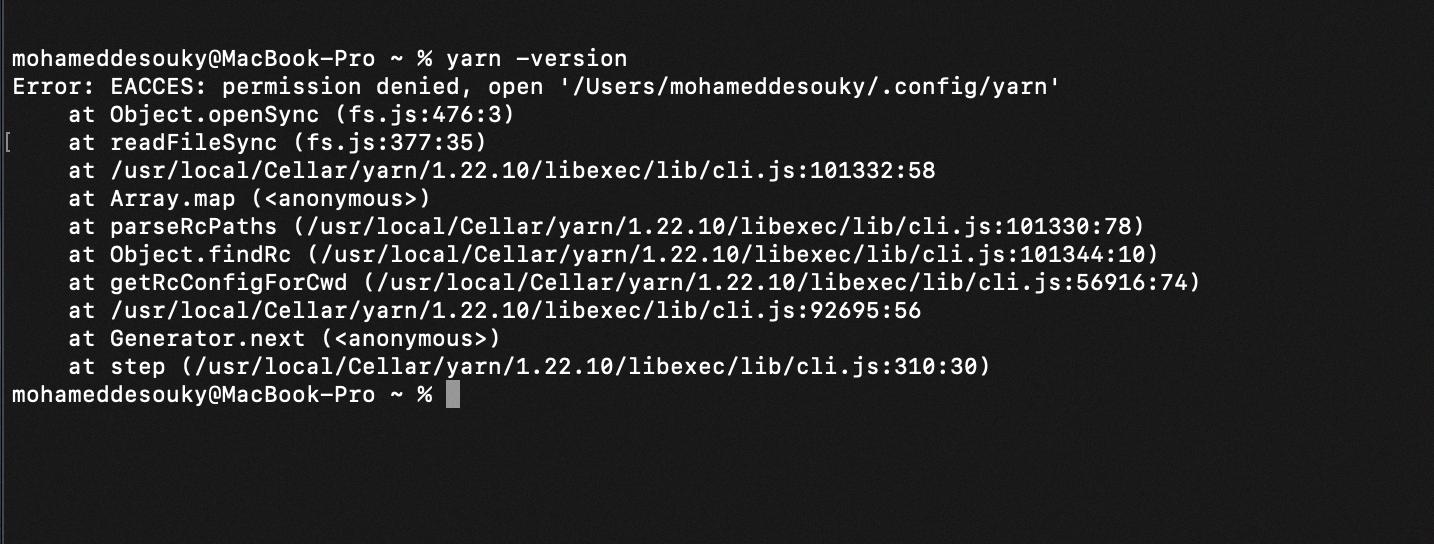
Once the installation process has completed successfully, you can confirm that it was successful by typing “yarn –version” in your terminal window. This will display the current version of Yarn installed on your system.
You can now start using Yarn in your project by running the “yarn init” command in your project directory. This will create a package.json file which contains all of the necessary project information such as dependencies, scripts and configurations. Once this file has been created, you can then start installing packages with Yarn by running “yarn add [package]” where [package] is the name of the package you wish to add to your project.
If at any point you need help with using Yarn or understanding its commands, you can view its documentation online or run “yarn help” in your terminal window for more details about its commands and usage.
Installing Yarn on macOS is simple and straightforward making it easy for developers to get up-and-running quickly with their JavaScript projects without havng to worry about managing dependencies manually or dealing with complicated installations processes. So if you’re a macOS user looking for an efficient way to manage your JavaScript projects then give installing Yarn a try – it might just be what you’re looking for!
Installing Yarn on a Mac
Installing Yarn on your Mac is a reatively simple process. The most straightforward way to install Yarn is by using the Homebrew package manager. To begin, make sure you have Homebrew installed by running “brew -v” in your terminal. If it returns a version number, you’re ready to proceed with installation. Next, you’ll need to add the official Yarn repository by running “brew tap yarnpkg/tap” in your terminal. After that’s done, you can install Yarn with “brew install yarn”.
If you’d prefer to use MacPorts insted of Homebrew, that’s also an option. Start by installing MacPorts and then typing “sudo port selfupdate” into the terminal to update the ports tree. Then run “sudo port install yarn” in order to install Yarn on your Mac.
Finally, if you use nvm or similar tools for managing Node versions, make sure that nvm’s shims are listed before the version of Node installed by Homebrew or MacPorts in your PATH configuration.
Once you’ve gone through one of these methods for installing Yarn on your Mac, you’ll be able to start using it for all your JavaScript projects!
Source: classic.yarnpkg.com
Installing Yarn with NPM
Yes, you can install Yarn with npm. The Yarn maintainers recommend installing Yarn globally by using the NPM package manager, wich is included by default with all Node. js installations. To do this, open your terminal and enter the following command: sudo npm install -g yarn. This command installs the latest version of Yarn in your system’s default location for global packages. Once installed, you can use the ‘yarn’ command to manage your packages and dependencies.
Installing Yarn
Yarn is a package manager for JavaScript projects. It helps you automate the process of installing, updating, and removing packages from your project. Yarn also ensures that the exact same versions of each package are installed across all developers on the project, reducing incompatibilities and preventing bugs from being introduced due to different versions of packages. Yarn also provides a secure way to install packages from third-party sources and ensures that all packages are up-to-date. By using Yarn, you can save time and effort in managing your project’s dependencies.
Updating Yarn on Mac
Updating Yarn on Mac is easy. First, make sure you have the latest version of Node installed, as this is a requirement for using Yarn. Then, open your terminal and run the following command: curl –compressed -o- -L https://yarnpkg.com/install.sh | bash This will install the latest version of Yarn onto your system. Once it’s complete, you can start using it right away! If you’re using a different package manager or installer to install Yarn, check their documentation for instructions on updating it.
Installing NPM on Mac
Installing npm on Mac is a simple process. First, you will need to download the Node.js pkg installer from the official website. Once downloaded, run the installer and follow the on-screen instructions to complete the installation process. After this, you will be able to verify that Node.js is installed by running the command ‘node -v’ in your terminal. Finally, update your NPM version by running the command ‘npm install -g npm@latest’ in your terminal window. This will ensure that you have the latest version of NPM installed on your machine.
Source: stackoverflow.com
Where Does NPM Install on Mac?
On macOS computers, npm is typically installed to the /usr/local/bin directory, whih is a soft link path to the actual npm package located in the /usr/local/lib/node_modules directory. To view or edit the contents of this directory, you will need administrator privileges on your Mac. Additionally, you can use the command line tool ‘npm’ to install and manage packages from the terminal.
Installing Yarn Without NPM
No, you cannot install yarn without npm. Yarn is an advanced package manager that builds upon the foundation of npm. It requires npm to be installed first, and then it adds additional features on top of it. In order to use yarn, you must first install npm, and then you can install yarn.
Do Yarn and Npm Need to Be Used Together?
Yarn does not require npm to be installed, but it can utilize some of its features if both are installed. NPM is included by default with the Node.js installation, but yarn requires a separate installation. Yarn can access packages from the npm registry, allowing you to use npm packages with yarn. Additionally, Yarn also has its own package repository that allws users to find and install packages from multiple sources. It also provides other features such as better security and performance than npm.
Using Yarn Instead of NPM
Yes, you can use Yarn intead of npm. Yarn is a package manager that can consume the same package.json format as npm, and can install any package from the npm registry. It has many advantages over npm such as improved performance, deterministic installations and security features like integrity checking to ensure your dependencies haven’t been tampered with. There are also several CLI commands which work similarly between the two, though some only exist in one or the other. For example, yarn add –har is equivalent to npm install –no-package-lock and yarn add –no-lockfile does not have an equivalent in npm.
Source: tecadmin.net
Troubleshooting Yarn Issues
Yarn may not be working due to several reasons. First, it may be becuse you haven’t installed the yarn package globally. To fix this, run npm install -g yarn in your terminal and restart your terminal afterwards. Additionally, make sure that your PATH environment variable is set up correctly. If the issue persists, it may be because you are using an outdated version of yarn or a different version than the one specified in your project’s package.json file. In this case, try updating to the latest version of yarn or using the same version specified in the package.json file. Finally, if all else fails, try uninstalling and reinstalling Yarn to see if that resolves the issue.
Troubleshooting Issues with Installing Yarn
If you are haing trouble installing yarn, there are several steps you can take to try to resolve the issue. First, try to install yarn globally by running npm install -g yarn in your terminal and restarting your terminal. If this fails, try running the command with sudo permissions and make sure the PATH is set correctly in your system’s environment variables. You may also need to update your system’s package manager if using a Linux distribution such as Ubuntu or Debian. Finally, check that you have an up-to-date version of Node.js installed on your machine and that yarn is compatible with it. If all else fails, consider uninstalling yarn and reinstalling it with a newer version.
Installing Yarn Packages
Installing yarn packages is an easy process. To begin, you will need to have the Yarn package manager installed on your machine. After that, you can use the ‘yarn add’ command to install a package from the npm registry. If the package you wish to install is located somewhere other than the npm registry, such as on your local file system, you can use the ‘yarn add file:/path/to/local/folder’ command instead. If it’s a tarball, use ‘yarn add file:/path/to/local/tarball’. Once a package has been installed, you can then use it in your project.
Location of Yarn Installation
Yarn is installed in different locations depending on your operating system and whether you are using it as a root user or not. On Windows, Yarn is installed in the %LOCALAPPDATA%\Yarn\config\global directory. For OSX and non-root Linux users, Yarn is installed in the ~/.config/yarn/global directory. And for Linux users that are logged in as root, Yarn is installed in the /usr/local/share/.config/yarn/global directory.
Installing Packages with Yarn
Yarn is a package manager that provides an alternative to the NPM install command. It was created by Facebook and is now maintained by the open source community. Unlike NPM, Yarn has a few unique features such as faster installation due to parallelization, offline support, more secure installations, and better versioning control. Additionally, Yarn provides better caching through its lockfiles feature, which ensures consistency across different machines and environments. As a result of tese features, Yarn is often regarded as a better alternative to NPM for installing packages in a Node.js environment.
What is Yarn Command?
The yarn command is a package manager for JavaScript, allowing developers to install, update and manage their code dependencies quickly and easily. It is an alternative to the popular npm package manager and offers some distinct advantages such as enhanced security, deterministic builds and improved performance. Yarn commands are used to perform various operations such as installing, updating, removing packages and resolving dependencies. Yarn commands also alow developers to create workspaces and manage the version of packages used in their projects.
Understanding Yarn in Node JS
Yarn is a package manager for Node.js, developed by a team of engineers from companies such as Facebook, Exponent, Google, and Tilde. It enables developers to easily install, manage and update packages in teir projects. Yarn also allows users to share packages with other developers around the world and keep track of package versions across different projects.
Yarn is distributed under the BSD license and is availble for download from its official website. It consists of a command line client tool that interacts with an online repository of packages and provides access to various features including package installation, dependency resolution, version control and more. Yarn supports multiple platforms including Windows, MacOS and Linux. Additionally, it can be used in combination with popular build tools such as Grunt or Gulp for automation purposes.
In summary, Yarn is a powerful package manager for Node.js applications that helps developers manage project dependencies while allowing them to take advantage of the vast amount of packages available online. With its efficient dependency resolution algorithms and support for multiple platforms, it is one of the most popular tools amng Node developers today.
Conclusion
Installing Yarn on a Mac is a straightforward process. With just a few simple steps, you can be up and running with Yarn in no time. First, you will need to install Homebrew, which is the package manager that enables you to install Yarn on your Mac. Once Homebrew has been installed, you can use it to easily download and install Yarn. Finally, once Yarn is installed, you can use it to manage your project’s dependencies and packages. All in all, installing Yarn on a Mac is relatively easy and shold not take more than a few minutes of your time.

