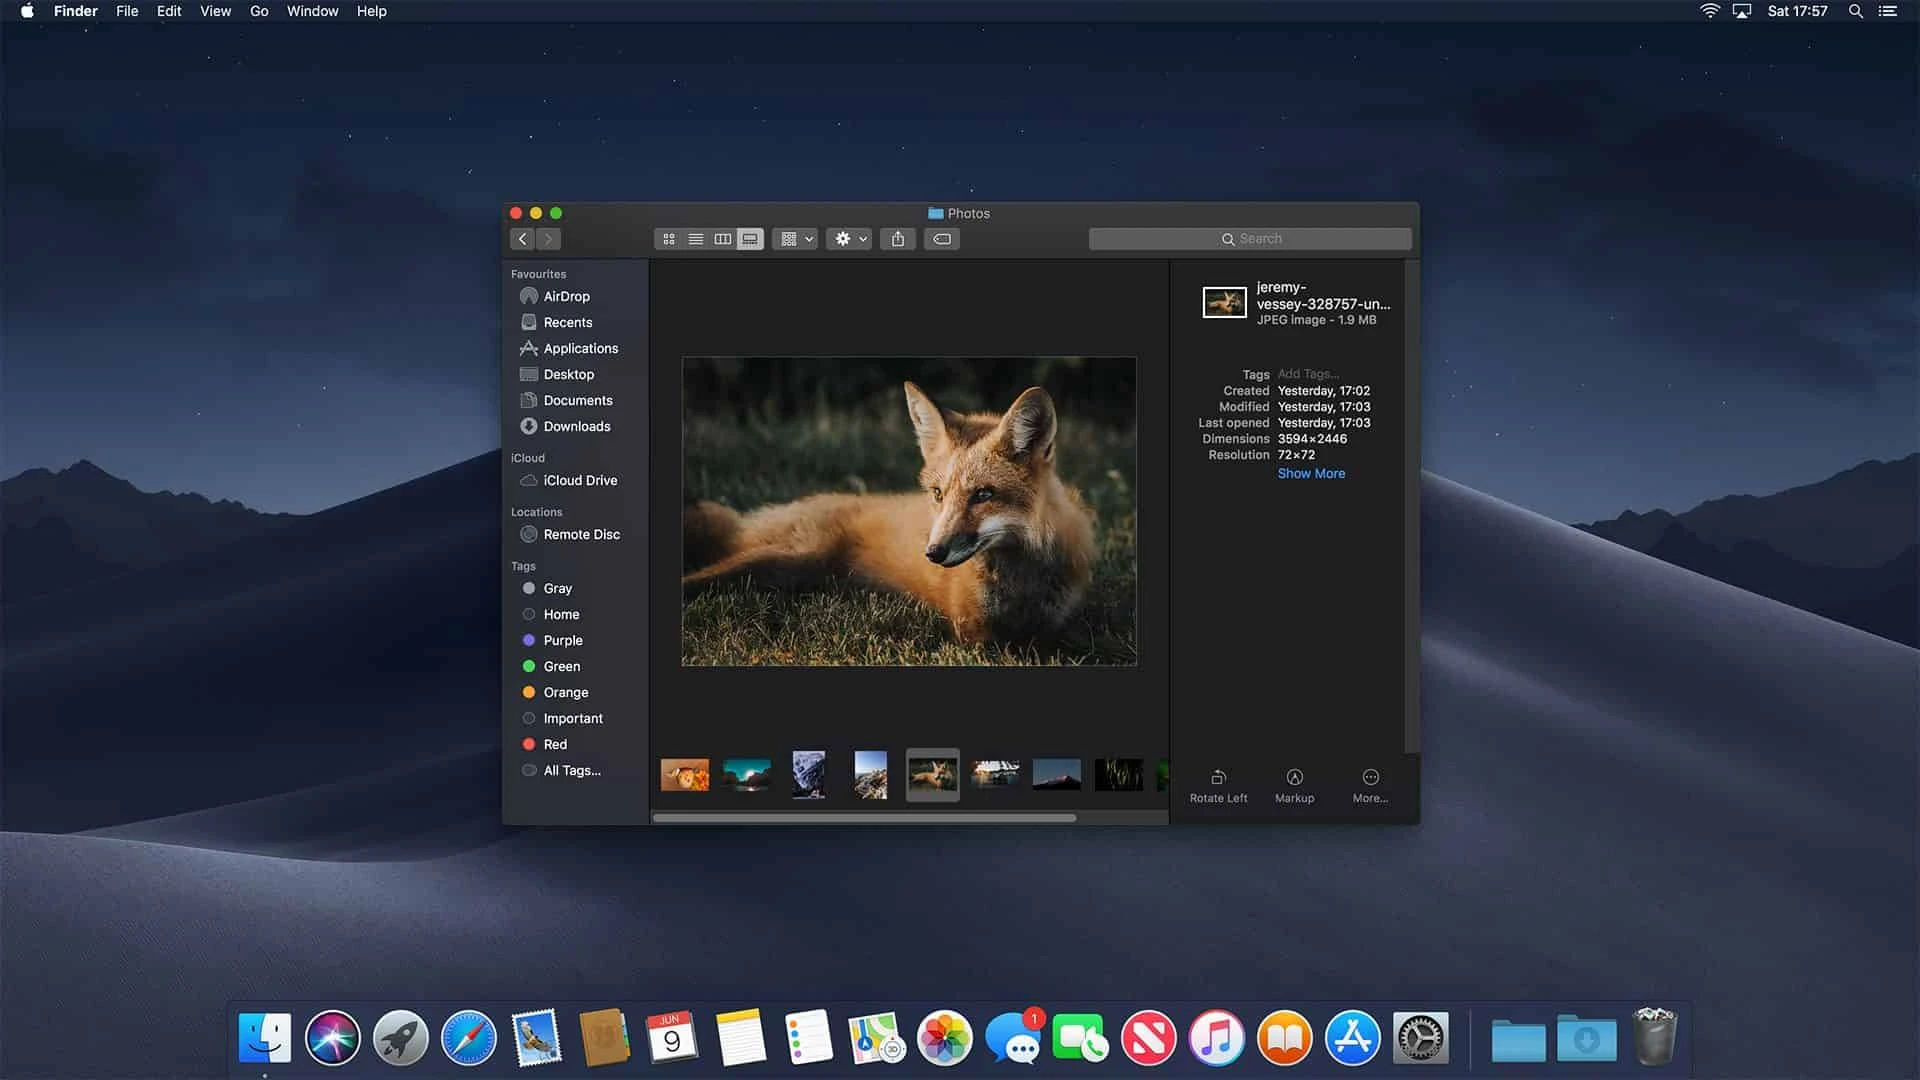
Are you looking for an easy way to view and organize all of your photos, videos, and documents on your Mac? Look no further than Finder Gallery View! Finder Gallery View is a great tool that allows you to quickly and easily scroll through large folders of content.
When you open any folder in Finder on your Mac, you’ll see a list of all the files contained withn it. But with Finder Gallery View, this list is replaced by a grid of thumbnails that show previews of each file. This makes it much easier to locate specific files and view them at a glance. Plus, the thumbnails remain visible even when scrolling up or down in the folder for added convenience.
To activate Finder Gallery View, simply click “View” in the top-right corner of your screen and then select “Gallery” from the drop-down menu. You can also customize the view for each folder by choosing “Show View Options” from the same menu. You can then set options such as thumbnail size, grid spacing, background color, and more.
Another useful feature of Finder Gallery View is that you can quickly move through multiple images stored in a single folder using the arrow keys on your keyboard. This is espeially helpful if you have multiple versions of an image or video clip stored together in one folder.
Finder Gallery View is an incredibly useful tool for anyone who needs to quickly navigate through their files without having to open them individually. So if you want to save time wile organizing your photos, videos, and documents on your Mac – give it a try!
Changing View in Finder
To change the view in Finder, open a Finder window, select the folder whse view you want to customize, then choose View > Show View Options or press Command-J. You can then set various options to customize the view for the selected folder. Depending on which view you select, you’ll have different options available; for example, in the Icon and List views, you can adjust icon size and arrange items by name or date. For Cover Flow and Column views, you can adjust text size and arrange items by name or date. Once you’ve set your desired options, click ‘Done’ to save your changes.
Changing the Default View in Finder on Mac
Changing the default view in Finder on a Mac is simple and easy. To begin, open the Finder window and click on “View” located in the top menu bar. From here, select “Show View Options” from the dropdown list. This will bring up a dialog box with several checkboxes that can be changed to modify your view options in Finder. Make sure both “Always open in list view” and “Browse in list view” have check marks next to them, then click the “Use as Defaults” button at the bottom of the dialog box. Once you do this, all folders you open in Finder will automatically open in list view! List view makes it much easier to navigate and see more detailed information aout files.
Viewing All Photos in a Folder on a Mac
To view all the photos in a folder on your Mac, open a Finder window and navigate to the folder where your photos are stored. Once you have opened the folder, press Command+4 to open Gallery view. This will show you thumbnails of all the images in that folder. You can then use the arrow keys to move though them one-by-one, or you can use the icons at the top of the window to switch between different views (such as List view). If you want to see a larger preview of any image, simply double-click it. Alternatively, you can open Preview and go to Preferences > Images > ? Open all files in one window. This will allow you to see larger previews for each photo in its own tabbed window.
Changing the View of Photos on Mac
On your Mac, you can easily change the view of photos in the Photos app. In the app, select an album or open Days or All Photos view. Then you can use the Zoom slider to zoom in or out on a photo, or pinch open or closed on the trackpad. You can also double-click a thumbnail to see an enlarged view of it. If you want to browse your photos by days, months, or years, you can do that too by selecting the relevant option from the View menu at the top of your screen.
Changing Preview Mode on Mac
To change the Preview mode on Mac, first select the folder or file you want to view. If the Preview pane is not already visible on the right, select View > Show Preview from the menu bar. Next, select View > Show Preview Options from the menu bar to open a window with various checkboxes. Depending on the type of file you have chosen, diffeent options will be available for you to choose from. Selecting a checkbox will enable its corresponding preview option for that file. When you have made your selections, click OK to confirm and apply your changes. The new settings will remain in effect until you decide to change them again in the future.
Changing Preview Settings on Mac
To change the settings in Preview on your Mac, open the app and select ‘Preview’ from the menu bar. Next, select ‘Settings’. You will be presented with a list of adjustable settings within the application. Select the setting you would like to adjust and then click it to make your desired changes. You can adjust settings reated to text, image, and PDF documents. When you are finished making adjustments, close the settings window to save your changes.
Customizing Finder on Mac
To customize your Finder on Mac, you can rearrange the items in the toolbar, add files or apps, and remove items. To rearrange the items in the toolbar, press and hold the Command key, then drag an item to a new location. To add a file or an app to the toolbar, press and hold the Command key and drag the item onto the toolbar until you see a green plus sign. To remove an item from the toolbar, press and hold the Command key and drag it out of the toolbar. You can also customize other aspects of your Finder by accessing its preferences menu. To do this, open Finder and select Finder > Preferences from the menu bar. This will open a window whre you can adjust settings such as default folder locations and icon size.
Making Mac Finder Look Like Windows
Making Mac Finder look like Windows is easier than you might think! To start, you can use the app uBar to get the Windows taskbar on your Mac. This will help you quickly access all of your apps and settings. Next, you can customize your dock with ActiveDock, wich will make it look more like the Windows Start menu. XtraFinder is a great way to add more features to Finder, such as dual-panes and tabs. BetterSnapTool makes it easy to resize windows on your Mac, just like you can on Windows. Finally, Witch lets you change shortcut keys so that they’re more similar to Windows’. With these tools, it’s simple to make Mac Finder look and feel just like Windows Explorer!
Changing the Default View for All Folders
To change the default view for all folders, you can use the Customize tab in the folder’s Properties window. Right-click on the folder, and select Properties. Then, click the Customize tab. Use the Optimize this folder for drop-down menu to select what view template you’d like to use for that particular folder. If you’d like to apply this same template to all subfolders within it, check the Also apply this template to all subfolders option befoe clicking Apply. Finally, click OK to save your changes. With this method, you can easily customize your folder views quickly and efficiently!
Viewing Photos on a Mac: An Easy Guide
The easiest way to view photos on a Mac is to use the Photos app. In the Photos app, you can browse your photos usig the sidebar on the left side of the window. Click an item in the sidebar to view photos organized by when they were taken, by days, months, or years. You can also sort your photos by albums, projects, memories, and more. With these options, it’s easy to find and view exactly what you’re looking for.
Viewing All Pictures in a Folder
To view all the pictures in a folder, start by opening File Explorer by clicking its taskbar icon or pressing Win + E. Once File Explorer is open, click This PC on the left-hand side pane and then type kind:picture in the search bar at the top and press Enter. This should display all of the pictures in your folder, though it may take a few moments for them to load. You can also use this method to find pictures from other folders on your computer.
Conclusion
Finder Gallery View is an excellent way to quickly view and manage your photos, videos, and other files. It allows you to easily sort throgh large amounts of files by displaying thumbnail previews of the images in a folder. You can use keyboard shortcuts to navigate the previews, adjust the size of the thumbnails, and customize the view for each folder. With Finder Gallery View, you can quickly find and organize all your files in one convenient place.


