GarageBand is an amazing digital audio workstation that is used by musicians and producers all around the world. It is a powerful tool for creating music and soundscapes, as well as for recording and editing audio. One of the many features of GarageBand is fade in, which allows users to gradually increase the volume of an audio track over time.
Fade in on GarageBand is a great way to achieve gradual transitions beteen different sections of a song or mix. This effect can help to create a more natural sounding mix and help to create a smooth transition between different parts of your song.
To use fade in on GarageBand, open up your project and select the track you would like to apply the effect to. Then select “Edit” > “Fade In” from the menu bar at the top of the screen. You will then see a line graph appear that shows the volume level over time. You can then adjust this line graph by dragging it up or down, depending on how much you want to fade in your track.
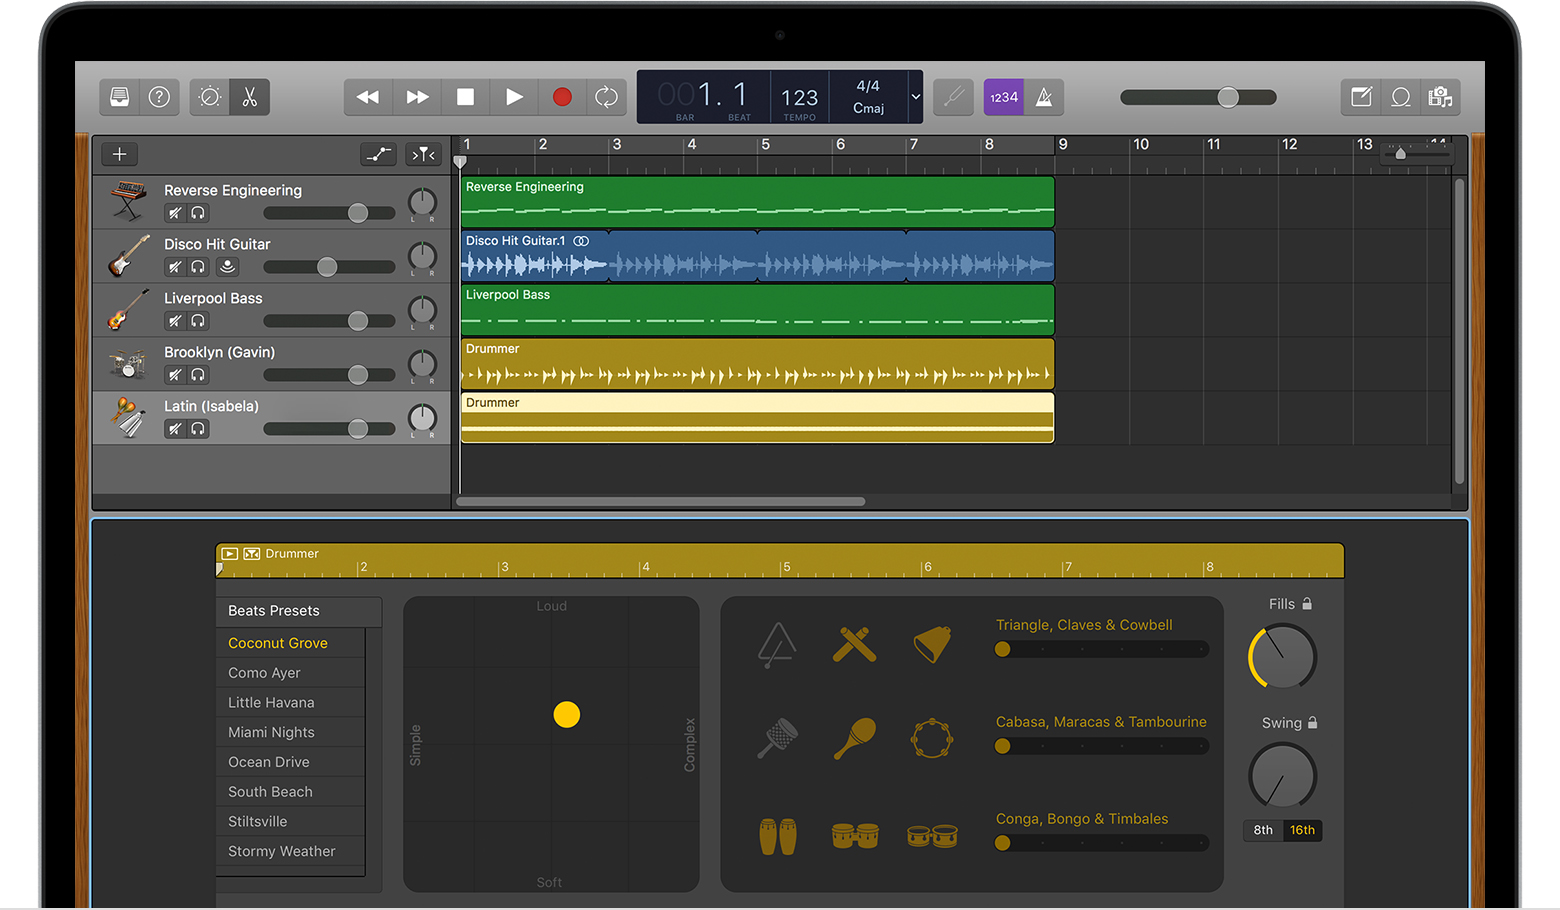
Once you have set up your fade-in effect, press “Play/Stop” on your project to hear how it sounds with your song. If you are happy with how it sounds, save your project and you are done!
Fade in on GarageBand is an incredibly ueful tool for creating smooth transitions between different sections of songs or mixes. It can help give your music that professional sound without having to manually adjust levels throughout your project. It’s also easy to use and only takes a few seconds to set up!
Fading an Individual Track in GarageBand
In GarageBand, you can fade an individual track by using the Track Automation feature. To do this, go to the Track Automation menu in the top right corner of your project window and select a desired track. Once you’ve selected the track, you’ll see a row of control points along the timeline; these are used to adjust the volume levels of the track over time. To create a fade-in effect, simply click and drag the first control point up and then drag the thrd control point up even higher. You can also manipulate individual track volumes by creating and dragging more control points anywhere in the song. To create a fade-out effect, just drag all of your control points down.
Source: idownloadblog.com
Locating the Automation Button in GarageBand
The Automation button is located in the track header of each track in GarageBand on Mac. To access it, open the Mix menu and select Show Automation (or press A). The Automation button will appear at the top of each track and can be used to view any existing automation settings for that track.
Fading Out Music in GarageBand on Macbook
On a Macbook, fading out music on GarageBand is quite simple. First, open the track that you want to fade out and select the ‘Edit’ button at the top of the screen. Then, select the ‘Fade Out’ option from the dropdown menu. This will create a volume line at the end of your track which you can adjust by dragging it left or rigt to change the length of your fade-out effect. You can also click and drag any points along the line to fine-tune how fast or slow you’d like your fade-out to be. When you’re done adjusting the line, simply click ‘Done’ and your fade-out will be applied to your track.
Fading Out Music on GarageBand for iPad
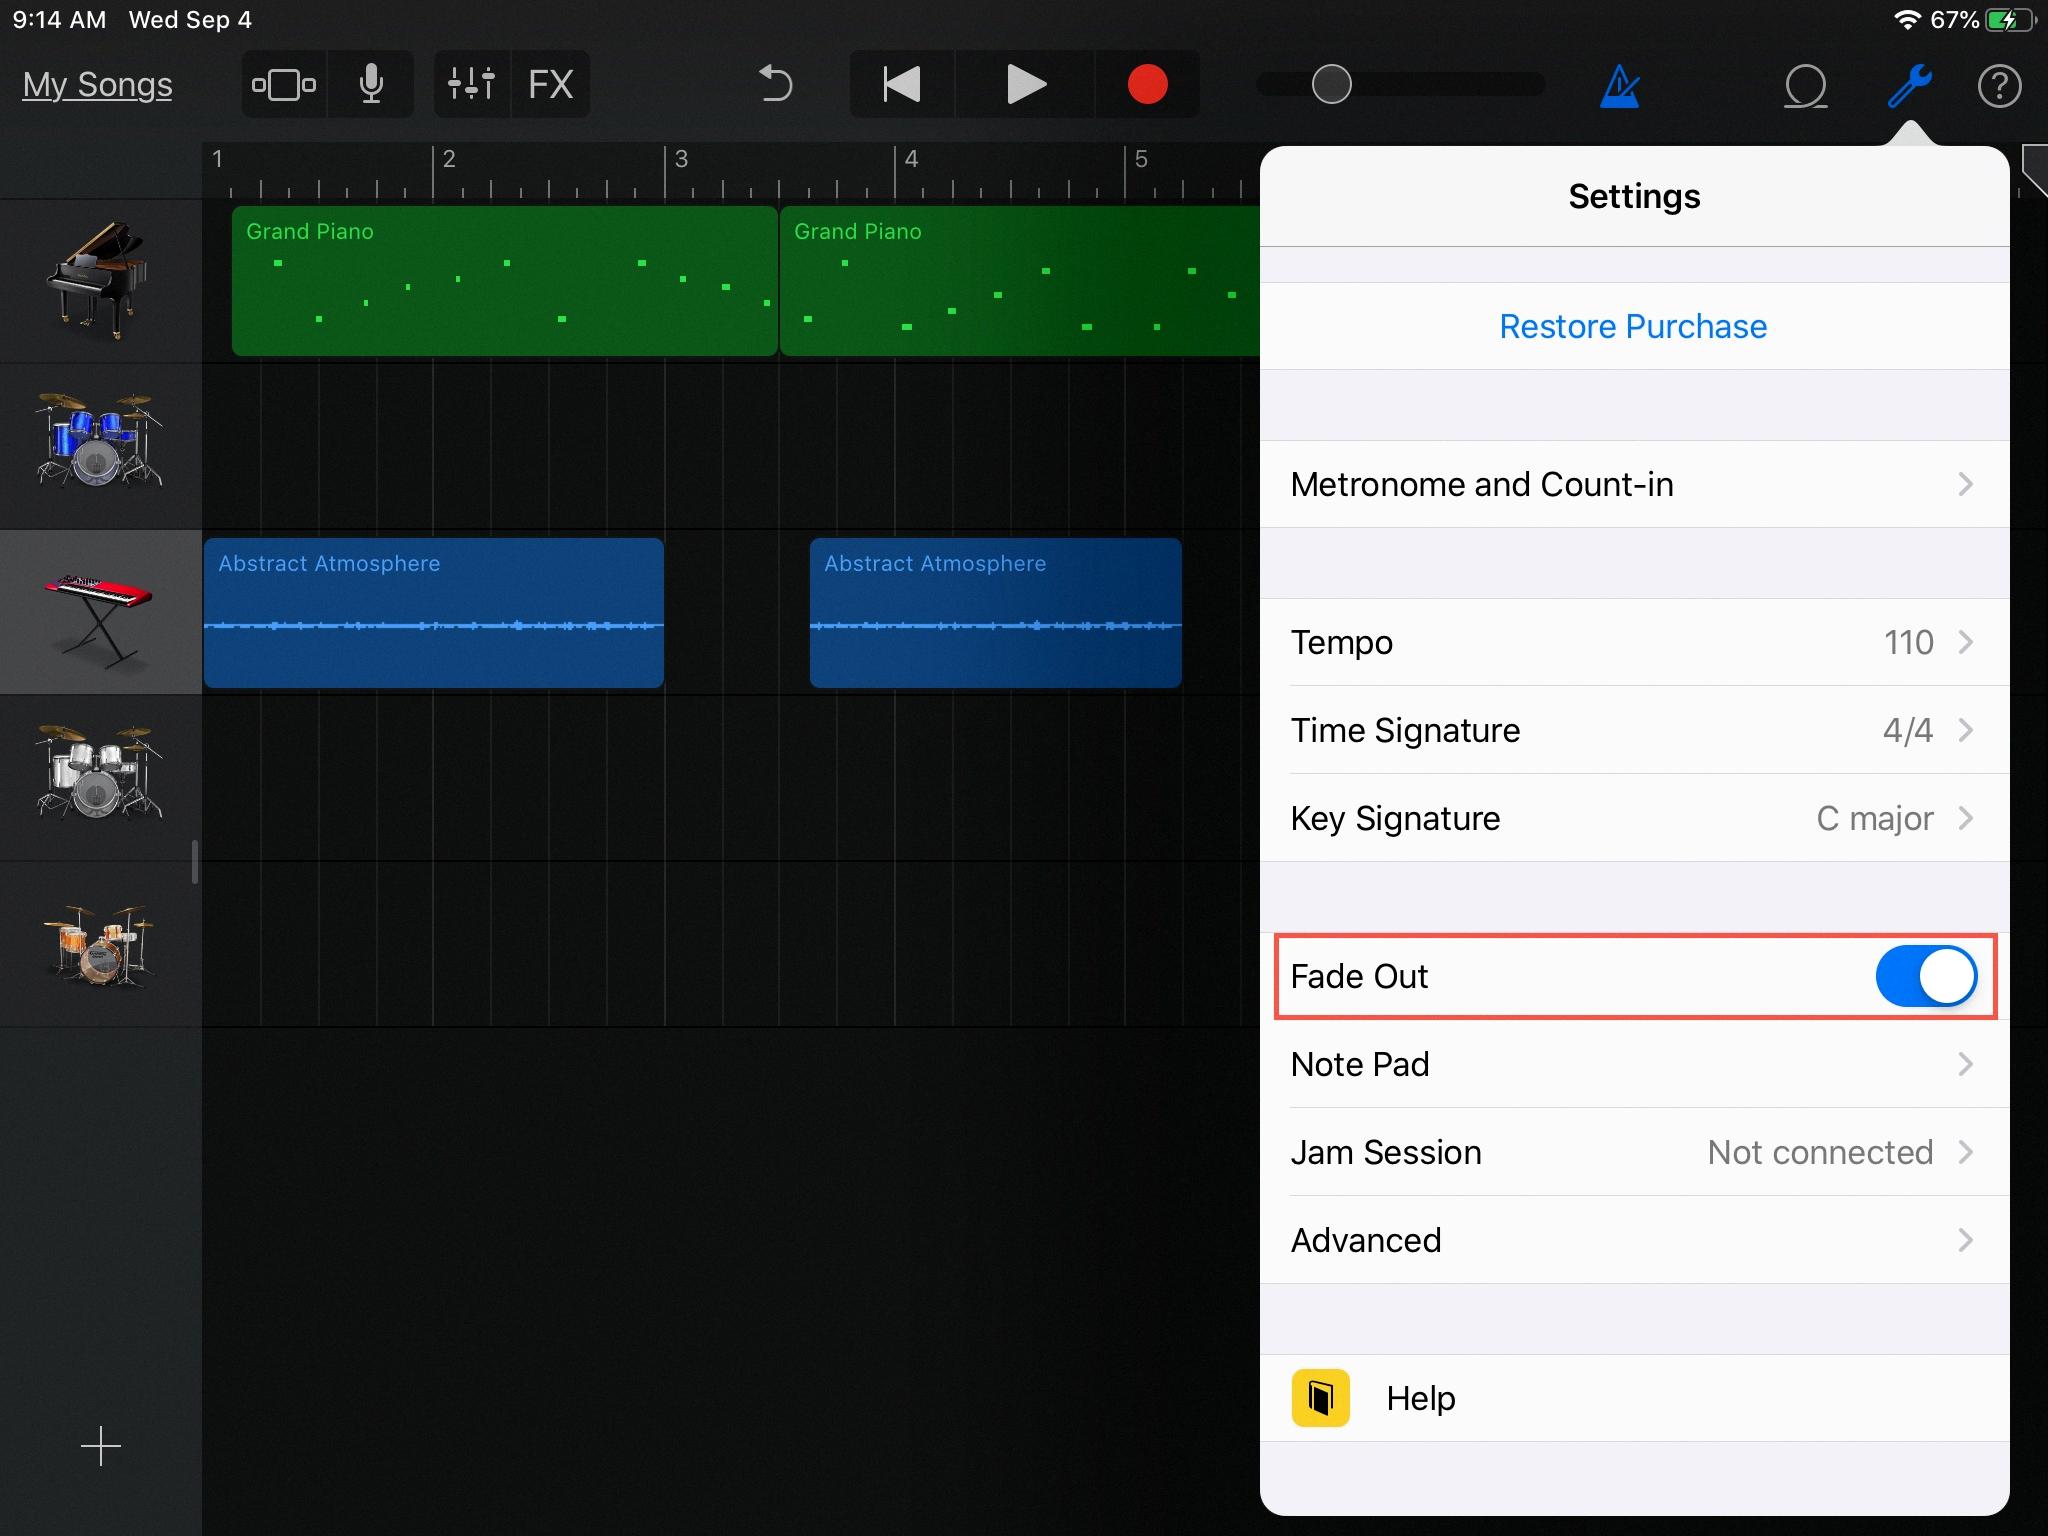
To fade out music on GarageBand iPad, you’ll need to open the Song Settings. To do this, tap the wrench icon at the top right corner of your screen. Once the Song Settings page is open, move the slider labeled “Fade Out” to turn it on. This will cause your track to slowly decrease in volume until it reaches zero. You can adjust how long this takes by moving the Fade Out slider left and right. Additionally, you can use the Auto-Fade button to automatically fade out your track at a pre-set duration whenever you hit Stop or End.
Changing Levels in GarageBand
To change the level in GarageBand, you will need to open the track header for the track you wish to adjust. Once there, you can drag the Volume slider left or right to lower or raise the volume level of that track. You may need to resize the track header slightly in order to view the Volume slider. If you wuld like to return it back to a neutral level (0 dB gain), option-click on the slider.
The Effectiveness of GarageBand for Mixing Music
Yes, GarageBand is great for mixing. It has a number of tools that make it easy to mix your audio and achieve professional-quality results. You can use the on-board equalizer, compressor, reverb, and oher effects to shape and enhance your sound. You can also adjust the levels of individual tracks in the Mixer window for precise control over volume balance. Additionally, GarageBand offers powerful automation features that allow you to create complex fades and effects with ease.
Mashing Up Songs in GarageBand
Yes, you can mash up songs in GarageBand by combining two or more audio tracks. To do this, you’ll need to create a song project and import the tracks you want to use. Once the tracks are imported, you can then move and edit them using the Tracks area or the Live Loops grid. You can also mix the tracks together using various effects such as EQ, reverb, and compression, and use the Remix FX tool to add scratching and othr DJ-style effects. Finally, you can record your mashup and share it with your friends!
Does GarageBand Have a Mixing Desk?
No, GarageBand does not have a mixing desk. However, you can still automate your tracks and adjust parameters like volume by selecting the track and adding adjustment points to the line. You can then drag tose points up or down to change the parameters of the item selected in the track’s pop-up menu.
Can You DJ Using GarageBand?
Yes, you can DJ on GarageBand! The Tracks area and the Live Loops grid both allow you to remix a GarageBand song in real time. With the Remix FX, you can scratch mix the song like a DJ usig a turntable, play it in reverse, stop or downsample the song, and use a variety of remix effects. You can also adjust the tempo or pitch of your track to create unique sounds and mixes. With GarageBand’s powerful tools, you can create exciting and dynamic DJ sets just like a professional.
Changing Gradual Pitch in GarageBand
Answer: In GarageBand, you can change the pitch of an audio track gradually by using a Pitch Shifter plug-in. To do this, add the plug-in to the track and then use the automation curves to adjust the pitch shift along the track. This will give you a smooth transition from one pitch to another. You can also use the Transpose option in GarageBand’s main window to quickly change the overall pitch of a track.
How Does Panning Work in GarageBand?
Panning in GarageBand alows you to adjust the stereo balance of a track. You can use the Pan knob to move a track’s sound from the left, right, or center of the stereo field. This is useful for creating a more dynamic mix by spreading out instruments and vocals across the stereo spectrum. It also helps to create depth and space in your project by allowing you to highlight certain elements of your mix.
Does GarageBand Include Sound Effects?
Yes, GarageBand does have sound effects. It comes with a variety of jingles and sound effects to add a professional touch to your podcast. You can find these sound effects in the Sound Effects tab under the Library section of the app. There are many different types of sound effects available, such as chimes, bells, horns, drums and percussion instruments, mechanical sounds, vocal samples, and more. You can also customize these sounds to fit your podcast’s style and tone.
Automating Effects in GarageBand
Yes, you can automate effects in GarageBand. The process of automating effects is quite simple and straightforward. To begin, select the track you would like to automate and head to the Automation tab located next to the Track Info tab. Here, you will find controls for varios parameters such as volume, panning, echo, and more. Once you have selected a parameter to automate, it will be highlighted in blue and a new automation line will appear at the bottom of the editor window. By clicking on this line and dragging it up or down, you can adjust your selected parameter at different points throughout your song. You can also use the Pencil tool to draw specific shapes or curves for more precise automation adjustments.
Automating Effects in GarageBand iOS
Yes, you can automate effects in GarageBand for iOS. To do this, open up the track editor and select the effect you want to automate. Then select Automation from the top of the screen and choose which parameter you want to automate (e.g. wet/dry mix, attack time, release time, etc.). You can then set points along a timeline to control how the effect chnges over time. For example, you could have a track start dry then gradually increase in intensity as it progresses or have an effect start off subtle and become more pronounced as it progresses.
Using Automation in GarageBand for iPhone
To use automation in GarageBand for iPhone, start by tapping the Automation button in the Control Bar to open the Automation tab. Next, select the parameter you want to automate from the list at the top of the tab. Once you’ve chosen your parameter, you can begin setting automation points by touching and holding any empty part of the track on whih you’d like to set a point. When a blue line appears and a circle appears on that line, drag it up or down to set the value of that automation point. You can also touch and hold an existing automation point to move it around. To add multiple points at once, touch and hold one point, then tap others to add them to your selection. Finally, when you’re done setting points, hit the Done button in the Control Bar.
Using Jam Sessions in GarageBand
To use a Jam Session in GarageBand, start by opening the app and tapping on “Create”. Select “Jam Session” from the list of options. You will then be able to choose whch song you want to jam along to from the Jamfactory catalogue. Once you select your song, press “Play” at the bottom of the screen to begin your Jam Session.
Your Jam Session will last for one hour, regardless of how often you change the song. During this time, you can access the entire selection of songs in the Jamfactory catalogue and use them as accompaniment while you practice or record your own performance. Depending on what type of subscription you have, you may have a certain number of available Jam Sessions every month. When your session ends, just tap “Stop” at the bottom of the screen and save any recordings you made during your session.
Using Smart Controls in GarageBand
Using Smart Controls in GarageBand is easy and intuitive. To access the Smart Controls panel, simply click on View/Show Smart Controls, use the keyboard shortcut B, or click on the Smart Controls at the top right of the GarageBand interface. The panel offers a variety of options to help you customize and control your recordings.
On the left side of the panel you will find Recording Settings which provide options to adjust microphone input levels, set noise gates and compression, and turn on Automatic Level Control (ALC). ALC will adjust audio levels if they are too loud or quiet, so you don’t have to worry about manually adjusting levels whle recording.
On the rigt side of the Smart Controls panel, you can find EQ settings which allow you to adjust treble and bass frequencies as well as add reverb and other effects. You can also adjust panning for individual tracks and choose from a variety of sound libraries including drums and percussion sounds.
Using Smart Controls in GarageBand is easy and provides versatile controls for customizing your recordings to your liking.
Editing Audio in GarageBand
Yes, you can edit audio in GarageBand. The software offers a range of audio editing tools, allowing you to make precise adjustments to your audio files. You can apply effects and filters, create fade-ins and outs, adjust the volume of a track, cut out sections of audio, and more. Additionally, you can use the loop browser to quickly add additional instruments or sound effects to your track. GarageBand also includes a variety of built-in virtual instruments which you can use to record and create music with. As long as you have the rigt peripherals connected to your Mac, such as a microphone or MIDI controller, you can easily record and edit audio in GarageBand.
Editing Music with GarageBand
Yes, you can cut music in GarageBand. To do this you will need to select the audio you want to delete or move by using the crosshairs to click and drag. Once the selection is made, you can hit the spacebar to play the portion of audio that you’ve selected, so you can be sure it’s exactly what you want. You can then delete or move the audio with simple commands such as “Cut” or “Copy”. GarageBand also povides other options such as trimming and splitting your audio selections.
Automating in GarageBand for iPad
To automate in GarageBand for iPad, you can use the Automation tool to create a dynamic mix. To begin, select the Track Inspector by tapping the icon of the three overlapping circles at the top of the screen. Then, tap on ‘Edit Automation’. You’ll now see a line representing your track’s volume or other parameters over time. To add automation points, simply tap anywhere along that line and drag it up or down. You can also touch and hold an automation point and drag to move it around. To select multiple automation points, you can touch and hold an automation point and then tap on others to add them to your selection; alternatively, you can touch and hold an empty part of the track, then drag around multiple automation points to select them. When you’re done editing your automation points, press ‘Done’ in the top rigt corner of the screen to save your changes.
The Benefits of Using GarageBand for Podcasting
Yes, GarageBand is a great choice for podcasters. It allows you to record, edit and mix audio quickly and easily. You can also add effects to your podcast recordings, such as reverb and compression. Plus, it has plenty of pre-programmed loops and sounds that you can use to enhance your audio. With GarageBand, you also have the flexibility to adjust the speed, pitch and volume of recordings without any degradation in quality. So it’s easy to create professional-sounding podcasts with GarageBand.
The Impact of Exporting a Song from GarageBand
Exporting a song from GarageBand can be tricky since there are a few settings that need to be taken into account. Depending on the type of export, different settings may need to be adjusted.
First, when exporting a song from GarageBand, ensure that the sample rate and bit depth are set correctly. A higher bit depth and sample rate will result in better sound quality but will require more storage space for the exported file. For professional quality audio recordings, it is recommended to use a minimum of 24-bit/44.1KHz or higher sample rate/bit depth settings.
Second, when exporting from GarageBand, make sure to select the appropriate export format for your desired output. Common formats include Wave (.wav), MP3 (.mp3), and AAC (.aac). Each format offers different levels of compatibility and sound quality – while MP3 files are compatible with most playback devices, it has lower sound quality compared to oher formats such as Wave or AAC files. In general, if you want the best-sounding file possible then Wave is usually the best choice.
Finally, when exporting your song from GarageBand make sure to apply the correct mastering settings. The mastering setting allows you to adjust levels such as volume and EQ so that your mix sounds balanced and polished before being exported out of GarageBand.
By following these steps you shoud be able to get an accurate representation of your mix once it has been exported out of GarageBand without any unwanted changes in sound quality or clarity.
Conclusion
Fade In on GarageBand is a great tool for creating professional-sounding tracks quickly and easily. With its intuitive interface, users can create ther own music without needing to understand complex music production concepts. It features a library of loops, instruments, and effects that can be used to craft unique sounds, as well as the ability to record audio or MIDI input. The app also offers editing tools like time stretching and pitch shifting which allow you to customize your work even further. For those looking for an easy way to create great sounding music, Fade In on GarageBand is an ideal choice.


