Converting a MOV file to MP4 format is a common task for many video editors and enthusiasts. Whether you want to compress the file size or make it compatible with a wider range of devices, converting to MP4 is often the go-to solution. In this article, we will explore how you can convert your iMovie project to MP4 using the iMovie app on your Mac.
To begin, open iMovie on your Mac and click on the File menu located in the top left corner of the screen. From the dropdown menu, select “Import Media” and choose the MOV video file you want to convert to MP4. This will import the MOV file into your iMovie project.
Once the MOV file is imported, you can start editing your video if desired. Once you are done editing, it’s time to export the video as an MP4 file. To do this, click on the “Share” option in the top menu and select “File” from the dropdown menu.
A new window will appear, allowing you to adjust the export settings. At the top of the project settings, you will see the resolution your project is set to, based on the first clip added to the timeline. If you wish to change the resolution, you can do so by selecting the desired option from the available choices.
Next, you need to select the destination folder where you want to save the converted MP4 file. Choose a location on your computer that is easily accessible.
Now, it’s time to fine-tune the export settings. Click on the “Settings” button located in the upper-right corner of the timeline. This will open a new window where you can adjust various export settings, including the video codec, audio codec, quality, and more.
To ensure a smaller file size, you can choose a lower quality setting or adjust the video compression settings. Keep in mind that reducing the quality too much may result in a loss of video detail or clarity. Strike a balance between file size and video quality that suits your needs.
Once you have adjusted the export settings to your liking, click on the “Next” button to proceed. You will be prompted to enter a file name for the converted MP4 file. Give it a meaningful name and click on the “Save” button.
IMovie will now begin exporting your project as an MP4 file. The time it takes to export will depend on the length and complexity of your video.
Once the export is complete, you will have a converted MP4 file that is compressed and resized from the original MOV video. This new file can be easily shared, uploaded, or played on a wide range of devices and platforms.
Converting a MOV file to MP4 using iMovie is a straightforward process that allows you to customize the export settings to suit your needs. Whether you want to reduce file size or improve compatibility, iMovie provides a simple and effective solution for converting your videos.
How Do You Convert MOV to MP4 in iMovie on iPhone?
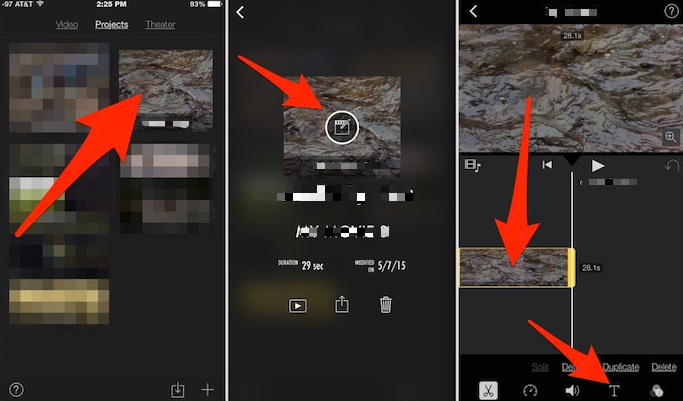
To convert a MOV file to MP4 in iMovie on your iPhone, follow these step-by-step instructions:
1. Open the iMovie app on your iPhone. If you don’t have it installed, you can download it from the App Store.
2. Tap on the “+” sign at the bottom of the screen to create a new project.
3. Select the “Movie” option.
4. Tap on the “Media” button at the bottom of the screen to import your MOV file. You can choose to import from your iPhone’s Camera Roll, iCloud Drive, or other compatible sources.
5. Once your MOV file is imported, tap on it to select it.
6. Tap on the “Create Movie” button at the bottom of the screen to create a new project with your MOV file.
7. Now, tap on the “Share” button, which is represented by an arrow pointing upwards, located at the bottom of the screen.
8. In the sharing options, select the “Save Video” option.
9. You will be prompted to choose the resolution for your exported MP4 file. Select the desired resolution option. Keep in mind that higher resolutions will result in larger file sizes.
10. Tap on the “Save Video” button to start the conversion process.
11. iMovie will convert your MOV file to MP4 using the selected resolution. The converted MP4 file will be saved to your iPhone’s Camera Roll.
That’s it! You have successfully converted your MOV file to MP4 using iMovie on your iPhone. You can now access and use the MP4 file as needed.

How Do You Change the Format on iMovie?
To change the format on iMovie, follow these steps:
1. Open the iMovie app on your Mac.
2. In the upper-right corner of the timeline, you will find a Settings icon. Click on it.
3. This will bring up the project settings.
4. At the top of the project settings window, you will see the resolution of your current project. This resolution is determined based on the first clip you added to the timeline.
5. To change the format or resolution of your project, you will need to add a new clip to the timeline with the desired format.
6. After adding the new clip, the project settings will automatically adjust to match the format of the newly added clip.
7. If you want to further customize the format settings, you can click on the “Video Format” dropdown menu in the project settings window.
8. In the video format menu, you can choose from various options such as resolution, aspect ratio, frame rate, and more.
9. Select the desired format settings for your project.
10. Once you have made the necessary changes, click on the “Done” button to save the new format settings.
11. Your iMovie project will now be in the updated format you have chosen.
Remember that changing the format or resolution of your project may affect the quality and appearance of your clips, so it’s important to choose the appropriate format based on your specific needs and preferences.
How Do You Compress an iMovie on a Mac?
To compress an iMovie on a Mac, you can follow these steps:
1. Open iMovie on your Mac.
2. Select the project you want to compress from the project library.
3. Click on the “Share” button located in the toolbar at the top of the iMovie window.
4. From the drop-down menu, choose the “File” option.
5. In the export settings, select a lower resolution and a lower quality setting to compress the video file. This will reduce the file size while compromising some of the video quality.
6. You can also choose a different format for the exported file if desired. iMovie offers various formats such as MP4, MOV, and AVI.
7. Once you have selected the desired export settings, click on the “Next” button.
8. Choose a destination folder where you want to save the compressed iMovie file.
9. Give a name to the compressed file and click on the “Save” button.
10. iMovie will start exporting and compressing the project based on the chosen settings. The time it takes to compress will depend on the length and complexity of your project.
11. Once the compression process is complete, you will have a compressed iMovie file ready to use with a reduced file size.
By following these steps, you can effectively compress an iMovie on your Mac, allowing for easier sharing and storage of your video projects.
Conclusion
Converting a MOV file to MP4 using iMovie is a simple and convenient process. By following a few easy steps, you can successfully convert your MOV video to the widely supported MP4 format.
To begin, open iMovie on your Mac and import the MOV video file you wish to convert. This can be done by clicking on the File menu and selecting Import Media. Once the video is imported, you can start editing it if desired.
When you are finished editing your video, click on the Share option in the top menu and select the File option. This will open the export settings window. Here, you have the option to adjust the resolution of the video. If you want to reduce the file size, you can choose a lower resolution.
To change the resolution, click on the Settings button in the upper-right corner of the timeline. The project settings will appear, showing the current resolution of your project. This resolution is based on the first clip added to the timeline. Adjust the resolution as desired to achieve the desired file size.
Once you have selected your desired resolution, click on the Export button and choose the File option. Enter the export settings as low as possible to compress and resize the video file. This will result in a smaller, more manageable MP4 file.
Converting a MOV file to MP4 using iMovie is a quick and efficient way to make your videos more compatible and easier to share. By following the steps outlined above, you can easily convert your videos and achieve the desired resolution and file size.


