Connecting a Wii remote to a Windows PC can be a bit more complicated than you might expect, but with the right steps, it can be done. Here’s a step-by-step guide to help you connect your Wii remote to your PC.
1. Check for Bluetooth Compatibility: First and foremost, make sure your PC has a Bluetooth dongle. If not, you’ll need to purchase one separately. You can usually find Bluetooth dongles at electronics stores or online.
2. Open Bluetooth & Other Devices: On your Windows PC, open the Settings page and navigate to “Bluetooth & other devices.” This is where you’ll be able to pair your Wii remote with your PC.
3. Activate Bluetooth Pairing Mode on the Wii Remote: Grab your Wii remote and hold down the 1 and 2 buttons simultaneously. This will activate the Bluetooth pairing mode on the Wii remote.
4. Add the Wii Remote as a Device: In the Bluetooth & other devices settings, click on the “Add Bluetooth or other device” button. This will initiate the device pairing process.
5. Sync the Wii Remote: Before proceeding, make sure your Wii remote is switched on. Then, press the sync button on the Wii remote. This will make the remote discoverable to your PC.
6. Connect the Wii Remote to Your PC: In the “Add a device” window, select the option for “Bluetooth.” Your PC will start searching for available devices. If you’ve followed the previous steps correctly, your Wii remote should appear in the list of available devices. Click on it to connect.
7. Complete the Syncing Process: While the lights on the Wii remote are still blinking, quickly press and release the red sync button on the Wii console. This will finalize the syncing process.
8. Verify Successful Connection: Once the syncing is complete, the player LED on the front of the Wii remote should stop blinking and stay lit. This indicates that the Wii remote is successfully connected to your PC.
Now that you have successfully connected your Wii remote to your Windows PC, you can start using it for various purposes, including gaming or controlling multimedia applications.
To use the Wii remote with Steam, simply press any button on the remote or press the 1 and 2 buttons together. Steam will automatically pair the controller and assign it an LED.
Keep in mind that these instructions are for connecting a Wii remote to a Windows PC. The process may vary slightly for different operating systems. Make sure to consult the specific instructions for your particular setup if you are using a different OS.
With these steps, you should be able to connect your Wii remote to your Windows PC and enjoy all the features it has to offer. Happy gaming!
Can You Connect a WiiMote to a PC?
It is possible to connect a Wii remote, also known as a WiiMote, to a Windows PC. However, the process is a bit more complex compared to connecting it to a Wii console. To establish the connection, you will need a Bluetooth dongle, as most PCs do not have built-in Bluetooth capabilities.
Here are the steps to connect a Wii remote to a Windows PC:
1. Open the Windows settings page by clicking on the Start button and selecting the gear icon for “Settings.”
2. In the settings menu, click on “Devices” to access the Bluetooth & other devices settings.
3. Make sure your Bluetooth dongle is plugged into your PC. If it is not, insert it into an available USB port.
4. On the Bluetooth & other devices settings page, ensure that Bluetooth is turned on. If it is not, toggle the switch to enable it.
5. Now, grab your Wii remote and hold down the 1 and 2 buttons simultaneously. This will activate the Wii remote’s Bluetooth pairing mode.
6. On your PC, click on the “Add Bluetooth or other device” button under the “Bluetooth & other devices” settings.
7. In the “Add a device” window that appears, select the “Bluetooth” option.
8. Windows will now search for available Bluetooth devices. It should detect the Wii remote, which will be listed as “Nintendo RVL-CNT-01” or something similar. Click on it to initiate the pairing process.
9. Windows may prompt you to enter a pairing code. If this happens, enter “0000” (four zeros) as the code.
10. Once the pairing is successful, you should see a notification on your PC stating that the Wii remote is connected.
Congratulations! You have successfully connected your Wii remote to your Windows PC. You can now use it to play games or control applications that support Wii remote input.
Note: Keep in mind that not all PC games or applications may be compatible with the Wii remote. Additionally, certain features of the Wii remote, such as motion controls, may not work as expected on a PC.
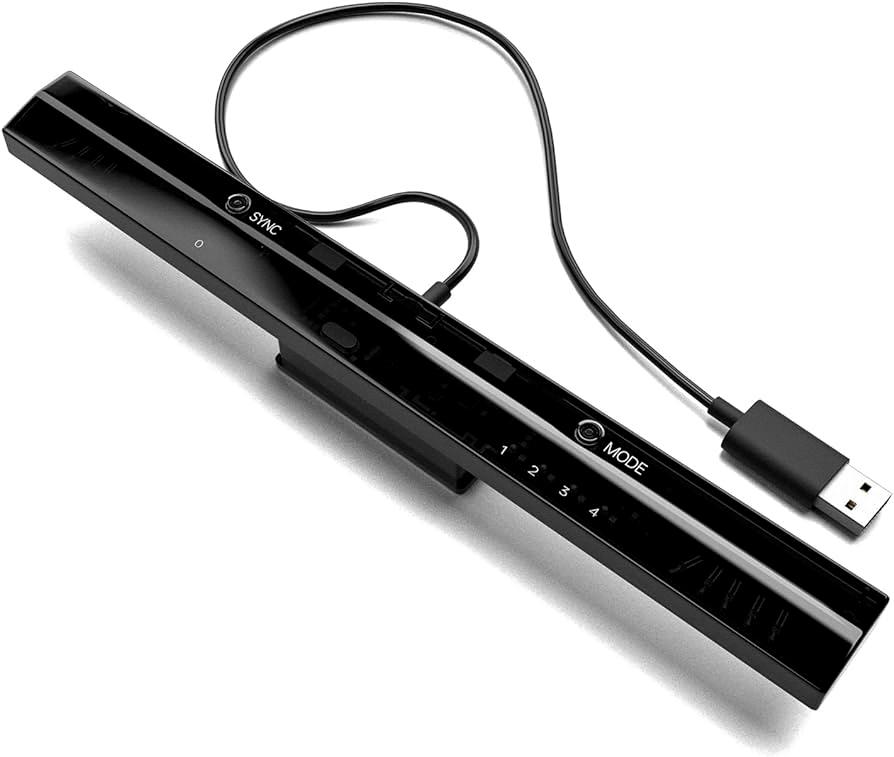
How Do You Sync Your Wii Remote to Your Computer Windows 11?
To sync your Wii Remote to your computer running Windows 11, follow these steps:
1. Open the Control Panel: Search for “Control Panel” in the Windows search bar and click on the corresponding result to open it.
2. Navigate to the Devices and Printers section: In the Control Panel, click on the “View devices and printers” option under the “Hardware and Sound” category.
3. Turn on the Wii Remote: Press the Power button on the Wii Remote to switch it on. The Power button is usually located on the bottom side of the Wii Remote.
4. Press the sync button on the Wii Remote: Look for a small red sync button on the Wii Remote. Press and hold this button until the lights on the Wii Remote start flashing.
5. Add a device: In the Devices and Printers section, click on the “Add a device” button located at the top of the window. This will initiate the device pairing process.
6. Windows will search for devices: Windows will automatically start searching for available devices to connect with. Wait for a moment until your Wii Remote appears in the list of available devices.
7. Select and pair the Wii Remote: Once your Wii Remote is listed, click on it to select it, and then click on the “Next” button to proceed with the pairing process.
8. Skip the PIN entry: Since the Wii Remote does not require a PIN for pairing, you can click on the “Skip” or “Next” button (depending on your Windows version) to bypass the PIN entry prompt.
9. Complete the pairing process: Follow the on-screen instructions to complete the pairing process. Once the pairing is successful, you will see a confirmation message indicating that your Wii Remote is connected to your computer.
How Do You Get Your Wii Remote to Work?
To get your Wii Remote to work, you need to sync it with your Wii console. Follow these steps:
1. Locate the SYNC Button on the Wii Remote. It is just below the batteries.
2. Press and release the SYNC Button on the Wii Remote. The Player LED on the front of the Wii Remote will start blinking.
3. While the lights are still blinking, quickly find and press the red SYNC Button on the Wii console. The SYNC Button is usually located behind a small door on the front of the console.
4. After pressing the red SYNC Button, wait for a moment. The Player LED blinking on the Wii Remote will eventually stop and stay lit, indicating that the syncing process is complete.
If you have multiple Wii Remotes, repeat these steps for each remote to sync them all with the Wii console. Keep in mind that the Player LEDs on the Wii Remotes will light up in different orders to indicate which player each remote is assigned to.
Additionally, make sure that the batteries in your Wii Remote are properly inserted and have enough charge. If the batteries are low, replace them with fresh ones.
If you follow these steps correctly, your Wii Remote should now be synced and ready to use with your Wii console. Enjoy your gaming experience!
How Do You Use WiiMote on Steam?
To use a WiiMote on Steam, you will need to follow these steps:
1. Connect your WiiMote to your computer via Bluetooth. Make sure your computer has Bluetooth capabilities or use a Bluetooth dongle if needed.
2. Open Steam and navigate to the “Steam” menu at the top left corner of the client.
3. Select “Settings” from the drop-down menu.
4. In the Settings window, click on the “Controller” tab located on the left-hand side.
5. Within the Controller settings, click on the “General Controller Settings” button.
6. A new window will open, displaying a list of recognized controllers. Look for the WiiMote in the list.
7. Click on the WiiMote option, and Steam will prompt you to press any button or the 1+2 buttons on the WiiMote to pair it with your computer.
8. Follow the on-screen instructions and press any button or the 1+2 buttons on the WiiMote to complete the pairing process.
9. Once the pairing is successful, Steam will assign an LED color to your WiiMote, indicating that it is connected and ready to be used.
10. You can now navigate Steam’s Big Picture mode or any compatible game using your WiiMote.
Please note that not all Steam games are compatible with the WiiMote. It is recommended to check the game’s controller support before attempting to use a WiiMote with it.
If you encounter any issues during the pairing process or while using the WiiMote on Steam, you can refer to the Steam forums or the Steam Support website for further assistance.
Conclusion
Connecting a Wii remote to a Windows PC requires a Bluetooth dongle and a few simple steps. First, open the Bluetooth settings on your Windows PC. Then, hold down the 1 and 2 buttons on the Wii remote to activate Bluetooth pairing mode. Next, search for the control panel on your PC and navigate to the device settings. Click on “Add a Device” and switch on the Wii remote. Press the sync button on the remote before proceeding to the next step. By adding the device through the control panel, you can skip the need for a PIN. Once the syncing process begins, the player LED on the front of the Wii remote will blink. While the lights are still blinking, quickly press and release the red sync button on the Wii console. When the player LED stops blinking and stays lit, the syncing is complete. You can then use the Wii remote as a controller for your PC. Whether you’re using it for gaming or other applications, following these steps will allow you to connect your Wii remote to your Windows PC successfully.


