If you’ve ever used Wireshark to try and capture data on your system, you may have encountered the dreaded “No Interfaces Found” error. It can be very frustrating when this happens, especially if you’re not sure what the cause is or how to fix it. In this post, we will provide some insights into why this problem occurs and how you can go about solving it.
The first thing to understand is that Wireshark needs access to your network interfaces in order to capture data. If these interfaces are not available, then Wireshark won’t be able to do its job. The most common cause of this problem is a firewall blocking access. To determine if this is the issue, try shutting down Wireshark and turning off your firewall temporarily. If Wireshark finds the network after doing so, then the problem lies with your firewall settings. You will need to set Wireshark as an exception in your firewall rules and turn the firewall back on again.
Another possible cause of “No Interfaces Found” is that you don’t have permission to capture as a non-root user. To check this, look up CaptureSetup/CapturePrivileges page or /usr/share/doc/wireshark-common/README in your system for more information on permissions setup. You can also view a list of available interfaces by running “”ifconfig”” or “”ifconfig -a”” in the command line interface (CLI). Finally, open up Wireshark again and click Capture > Interfaces for an overview of all local network interfaces available for capture.
We hope that this post has been helpful in providing some insight into why “No Interfaces Found” errors occur in Wireshark and how you can go about fixing them. If you still encounter an issue after following our advice above, feel free to contact us for further assistance!
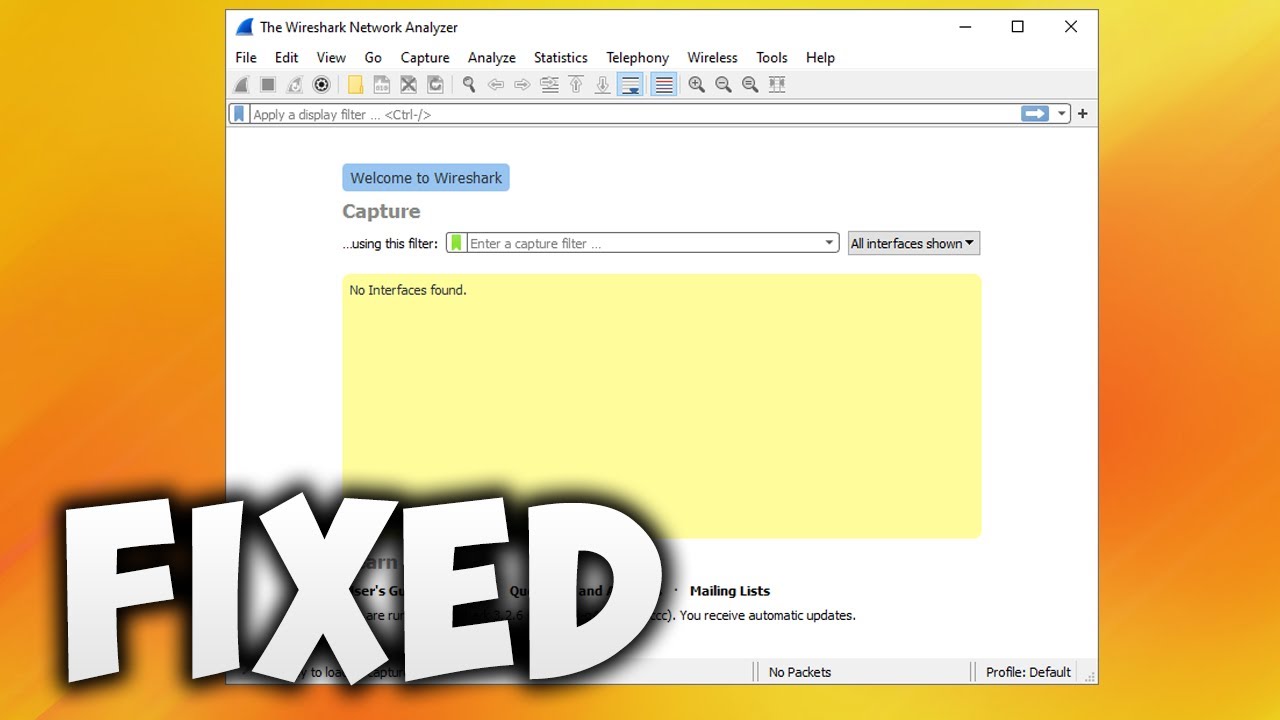
Troubleshooting ‘No Interfaces Found’ Error in Wireshark
If you are seeing the message “No Interfaces Found” in Wireshark, there are a few steps you can take to try to resolve the issue.
First, shut down Wireshark and turn off your firewall. Open Wireshark again to get it to look for networks. If it now manages to find the network, the problem likely lies with your firewall. To fix this, set Wireshark as an exception in your firewall rules and turn the firewall back on again.
If this doesn’t work, check that your network adapter is installed correctly by going into Device Manager and ensuring that it is marked as ‘working properly’. Make sure that you have plugged in all necessary cables or wireless adapters if applicable and restart your computer.
You can also try changing the capture method from ‘default’ to ‘WinPcap’ or vice versa. This can be done by going into Capture > Options > Manage Interfaces > Capture Method.
Finally, if all else fails, reinstalling Wireshark should do the trick!
Troubleshooting Wireshark’s Inability to See Network Interface
It is possible that Wireshark does not see your interface for a variety of reasons. Some of the most common issues include:
1. Your user does not have permission to capture packets on the interface. Make sure you have set the correct permissions so that you can capture as a non-root user, as described on the CaptureSetup/CapturePrivileges page and in /usr/share/doc/wireshark-common/README.
2. The network interface is not configured correctly or is down. Make sure your network interface is up and running by using ifconfig or ipconfig to view the status of your interfaces.
3. You may be using an unsupported version of Wireshark. Check that you are using a version of Wireshark that is compatible with your operating system and supports capturing from your type of interface.
4. A firewall or other security software could be blocking access to the interface or preventing Wireshark from seeing it properly. Try disabling any active firewalls and other security software to see if this resolves the issue.
Accessing Interfaces in Wireshark
In order to get interfaces in Wireshark, you first need to open the program. Once it is open, you can access the list of interfaces by going to the “Capture” menu and selecting “Options”. This will open a dialog box with a list of available interfaces that Wireshark has detected on your system. To start capturing packets on any of these interfaces, simply select it from the list and click “Start”. You can also configure advanced settings for each interface from this dialog box.
Finding Local Interfaces Using Wireshark
To find local interfaces in Wireshark, you can click Capture > Interfaces from the main menu. This will open a window with a list of available interfaces on your local network. You can then select any interface for capture by clicking on it and then clicking the start button to begin capturing packets from that interface. Additionally, you can use the filter bar at the top of the window to refine your results and view only specific types of traffic. Once you’ve begun capturing packets, you can examine them in detail by using the various tabs in the main window or by expanding each one individually in the bottom pane.
Troubleshooting Wireshark Not Displaying Packets
The most likely reason Wireshark is not displaying any packets after starting a capture using an existing 802.11 client card is that the card does not support promiscuous mode. Promiscuous mode is a feature that allows a computer to read all of the data on a network, including packets intended for other computers. Without this feature enabled, the card can only read packets sent directly to it; all other packets will be ignored by the card and not visible in Wireshark.
To enable promiscuous mode on most cards, you must either use specialized software or use a compatible operating system that supports it natively (such as Linux). Unfortunately, Windows does not natively support promiscuous mode for most 802.11 client cards, so you may need to look into alternative solutions if you want to capture all of the network traffic with Wireshark.
Enabling Network Interfaces
In order to enable network interfaces, you need to use the “ifup” command. This command will bring the network interface up and make it available for use. Before using the command, you should ensure that your network settings are properly configured. To do this, you can use the “ifconfig” command to view and set your network settings. Once everything is in place, you can run the “ifup” command followed by the name of the interface you want to enable. For example, if you wanted to enable a network interface named “eth0” then you would type in “ifup eth0”. After running this command, your network interface should be enabled and ready for use.
Conclusion
In conclusion, if you experience the issue of Wireshark not finding any interfaces, there are a few troubleshooting steps you can take to identify and resolve the issue. First, check that your firewall is not blocking Wireshark from accessing the network. Set Wireshark as an exception in your firewall rules and turn the firewall back on again. Additionally, make sure that you have set permissions so you can capture as a non-root user, and use the “”ifconfig”” or “”ifconfig -a”” command to view your local network interfaces. Finally, open Wireshark again to get it to look for networks, this should help diagnose and solve any issues related to Wireshark not finding any interfaces.

