Are you looking for a secure and reliable way to access your Synology NAS remotely? If so, then you should consider setting up a VPN server on your Synology NAS. A VPN (a virtual private network) is a secure connection between two or more computers that allows the exchange of data over a public or private network. With a VPN server running on your Synology NAS, you can easily connect to it from anywhere in the world and securely access resources shared within the same local area network as your Synology NAS.
In this blog post, we’ll walk you through the steps involved in setting up a VPN server on your Synology NAS. We’ll also discuss some of the benefits of using a VPN with your Synology NAS and how to configure it correctly for optimal results. So, let’s get started!
The first step is to install OpenVPN on your Synology NAS. This will allow users to securely connect to their local area network via an encrypted tunnel. To install OpenVPN, open up the Control Panel on your Synology NAS and click on “Network”. Then click on the “Network Interface” tab in the menu and select “OpenVPN Server” from the list of available options.
Once OpenVPN is installed, you can move on to creating a profile for each user who needs access to the VPN server. To do this, click “Create Profile” under “OpenVPN Server Settings” in the Control Panel. Here you can enter all of the necessary details such as username and password information as well as any additional settings needed for authentication purposes. Once complete, click “OK” to save your changes and create the profile for each user who needs access to the VPN server.
Once all of your profiles have been created, you can move on to configuring your DNS settings for optimal performance with your VPN server. To do this, go back into your Network Interface tab within the Control Panel and select “DNS Server Settings” from the list of available options. Here you can enter all of the necessary DNS information needed to ensure that data is routed efficiently and securely through your VPN tunnel when connected remotely from outside of the local area network of your Synology NAS.
Finally, if IPv6 is enabled on your router or modem then it’s recommended that you disable it while using OpenVPN since some ISPs may use IPv6 instead of IPv4 which could potentially cause connection issues with certain devices connecting remotely via OpenVPN protocol if IPv6 is enabled at both ends (client and server). To disable IPv6 go into Network > Network Interface tab within Control Panel and uncheck “Enable IPv6 Support” before saving changes made here by clicking the “OK” button at the bottom right corner of the window opened after clicking the “Network Interface” tab mentioned earlier in this section (instructions).
That’s it! Now all that’s left is for users connecting remotely via OpenVPN protocol to enter their login credentials when prompted by client software used (such as Tunnelblick) when attempting connection establishment with remote endpoint/server (your Synology NAS). With these steps followed correctly users should now be able to successfully establish a secure connection with the remote endpoint/server (your Synology NAS) making use of OpenVPN protocol provided by Synology’s own “VPN Server” package – allowing DSM users to remotely & securely access resources shared within same local area network as their own device connected with via internet/internet-based network when connected with said remote endpoint/server (your Synology NAS).

Does Synology Offer VPN Services?
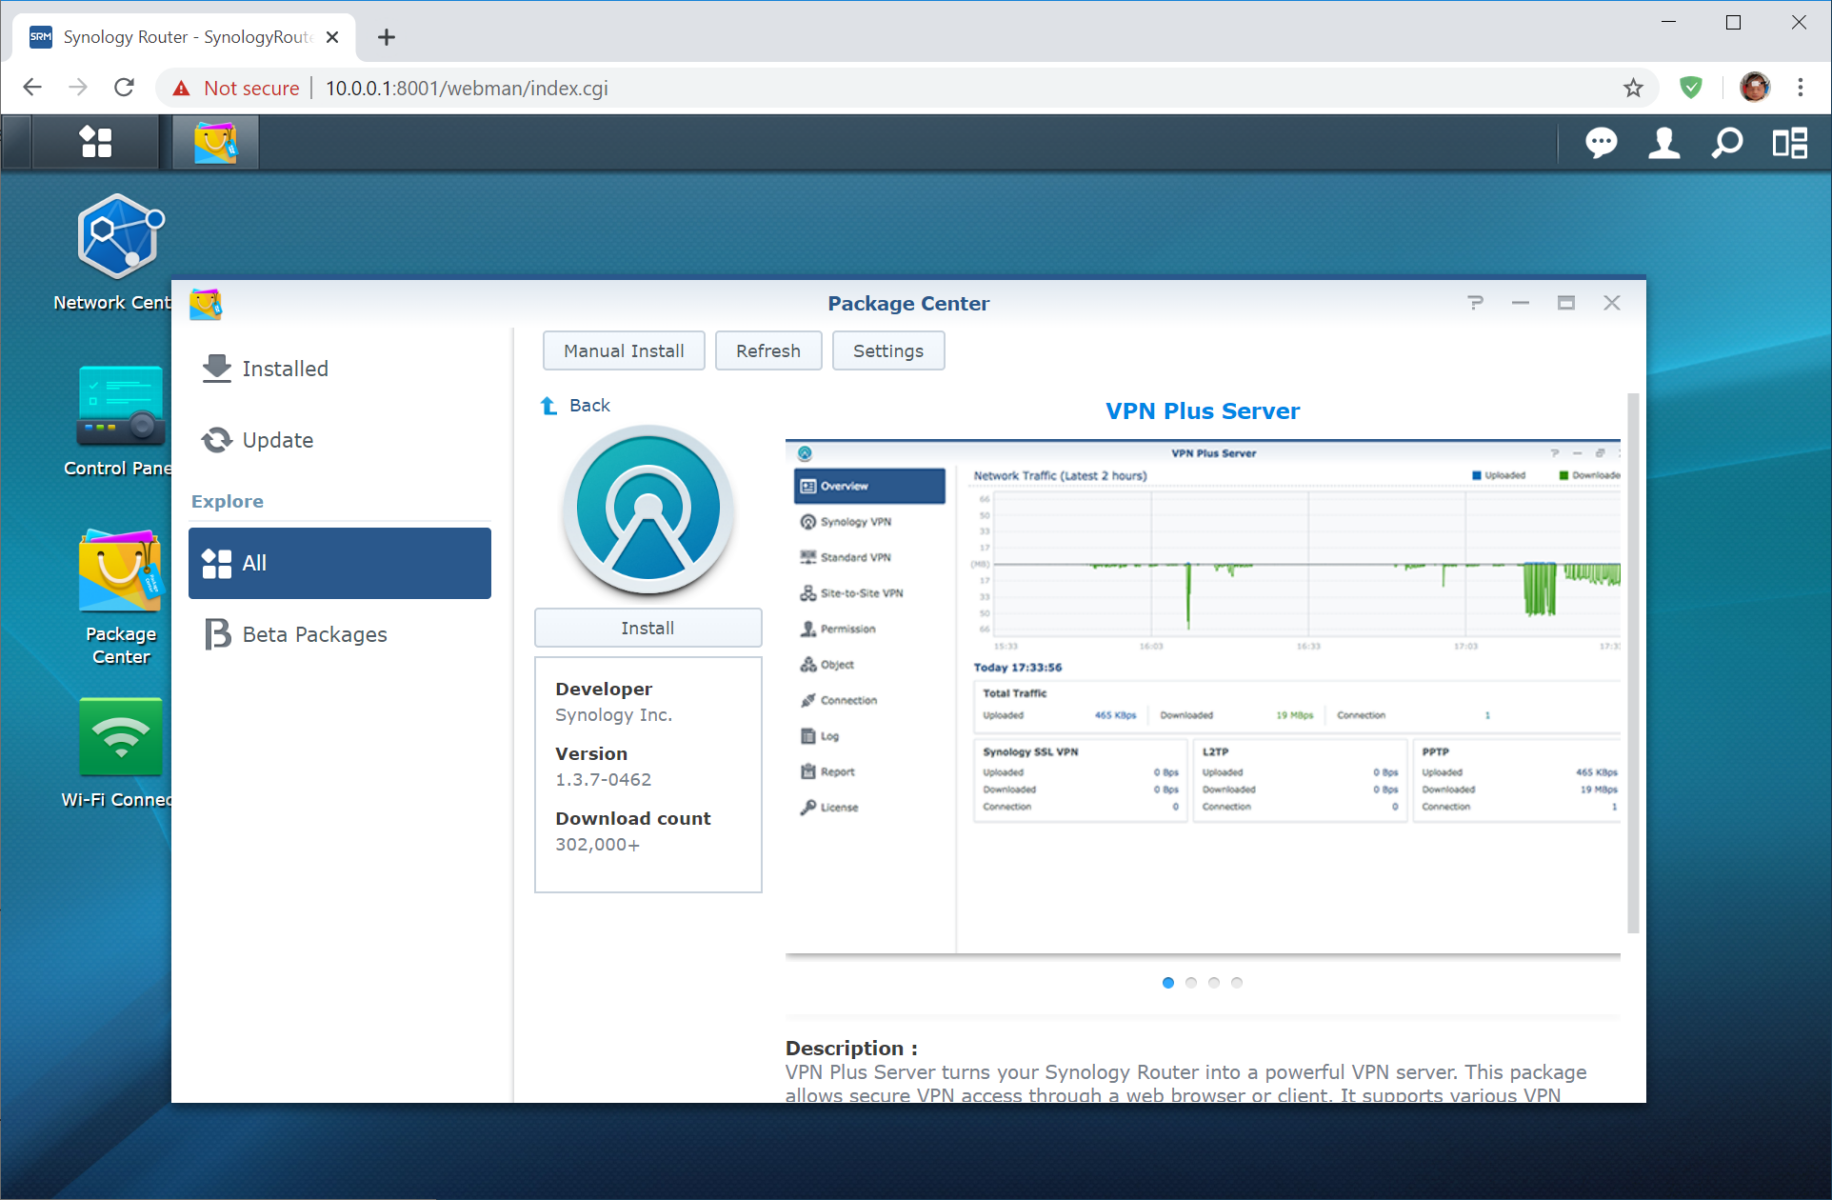
Yes, Synology does have a VPN solution for its NAS devices. With Synology’s VPN Server package, you can set up a secure and reliable Virtual Private Network (VPN) server on your Synology NAS to allow remote access to the resources and data stored within your local area network.
The setup process is straightforward and user-friendly, allowing you to configure the VPN server with just a few clicks. After setup, users can securely connect to your Synology NAS from any device over the Internet through either the PPTP or OpenVPN protocols. This allows DSM users to access resources such as shared folders, printers, and other services while also protecting their data traffic with encryption.
Synology’s VPN Server package also includes features such as auto-reconnection upon connection loss and an integrated firewall for added security. With this comprehensive solution, you can ensure secure remote access for DSM users no matter where they are.
The Benefits of Using a Synology VPN Server
Synology’s VPN Server package is a great way to securely and remotely access resources shared within the local area network of your Synology NAS. It provides a high level of security and encryption, so you can be sure that all data transmitted over the VPN connection is kept private and secure. In addition, it allows for seamless integration with other Synology services, such as Cloud Station, so users can easily sync their files between devices. Furthermore, it is incredibly easy to set up and use, making it ideal for those who are not tech-savvy. Finally, because it is powered by the Synology DiskStation Manager (DSM) software, you can be sure that your data remains safe and secure, backed up with regular updates from the manufacturer.
Setting Up OpenVPN on Synology
Setting up OpenVPN on a Synology NAS is a straightforward process. First, you will need to log in to the control panel of your Synology NAS, then click on the “Network” tab. From here, click on the “Network Interface” tab in the menu. If you have any existing VPN profiles, delete them before proceeding with the setup.
Next, you will need to create a new VPN profile and choose your preferred server. You will also be prompted to enter your login credentials (e.g. username and password). Once that is done, you can then select the encryption protocol and authentication algorithm for your VPN connection. Additionally, it is recommended that you disable IPv6 before completing the setup process.
Finally, once all of your settings have been entered and configured properly, you can save your new VPN profile and connect to it using OpenVPN. Congratulations – you’ve now successfully set up OpenVPN on your Synology NAS!
Should I Use a VPN on My Network Attached Storage (NAS)?
Yes, you should definitely use a VPN on your NAS device. A VPN provides an additional layer of security and privacy to your data by encrypting the traffic between your device and the network. This ensures that all data sent over the network, such as files stored on your NAS, remain private and secure. Additionally, a VPN can also prevent malicious actors from accessing your network, as they will not be able to intercept or modify any information sent over the connection. With a VPN installed on your NAS device, you can rest assured that all of your data is safe and secure.
Benefits of Using a VPN
1. Online Security and Privacy: A VPN helps protect your data when you are using other networks by encrypting your data and hiding your browsing history, banking information, account passwords, and other sensitive data from potential cyber criminals.
2. Accessing Content: A VPN can also be used to access content that is blocked in certain countries or regions. For example, you can use a VPN to access websites that are only available in certain countries or watch streaming services that would otherwise be unavailable to you.
Conclusion
In conclusion, Synology’s VPN Server package is an excellent choice for users who need to securely access resources shared within a local area network. This package allows DSM users to remotely and securely connect to their Synology NAS, eliminating the need for cumbersome workarounds. Installing OpenVPN on a Synology NAS is straightforward, and requires disabling IPv6, creating a VPN profile, choosing a server, and entering login credentials. With the VPN Server package, users can easily turn their Synology NAS into a secure VPN server allowing them to access resources with ease.


