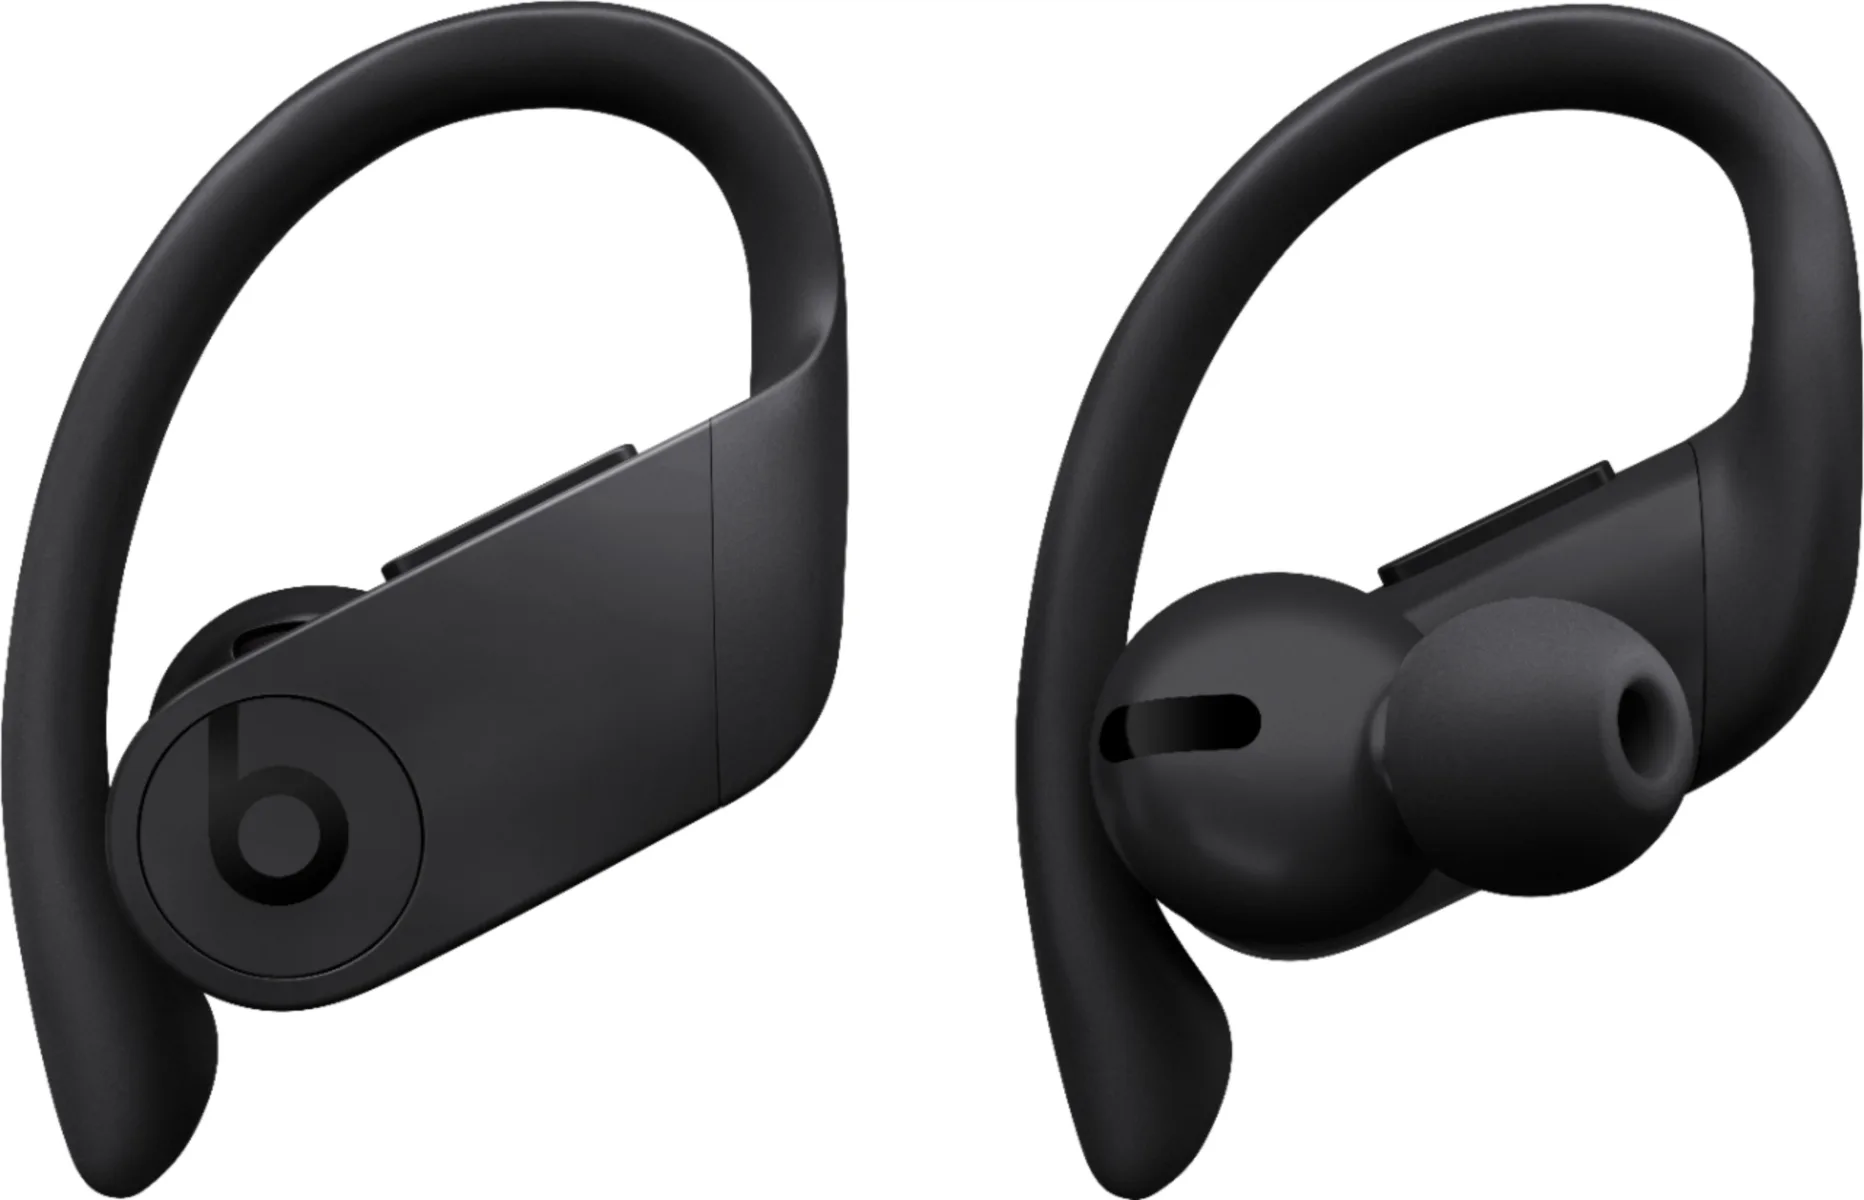
Have you been experiencing muffled audio from your Powerbeats Pro headphones? If so, you’re not alone. Many users have reported that the microphone on their Powerbeats Pro headphones is producing a muffled sound when making calls or recording audio.
The cause of this issue can vary depending on the user’s setup and environment, but there are some solutions that might just help you fix the problem.
First, let’s look at the possible causes of this issue. It could be due to a hardware malfunction or poor positioning of the microphone. Dust build-up on the mic diaphragm is another common culprit that can lead to muffled audio. Additionally, using the wrong type of microphone or recording in a noisy environment can also cause this issue.
Now let’s take a look at some potential solutions to fix this problem:
1) Make sure that the mic diaphragm is in front and the air vent is facing away from your mouth when making calls or recording audio.
2) Check that all apps you use with your Powerbeats Pro headphones have access to your microphone by going into your device settings and enabling mic access for each app.
3) Set your device as the default recording device in Windows settings, as this will ensure that all audio is routed through your Powerbeats Pro headset correctly.
4) Adjust mic levels in Windows settings if necessary to balance out any background noise and optimize sound quality.
5) Cleaning out any dust build-up on your microphone can also help improve sound quality significantly – simply use a soft cloth or brush to gently remove any debris from the diaphragm area.
6) Finally, make sure you’re using an appropriate microphone for whatever task you’re undertaking – different types of mics are optimized for different uses and environments, so be sure to pick one accordingly!
We hope these tips help you fix any muffled audio issues with your Powerbeats Pro headphones!

Investigating the Cause of Muffled Sound in Powerbeats Pro
The Powerbeats Pro may sound muffled due to a variety of causes. These could include a loose connection between the headphones and audio source, low battery levels, interference from other nearby Bluetooth devices, mismatched Bluetooth codecs, or an issue with the microphone. To fix this issue, try checking all your connections and charging the headphones if necessary. Additionally, try disconnecting any other wireless devices from your system and making sure that your audio source is using the same Bluetooth codec as your Powerbeats Pro. Finally, check your Powerbeats Pro’s microphone to make sure it isn’t blocked or damaged in any way.
Fixing a Muffled Microphone Sound
To fix a muffled mic, check that the mic diaphragm is in front and the air vent is facing away from your mouth. Make sure all necessary apps can access your microphone and that the device is set as a default recording device. You can also adjust the mic levels in the Windows settings. If these steps do not work, try cleaning the mic with a damp cloth to remove any dirt or debris that could be causing interference. Additionally, you may need to replace the microphone if it has been damaged or worn out.
Location of the Mic on Powerbeats Pro
The microphone on the Powerbeats Pro is located in each of the earbuds. By default, both earbuds can be used as a microphone, so that either of your earbuds can act as microphone. However, if you are only using one earbud at a time, that particular earbud will act as the microphone.
Recalibrating Powerbeats Pro
To recalibrate your Powerbeats Pro, you’ll need to complete a few steps. First, make sure that both earbuds are in their charging case. Then, press and hold the power button on the back of the case for 10 seconds. When the LED indicator light flashes, release the button. The earbuds will now enter pairing mode and be ready to be re-calibrated with your device. After completing these steps, you should be able to use your Powerbeats Pro as normal.
Troubleshooting: Why Does My Microphone Sound Like I’m Underwater?
It is likely that your mic is not receiving enough internet speed or there is faulty networking equipment or a loose connection. This can cause your audio to sound muffled or as if you are underwater. You may want to check your internet speed and see if it meets the requirements for using a mic, and also check your networking equipment and connections to make sure everything is secure.
Troubleshooting Poor Quality Audio on an iPhone Microphone
The most likely cause of muffled audio or a caller sounding like they’re underwater on an iPhone is due to the microphone being obstructed. This can happen if there is debris in the mic if it’s covered by a protective case, or if there is something blocking the mic port. Additionally, having a low-quality microphone can also produce this effect. To fix this issue, clean the microphone with compressed air and make sure nothing is blocking it. If the issue persists, you may need to replace your microphone.
Fixing a Muffled Microphone on an iPhone
If your iPhone’s microphone is muffled or muted, there are a few steps you can take to try and fix it. First, make sure that you’re not connected to any Bluetooth devices, as these can interfere with the microphone. Then check that all of your apps have permission to use the microphone. If that doesn’t work, try updating your iOS or restoring your iPhone to default settings. You may also want to try using an external microphone, as this can help improve sound quality. If none of these steps work, contact Apple Support for additional assistance.
Improving Microphone Quality
1. Use the right microphone: Make sure you are using a microphone that is appropriate for the type of sound you want to capture. Choose a condenser mic if you need a more accurate sound, or a dynamic mic for a more robust sound.
2. Set the gain: Adjusting the gain on your microphone will help you achieve optimal levels for your recordings. Make sure to set it just high enough so that your voice is audible without any distortion, but not so high that it clips.
3. Consider your recording environment: If you are recording in an untreated space, there could be unwanted reverberation that could affect the clarity of your recordings. Invest in some acoustic treatments such as foam panels or bass traps to reduce this extra noise.
4. Use polar patterns: Depending on the type of microphone you are using, it may have different polar patterns (directivity) available to choose from. By choosing an appropriate pattern, like cardioid or omnidirectional, you can reduce any unwanted background noise while still capturing clear recordings of your voice.
5. Use plugins: Plugins like EQ and compression can help shape and enhance the quality of your recordings by making certain frequencies louder or quieter and controlling dynamic range respectively. Experiment with these tools until you find the settings that work best for your specific application and voice type!
Conclusion
The Powerbeats Pro microphone can suffer from the muffled sound if not properly cared for and maintained. To prevent this, make sure to keep the mic diaphragm in front and the air vent facing away from your mouth. Additionally, check that the correct device is set as the default recording device, and give your apps access to use the microphone. If these measures don’t help, dust build-up, poor positioning, or background interference may be causing your mics to sound muffled. In this case, it would be best to take your Powerbeats Pro to a professional audio technician who can inspect and clean them as needed.


