Samsung TVs are popular for their high-quality displays and smart features. However, sometimes you may find that your Samsung TV is not getting all the channels you expected. Don’t worry, there are simple steps you can take to scan for channels and ensure you have access to all the available options.
First, you need to access the source menu on your Samsung TV. To do this, grab your remote control and look for a button labeled “Menu.” Press it to open the menu options.
Once you have the menu open, use the arrow buttons on your remote to navigate to the “Setup” or “Settings” option. This will vary depending on your TV model, but the goal is to find the menu that allows you to adjust the TV settings.
After selecting “Setup” or “Settings,” you’ll want to choose the correct source for your TV. Look for an option labeled “Source” and select “Television” if it’s not already selected. This tells your TV that you want to access over-the-air channels.
Next, you’ll need to connect your antenna to the RF connector on the back of your Samsung TV. Make sure the antenna is properly connected to ensure a reliable signal.
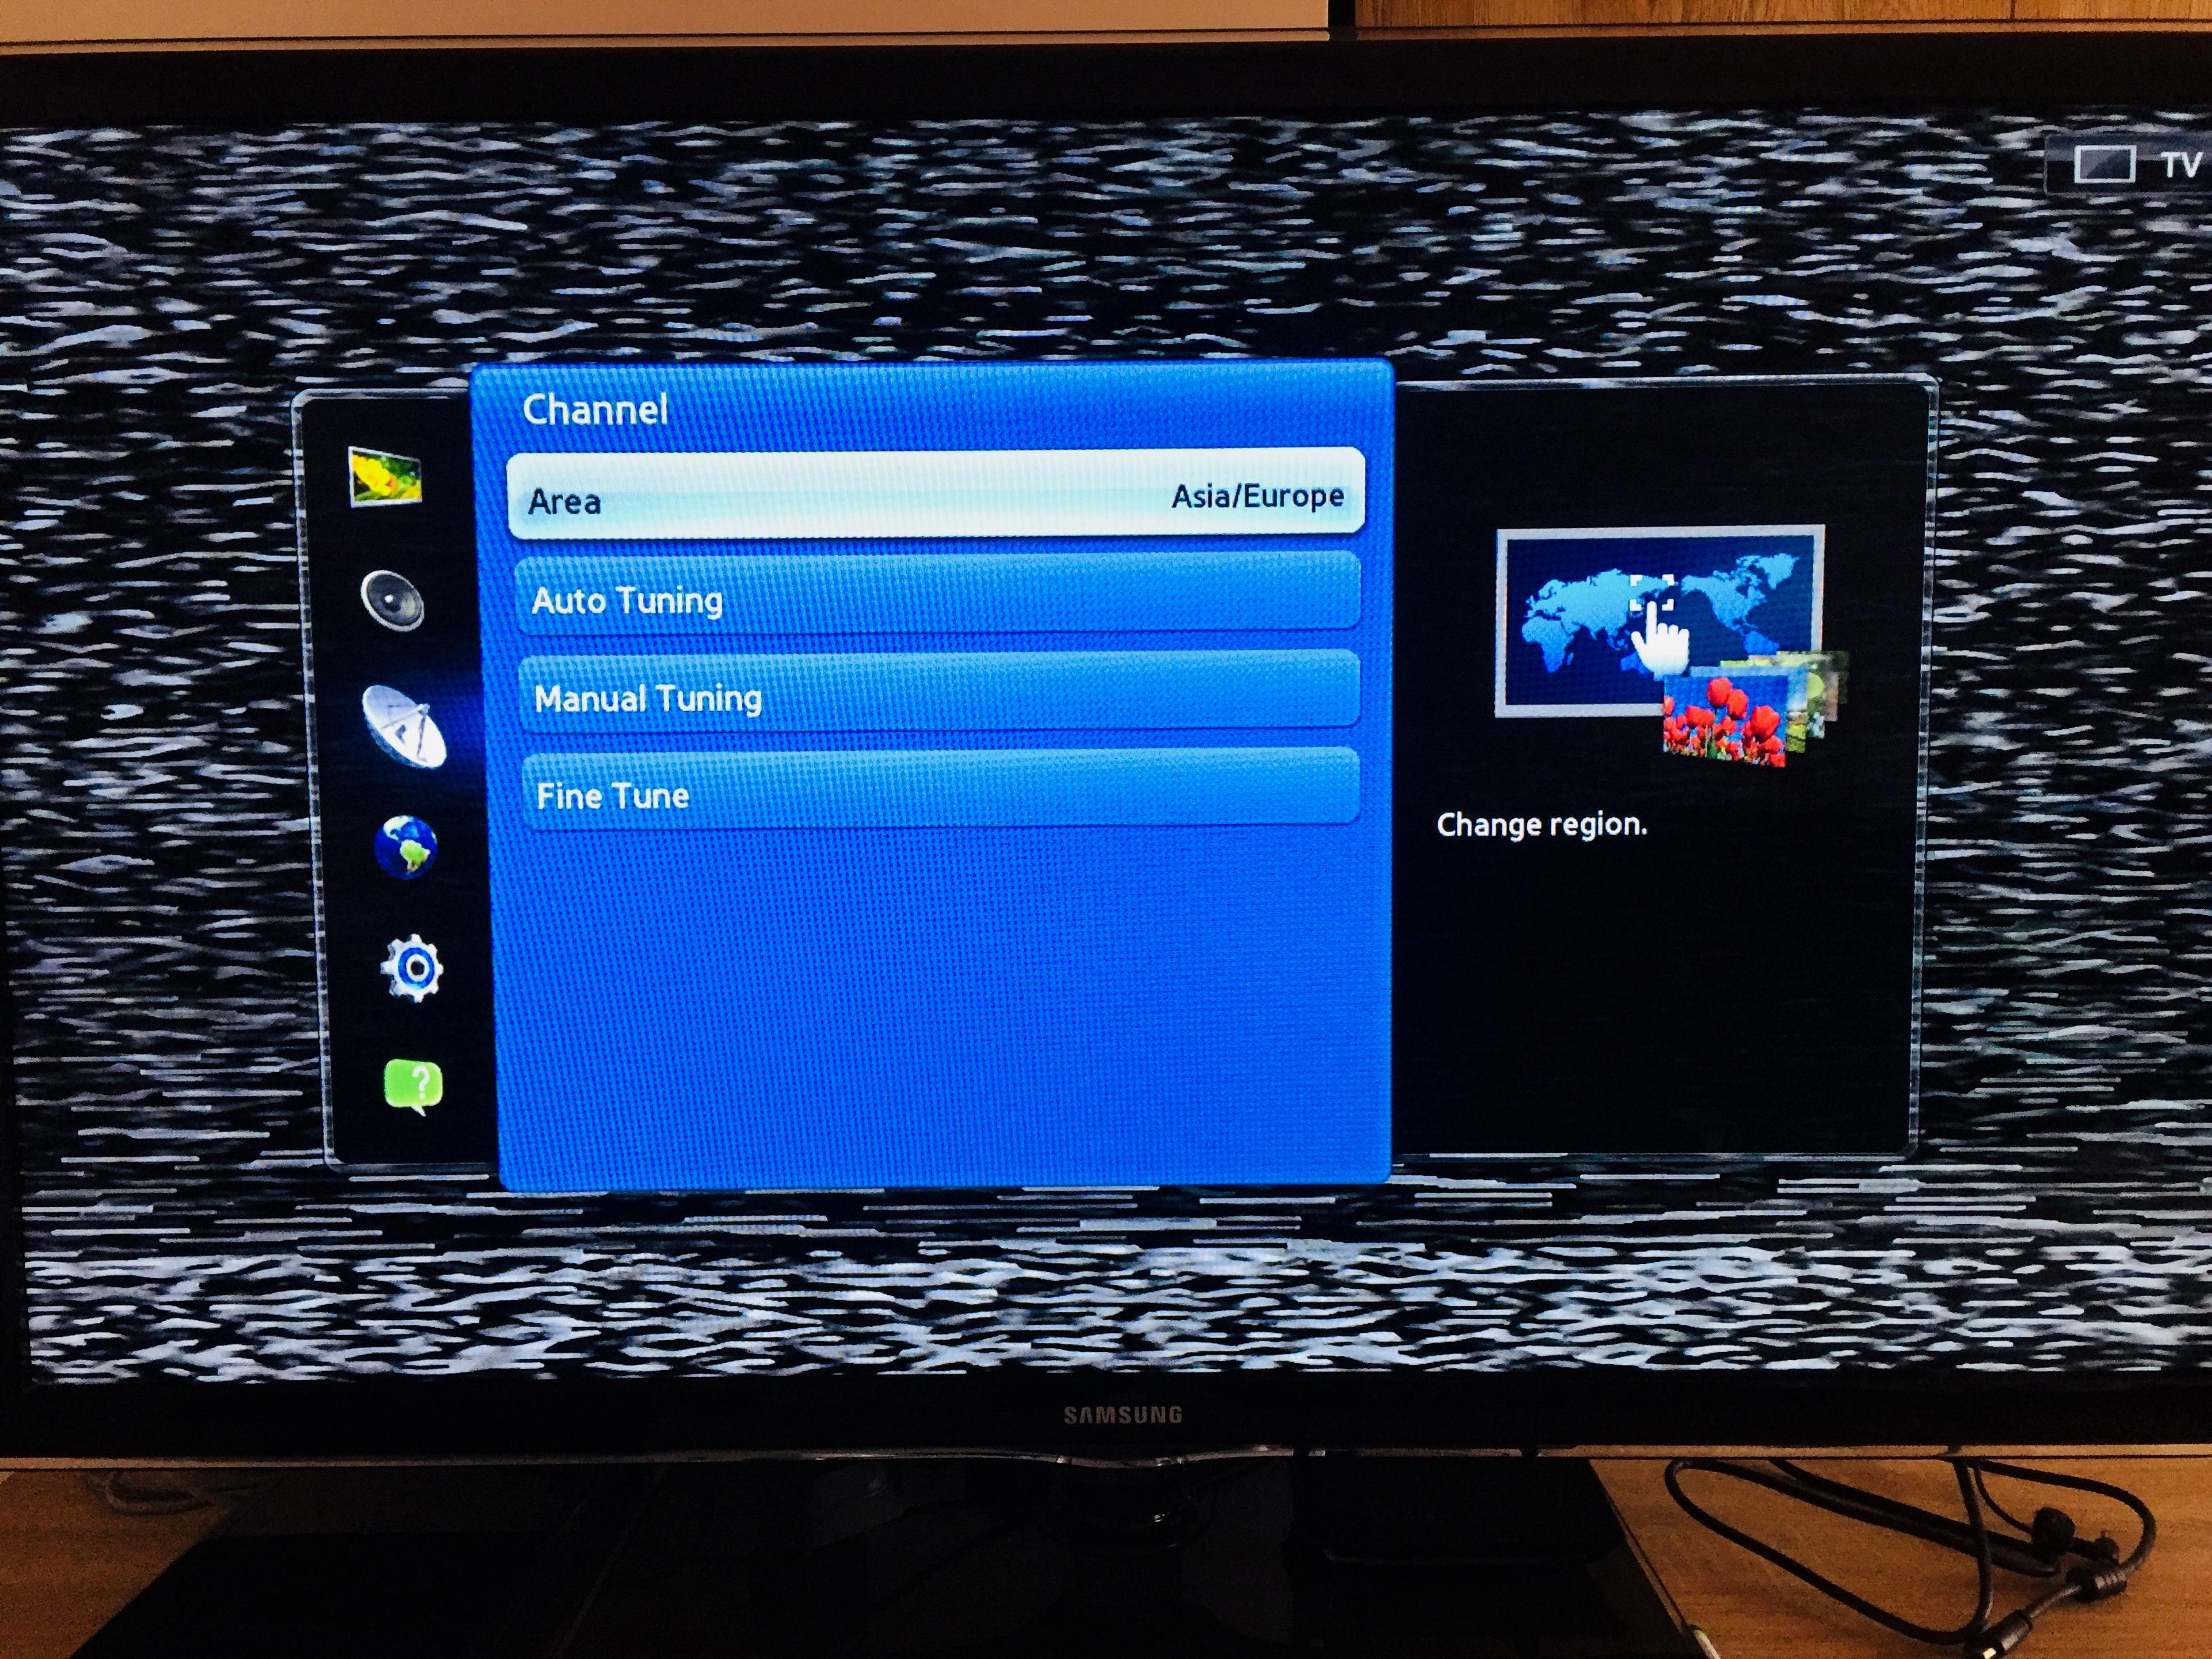
Once the antenna is connected, go back to the menu options and find the “Channel Scan” or “Auto Program” feature. Select this option, and you’ll be prompted to choose between scanning for “Air,” “Cable,” or “Both” channels. If you’re using an antenna, select “Air” to scan for all the available channels in your area.
Now, sit back and relax as your Samsung TV scans for channels. This process may take several minutes, so be patient. Your TV will search for all the available channels and save them to your channel list.
Once the scan is complete, you should have access to all the channels that have a reliable signal in your area. Use the channel buttons on your remote to navigate through the list and find the channels you want to watch.
If you’re still having trouble receiving all the channels, make sure your antenna is positioned correctly and is in good condition. Sometimes, a simple adjustment or upgrade to your antenna can improve reception.
Scanning for channels on your Samsung TV is a straightforward process. By accessing the source menu, selecting the appropriate source, connecting your antenna, and performing a channel scan, you can ensure that you have access to all the available channels in your area. Enjoy watching your favorite shows and movies on your Samsung TV!
Why Is My Samsung TV Not Finding Channels?
There could be several reasons why your Samsung TV is not finding channels. Here are some possible explanations:
1. Antenna or cable issue: Make sure that your TV is properly connected to the antenna or cable. Check if the cable is securely attached to both the TV and the wall outlet. Try replacing the cable or antenna if it appears damaged.
2. Weak signal: If you are using an antenna, your TV may not be able to find channels if the signal is too weak. Ensure that your antenna is positioned correctly and is pointing towards the broadcast tower. You may also need to consider using a more powerful antenna or a signal amplifier to improve the signal strength.
3. Channel scan not performed: If you have recently set up your TV or made changes to your antenna or cable setup, it is possible that you haven’t performed a channel scan. Go to the source or input menu on your TV and select ‘TV’. From there, navigate to the settings or setup menu and look for the option to perform a channel scan or auto-tune. This will allow your TV to search for and store available channels.
4. Incorrect input selection: Sometimes, the issue may not be with the TV itself, but with the input selection. Make sure you have selected the correct input source on your TV, especially if you have multiple devices connected (e.g., cable box, gaming console). Switch to the TV input source and try performing a channel scan again.
5. Software or firmware issue: If none of the above solutions work, it is possible that there is a software or firmware issue with your TV. Check for any available software updates for your TV model and install them if necessary. You may also try resetting your TV to its factory settings, but be aware that this will erase any customized settings or preferences.
Note: If you are using a cable or satellite provider, ensure that you have subscribed to the necessary channels and that your service is active and working properly. Contact your service provider for assistance if needed.
If the problem persists, it is recommended to consult the user manual of your specific TV model or contact Samsung customer support for further assistance.

How Do I Get My Samsung Smart TV To Recognize My Antenna?
To get your Samsung Smart TV to recognize your antenna, you can follow these steps:
1. Press the home button on your Samsung Smart TV remote control. This will take you to the main menu.
2. Using the arrow keys on your remote, navigate to the “Settings” option. It is usually represented by a gear icon.
3. Once you have selected “Settings,” scroll down and choose the “Broadcasting” or “Channels” option. This will allow you to access the settings related to your TV’s antenna channels.
4. In the “Broadcasting” or “Channels” menu, you should see an option to set up your antenna channels. Select this option.
5. Next, you will need to choose the type of signal you want to scan for. In this case, select “Air” or “Antenna” as the signal type.
6. The TV will then start scanning for available antenna channels in your area. This process may take several minutes, so be patient.
7. Once the scanning is complete, the TV will display a list of all the available antenna channels it has detected. You can then save these channels to your TV’s memory.
8. After saving the channels, you can exit the menus and return to watching TV. Your Samsung Smart TV should now recognize and display the antenna channels you scanned for.
In summary, to get your Samsung Smart TV to recognize your antenna, you need to access the settings menu, navigate to the broadcasting or channels option, select the antenna setup, scan for air channels, save the detected channels, and finally exit the menus.
How Do I Run A Channel Scan On My TV?
To run a channel scan on your TV, follow these steps:
1. Locate your TV remote: Begin by finding your remote control, as you will need it to navigate the TV’s menu.
2. Press the “Menu” button: Look for a button labeled “Menu” on your remote control. It is usually located near the center or top of the remote.
3. Navigate to the setup or settings menu: Once you press the “Menu” button, use the arrow buttons on your remote to navigate to the setup or settings menu. The exact name may vary depending on your TV brand and model.
4. Select the channel scan option: Within the setup or settings menu, look for an option related to scanning for channels. It may be labeled as “Channel Scan,” “Auto Tune,” or something similar.
5. Start the channel scan: Once you have selected the channel scan option, press the appropriate button on your remote to start the scan. This button is often labeled as “OK” or “Enter.”
6. Wait for the scan to complete: Your TV will now scan for available channels. This process may take a few minutes, so be patient and avoid interrupting the scan.
7. Save the channels: Once the scan is complete, your TV will display a list of available channels. Select the option to save these channels, so they can be easily accessed later.
8. Enjoy your newly scanned channels: After saving the channels, you can now enjoy watching your favorite programs on the newly scanned channels.
Remember, these steps might vary slightly depending on your TV brand and model. It is always a good idea to consult your TV’s user manual for specific instructions tailored to your device.
How Do I Get Local Channels On My Samsung Smart TV?
To get local channels on your Samsung Smart TV, you can use the built-in tuner or connect an antenna. Here’s a step-by-step guide:
1. Check if your TV has a built-in tuner: Some Samsung Smart TVs come with a built-in tuner that allows you to access over-the-air channels without the need for an external antenna. To check if your TV has a tuner, go to the TV’s settings menu and look for the option to scan for channels. If you find it, that means your TV has a tuner.
2. Connect an antenna: If your TV doesn’t have a built-in tuner or you prefer to use an external antenna for better reception, you’ll need to connect one. Start by locating the antenna input on your TV – it’s usually labeled as “ANT” or “RF In.” Then, connect the antenna to the TV using a coaxial cable. Make sure the antenna is positioned properly and facing the direction of the local broadcast towers for optimal reception.
3. Scan for channels: Once your antenna is connected, go to the TV’s settings menu and select the option to scan for channels. This will initiate a channel scan, during which your TV will search for available over-the-air channels. The scanning process may take a few minutes, so be patient. Once the scan is complete, your TV will display a list of detected channels.
4. Organize the channels: After the channel scan, you may want to organize the channels to your liking. Most Samsung Smart TVs allow you to rearrange the channel order, hide unwanted channels, or create favorites lists. Refer to your TV’s user manual or the on-screen menu for instructions on how to customize your channel lineup.
5. Enjoy local channels: With the scanning and organizing done, you can now enjoy your local channels on your Samsung Smart TV. Simply select the desired channel from the TV’s channel list or use the channel up/down buttons on your remote to navigate through the available channels.
It’s important to note that the availability and number of local channels may vary depending on your location and the strength of the signals in your area. Using a high-quality antenna and positioning it correctly can help improve reception and increase the number of channels you can receive.
In summary, to get local channels on your Samsung Smart TV, you can use the built-in tuner or connect an antenna. Make sure to scan for channels, organize them to your preference, and enjoy your local programming.
Conclusion
If your Samsung TV is not getting all channels, it is important to go through the proper steps to ensure a successful channel scan. By accessing the source menu and selecting ‘TV’, you can then connect your antenna to the RF connector on the back of the TV. From there, you will need to choose ‘Channel Scan’ and select either ‘Air, Cable, or Both’ depending on your setup. By scanning for all available channels with a reliable signal, you can ensure that your TV is able to receive all the channels in your area.
It is important to note that this process may take several minutes as the TV searches for and scans in all available air channels. Patience is key during this process. Once the scan is complete, you can navigate through the available channels using your remote control.
Additionally, if you are using an antenna to receive over-the-air channels, it is crucial to position the antenna properly for optimal reception. This may require adjusting the antenna’s position or using an amplified antenna if you are located far from broadcast towers.
By following these steps and ensuring a successful channel scan, you can enjoy all the available channels on your Samsung TV.


