Autofill is a convenient feature that saves time and effort by automatically filling in information on web forms. It remembers details such as your name, address, and credit card information, making it easier to complete online transactions and fill out registration forms. However, there may be times when you want to delete unwanted autofill entries on your Android device. In this article, we will guide you on how to do just that.
To delete unwanted autofill entries on the Chrome browser, follow these steps:
1. Open Chrome on your Android device.
2. Tap on the three-dot symbol in the top-right corner of the screen.
3. From the dropdown menu, select “More Tools.”
4. In the submenu, tap on “Clear browsing data.”
5. A new window will open with several options. Tap on the “Advanced” tab.
6. From the “Time range” dropdown, select “All time” to delete all autofill entries.
7. Check the box next to “Autofill form data.”
8. You can also choose to clear other browsing data if desired.
9. tap on the “Clear data” button.
By following these steps, you can easily delete unwanted autofill entries from the Chrome browser on your Android device.
Autofill is a convenient feature, but it’s important to manage and delete unwanted entries to protect your privacy and prevent outdated or incorrect information from being automatically filled in. By following the steps outlined above, you can easily delete unwanted autofill entries on your Android device and customize your autofill preferences to suit your needs.
How Do You Delete Unwanted Autofill Entries?
To delete unwanted Autofill entries on your Chrome browser, follow these steps:
1. Open Chrome by clicking on its icon.
2. In the top-right corner of the browser window, you will see three vertical dots. Click on these dots.
3. A drop-down menu will appear. From this menu, select “More Tools”.
4. Another menu will appear, and from here, select “Clear browsing data…”.
5. A new window will open with different options. Click on the “Advanced” tab located at the top.
6. In the “Time range” drop-down menu, select “All time” to ensure that all Autofill entries are deleted.
7. Scroll down until you find the “Autofill form data” option. Check the box next to it.
8. Now, you can either choose to clear other types of browsing data or solely focus on Autofill form data.
9. Once you have made your selection, click on the “Clear data” button.
10. Chrome will now proceed to delete all the unwanted Autofill entries from your browser.
By following these steps, you can easily remove any unwanted Autofill entries from your Chrome browser, ensuring a clean and personalized browsing experience.

How Do You Clear Autofill Search on Android?
To clear Autofill search on Android, you can follow these steps:
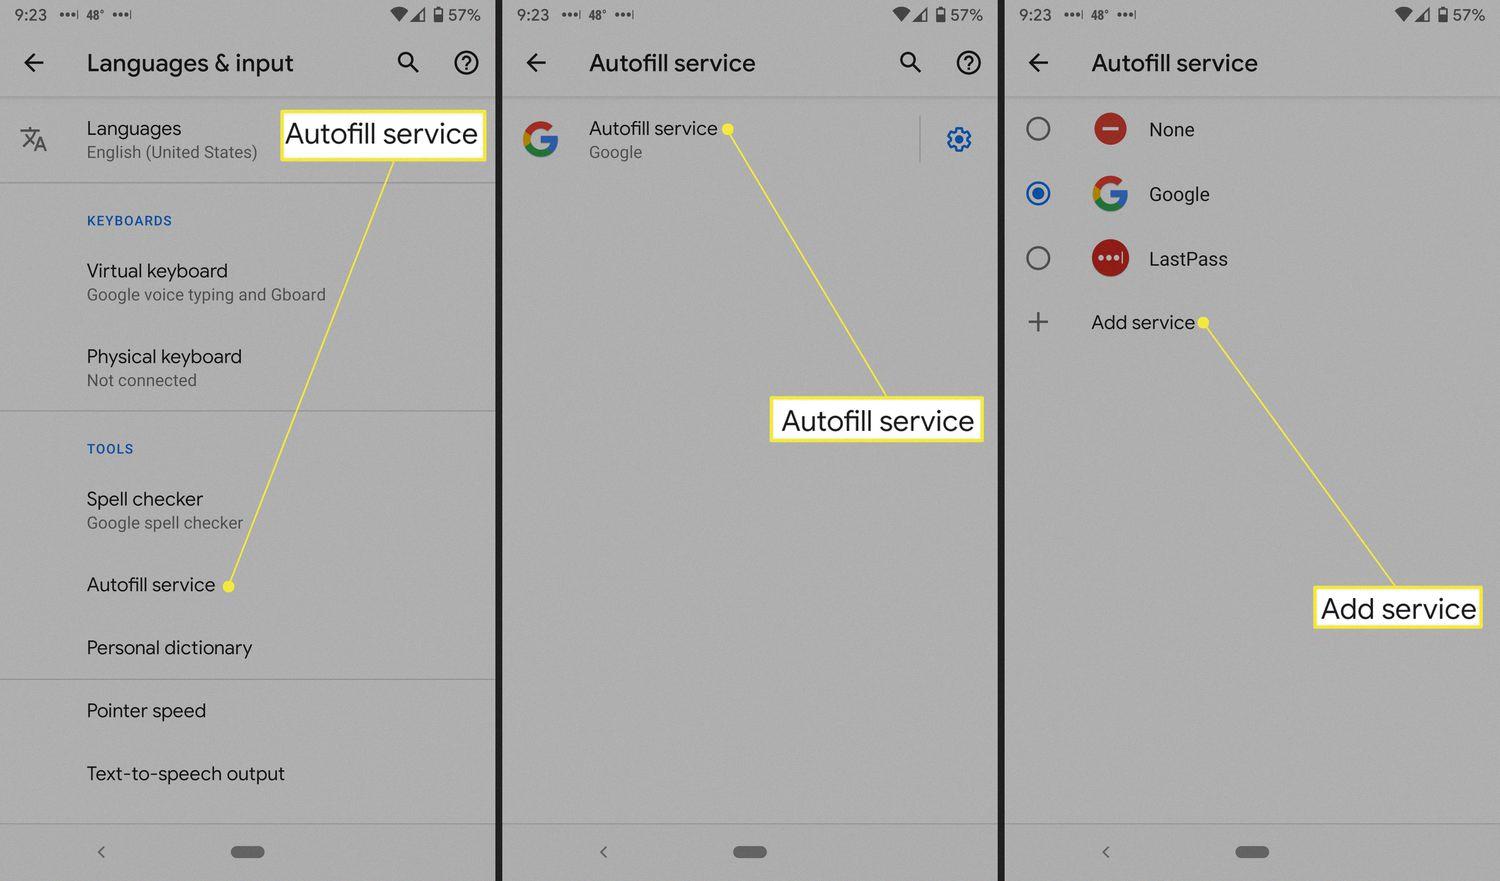
1. Open the Settings app on your Android device.
2. Scroll down and select “System” or “System & Device,” depending on your Android version.
3. Look for the “Languages & input” or “Language & input” option and tap on it.
4. In the “Advanced” section, find and select “Input assistance” or “Text correction.”
5. Look for the “Autofill service” option and tap on it.
6. You will see a list of available autofill services. Select the one that is currently enabled.
7. In the settings for the selected autofill service, you should find an option to clear the search history or data.
8. Tap on this option to clear the Autofill search history.
Remember that these steps may vary slightly depending on the Android version and device manufacturer.
How Do You Turn Off Autofill on Android?
To disable the Autofill feature on your Android device, you can follow these steps:
1. Start by opening the Google app on your device.
2. Look for the “Autofill” option and tap on it.
3. Next, tap on “Autofill with Google” to access further settings.
4. toggle the switch labeled “Use Autofill with Google” to the off position.
By following these steps, you will successfully disable the Autofill feature on your Android device.
How Do You Manage Autofill on Samsung?
To manage autofill on your Samsung Galaxy device, follow these steps:
1. From the Home screen, tap on the “Apps” icon.
2. Locate and tap on the “Internet” app. If you are using Chrome, tap on the three dots at the top right corner and select “Settings.”
3. Once in the Internet app, tap on the “More” option. If you are using Chrome, skip this step.
4. From the dropdown menu, select “Settings.”
5. Look for the “Auto fill profile” or “Auto-fill forms” option, depending on the browser you are using, and tap on it.
Here you will find the settings to adjust or add autofill forms. You can manage your personal information such as name, address, phone number, and credit card details. You can also enable or disable autofill for forms on websites.
To add a new autofill profile, tap on the “Add” or “Create new profile” button. Fill in the required information and save it. You can have multiple profiles for different purposes, like personal and work addresses.
To edit an existing autofill profile, select the profile you want to modify and make the necessary changes. Remember to save the changes after editing.
To delete an autofill profile, select the profile and look for the “Delete” or “Remove” option. Confirm your action to remove the profile from autofill.
By managing autofill on your Samsung device, you can save time and effort when filling out forms on the internet.
Conclusion
Autofill is a convenient feature offered by web browsers like Chrome and Internet App that automatically fill out forms with previously entered information. It saves time and effort by eliminating the need to manually enter the same information repeatedly.
However, there may be instances where unwanted or outdated autofill entries appear, which can be frustrating. Fortunately, it is possible to delete these entries to keep your autofill data clean and accurate.
For Chrome browser users, deleting unwanted autofill entries is simple. By accessing the browser’s settings, you can navigate to the clear browsing data option and select the autofill form data box. This will remove all unwanted entries from your autofill history.
On Android devices, you can also disable the autofill feature entirely or change the autofill service by going to the device settings and accessing the Autofill section. From there, you can toggle the Use Autofill with Google option off to disable it or choose a different autofill service.
Similarly, on Samsung Galaxy devices, you can adjust or add autofill forms by going to the Internet App settings and selecting the Auto fill profile or Auto-fill forms option. This will allow you to manage your autofill information and customize it to your preferences.
Autofill is a useful feature that can streamline your browsing experience, but it’s important to regularly review and delete unwanted entries to maintain accuracy and privacy. By following the provided steps, you can easily manage your autofill data and ensure a smooth and efficient browsing experience.


