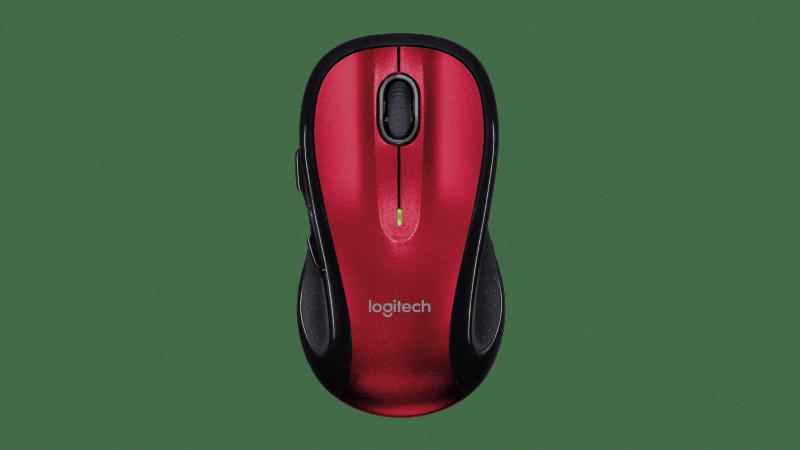
Are you tired of dealing with tangled wires whie using your mouse? If so, then a Logitech wireless mouse may be the perfect solution for you. Logitech wireless mice are great because they offer superior tracking accuracy, battery life up to 18 months and a reliable connection to your computer. Plus, they come in various sizes and styles to fit any user’s needs.
Connecting a Logitech wireless mouse is a relatively simple process. First, you will need the mouse itself and the USB Unifying Receiver that coms with it. Plug the receiver into an available USB port on your computer. Once plugged in, the receiver will automatically install any necessary drivers on your computer if needed. After this is completed, you can turn on the power switch located at the bottom of your mouse and press and hold the Easy-Switch button for 3 seconds. After this is done, the LED should start blinking rapidly indicating that it is ready to be paired with your computer.
Once connected, you can start using your Logitech wireless mouse right away! With advanced optical tracking technology for precise aiming and navigation, long-lasting battery life and a reliable connection courtesy of their 2.4GHz frequency hopping technology – Logitech wireless mice are simply amazing! Plus they come in various sizes and styles so it’s easy to find one that suits you best. So if you’re looking for an easy way to get rid of all those tangled wires while still having an accurate and reliable experience – then a Logitech Wireless Mouse might just be what you need!
Pairing a Logitech Wireless Mouse
To pair a Logitech wireless mouse, you will need to first turn the mouse over and switch it on. You should see an LED light blinking fast. If not, press and hold the Easy-Switch™ button (on bottom of mouse) for 3 seconds.
Next, locate the Bluetooth settings on your computer or mobile device and select your Logitech mouse from the available devices list. Finally, complete the pairing process by following any additional instructions provided by your device. That’s it! Your Logitech wireless mouse is now successfully paired with your computer or mobile device.

Source: logitech.com
Troubleshooting Logitech Mouse Pairing Issues
If your Logitech mouse is not pairing, there are a few possible causes. First, make sure that your mouse is in pairing mode. This is usually done by pressing the power button for several seconds until the LED light flashes. Next, check that your computer has Bluetooth enabled and that it’s in discoverable mode. Finally, check if the Logitech software is up to date and if you have installed the correct drivers for your device. If all of thee steps do not resolve the issue, then it may be necessary to reset the mouse itself or contact Logitech’s technical support for further assistance.
Getting Computer to Recognize Logitech Mouse
First, you’ll need to make sure that your Logitech mouse is properly connected to your computer. If it is, then open the Device Manager and locate the Mouse device. On the Driver tab you may see an option to ‘Roll back’ the driver – if so, try that first. If not, then you can try uninstalling the driver. To do this, restart your computer using your keyboard’s Ctrl + Alt + Del keys, then on the blue screen select the Power icon in bottom riht corner and press Enter. Then arrow down to Restart and press Enter again to reinstall the driver. Once your computer has restarted it should recognize your Logitech mouse!
Reconnecting a Logitech USB Mouse
First, make sure your Logitech USB mouse is plugged into an availale USB port on your computer. If the mouse isn’t already connected, plug it in and then power on the mouse. Then, press the “Connect” or “Pairing” button on the receiver or USB dongle that came with the mouse. This will cause a light to blink rapidly. Finally, press and hold down the pairing button located on the bottom of your Logitech mouse for 5 seconds or until you hear a click sound. Your mouse should now be successfully paired with the receiver and ready for use.
Connecting a Logitech Mouse Without a USB Connection
To connect your Logitech mouse without using a USB connection, you will need to make sure that your mouse supports Bluetooth. If it does, then you can use Bluetooth to connect it. To do this on a Windows 10 PC, go to Settings > Devices > Add Bluetooth. On your mouse, press the Connect button; the device should appear as an available Bluetooth device on your screen. Once the connection is established, you can start using your Logitech mouse without needing a USB connection.
Resetting a Logitech Wireless Mouse
To reset your Logitech wireless mouse, start by turning off the mouse. Then use a paperclip or similar item to press and hold the reset button on the bottom of the mouse for five full seconds. After releasing the button, turn your mouse back on. Your mouse should now be reset and any previous issues should be resolved.
Troubleshooting Logitech Mouse Detection Issues
Firstly, ensure that the mouse is properly connected to your computer and the USB port is working correctly. Then, try turning your mouse off and on again, as well as disconnecting and reconnecting it. If this doesn’t work, you can try using a diferent mouse or replacing the batteries. Additionally, you might want to connect the mouse to a different USB port or use it with a different computer. Finally, if all else fails, try reinstalling the Logitech Mouse drivers.
Locating the Connect Button on a Wireless Mouse
The connect button on a wireless mouse is usually located on the bottom of the device, alongside the power button. It is typically a small round button which can be easily pressed with your finger.
The Significance of Logitech Mouse Blinking Blue
The Logitech mouse is blinking blue because it is in pairing mode. When the blue light starts blinking, it means that the mouse is ready to be paired with another device, such as a computer or laptop. This allows you to use your mouse wirelessly and without any cables.
Troubleshooting Computer’s Inability to Recognize Wireless Mouse
If your computer isn’t recognizing your wireless mouse, there are a few things to check. First, make sure your mouse has power. If it has a power switch, check that it’s switched on. If the mouse requires batteries, make sure they are installed correctly and still have a charge. Second, make sure the wireless receiver is within range and not blocked by too many objects. Thirdly, try disconnecting and then reconnecting the wireless USB adapter into a different port on your computer. If none of these steps work, you may need to contact technical support for further help.
Connecting a Wireless Mouse to a Computer
To connect a wireless mouse to your computer, first press and hold the Connect button on the bottom of the mouse. Then, on your computer, open the Bluetooth software. Click the Devices tab, then click Add. Finally, follow the onscreen instructions to complete the connection process. Be sure to keep your mouse close to your computer throughout this process. Once connected, you sould be able to use your wireless mouse with ease!
Conclusion
The Logitech Wireless Mouse is a great choice for anyone looing for a reliable and efficient mouse. It’s easy to set up, with a simple switch on the bottom of the mouse and an LED indicator to show when it’s properly paired. The mouse also offers great battery life and smooth tracking, making it perfect for both work and play. With its excellent performance, reliability, and affordability, the Logitech Wireless Mouse is an ideal choice for any user.


