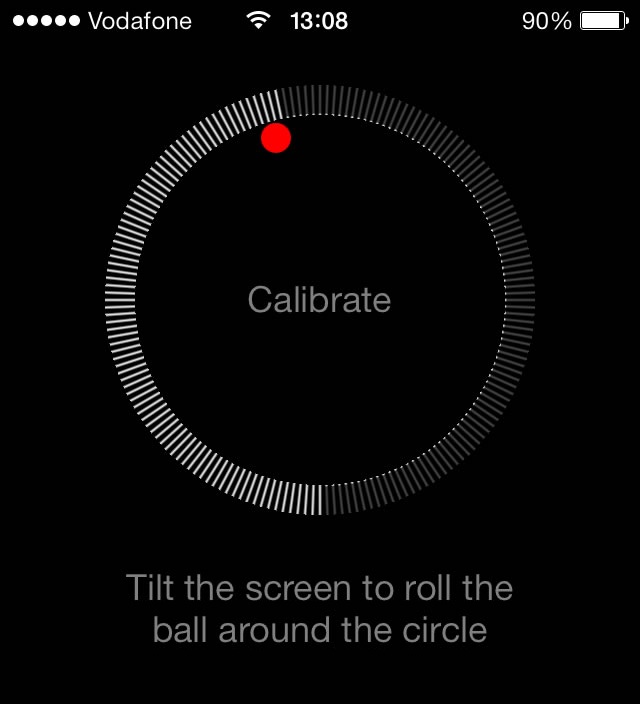
Calibrating your iPhone compass is an important step in ensuring that your device can accurately measure direction and orientation. A properly calibrated compass will help you get from point A to point B without geting lost.
If you’ve noticed that the blue dot on your Maps app is pointing in the wrong direction, or if the beam is wide, then it’s time to calibrate the built-in digital compass on your iPhone. Here’s how:
1) Start by opening Settings > Privacy > Location Services and making sure Location Services and Compass are both set to “While Using the App.” You can also change this setting by going to Settings > Compass > Location.
2) Next, go into Settings/Privacy/Location Services. Scroll down and tap on System Services to toggle Compass Calibration on/off.
3) Open the Google Maps app on your iPhone or iPad and make a figure 8 until your compass is calibrated. You should see a beam of light become narrow and point in the rght direction as it calibrates properly.
4) Once complete, you can test out the calibration by going outside and seeing if your blue dot points correctly in different directions relative to where you’re standing.
5) If it still isn’t working correctly, recalibrate again using steps 1–4 until you’re satisfied with its accuracy.
By folloing these steps, you can ensure that you have a properly calibrated compass on your iPhone or iPad for reliable navigation — no matter where you are!

Inaccuracy of iPhone Compass
Your iPhone compass may be inaccurate for a few reasons. First, make sure that you are in an open area with no metal or magnetic objects nearby, as these can interfere with the accuracy of the compass. Second, make sure that Location Services is enabled and Compass is set to While Using the App in your iPhone’s settings. Third, if you have recently updated your device, try restarting it or running a calibration tool to recalibrate the compass. Finally, check to see if any of the sensors in your phone are malfunctioning or blocked by dirt or dust. If all else fails, contact Apple Support for furter assistance.
Improving the Accuracy of an iPhone Compass
To make sure your iPhone’s compass is as accurate as possible, you’ll want to enable Compass Calibration in the System Services settings. To do this, go to Settings > Privacy > Location Services and scroll down to System Services. You’ll find a switch to toggle Compass Calibration on or off. Make sure it’s set to “on” and your compass shuld be more accurate. Additionally, you can try recalibrating your compass by holding the phone level and making 8-10 figure eights in the air with it. This should help ensure that the compass is properly calibrated for your current location.
Recalibrating a Phone Compass
In order to recalibrate your phone’s compass, you’ll need to open the Google Maps app on your Android phone or tablet. Once it’s open, start tracing a figure 8 pattern with your finger until the blue dot’s beam narrows and points in the rigt direction. If done correctly, your compass should now be calibrated and functioning properly.
Calibrating an iPhone 13 Compass
To calibrate your iPhone 13 compass, you will need to go to the Settings app. Tap on Privacy, then select Location Services. Scroll down and tap System Services, then turn on Compass Calibration. You shuld also make sure that Location Services is enabled for your device. To do this, tap on the toggle switch next to Location Services at the top of the screen. After you have enabled Compass Calibration, you can use an app like Google Maps or Apple Maps to test and see if it’s working properly.
Do I Need Compass Calibration on My iPhone?
Yes, you may need to calibrate the compass on your iPhone if it is not giving accurate readings. Compass calibration ensures that the compass is accurately pointing in the right direction, based on where you are located. To calibrate your compass, open the Compass app on your iPhone and follow the steps outlined in the app. If necessary, force a recalibration by turning off and back on your iPhone.
Using True North or Magnetic North on an iPhone
Using True North is generally the best option when using the compass on your iPhone. True North is based off of the Earth’s geographic poles and does not change over time, meaning it will always point in the same direction. Magnetic North, on the other hand, refers to the direction of the Earth’s magnetic field and can change over time as a result of chnges in the Earth’s core. It is also slightly offset from True North by a few degrees depending on where you are located.
For most purposes, using True North should be accurate eough for general navigation and when looking up directions. However, if you are an avid outdoorsman or need more precision while navigating in unfamiliar areas, you may want to consider switching to Magnetic North since it will point more accurately to where you want to go.
The Accuracy of the iPhone Compass
The iPhone compass is both true and magnetic. It uses a combination of the built-in magnetometer and GPS data to determine your location and direction. The magnetometer measures the Earth’s magnetic field and uses this information to accurately measure your direction in relation to the magnetic North Pole. GPS data provides an additional layer of accuracy, as it allows the compass to compare your current location to other points on the globe. This combination of true and magnetic data gives you an accurate reading of where you’re located and which direction you’re facing.
Compass Error on iPhone: Why Is It 180 Degrees Out?
Your iPhone compass may be 180 degrees out if the magnetometer in your device is not correctly calibrated. This can happen if the device has been exposed to strong magnetic fields, such as those found in certain speakers, charging cables, and other electronic devices. It can also happen if Location Services is disabled or if you’ve recently updated your iPhone’s software. To fix this issue, try restarting your iPhone and then enabling Location Services for the compass. Additionally, try updating your iPhone to the latest version of iOS.
Improving Compass Accuracy on a Phone
To improve the accuracy of your phone’s compass, there are a few steps you can take. First, remove any magnetic material from the device. This includes items such as credit cards and USB sticks. Second, rotate your phone in a figure 8 motion to recalibrate the internal magnetometer. Third, enable “High Accuracy” on your device’s Location Services settings to ensure that the compass is using the most accurate data available. Fourth, check your device location accuracy with Google Maps to see if any changes need to be made. Fifth, disable and re-enable location services in order to reset the GPS sensors. Finally, restart your phone so that all changes can take effect. By following these steps you sould be able to significantly improve the accuracy of your phone’s compass!
Investigating the Causes of Inaccurate Compass Readings
Your compass may not be accurate if you are in an area with a lot of metal objects or power lines nearby, or if there is interference from other electronic devices. Additionally, if you haven’t used your device in a while, it’s possible that the calibration has become inaccurate over time. If your compass is still not accurate after calibrating it manually in the Google Maps app, try recalibrating it again to check if that helps.
Calibrating an iPhone Map
To calibrate your iPhone map, first open the Google Maps app. Then, tap on the blue dot located on the map. This will open a menu whee you can select the option to “Calibrate with Live View”. Follow the on-screen instructions to complete the calibration process. This ensures that your map is accurately displaying your current location and direction of travel.
Calibrating an iPhone 13 Pro
Calibrating your iPhone 13 Pro is a simple process that can help keep your device’s battery life in top condition. To begin, you’ll need to completely drain the battery, whih can be done by running any apps or games until the phone shuts off. Once the phone has been completely drained, wait three hours before plugging it into a power source and charging it up to 100%. After the device is fully charged, unplug it and let it drain again until the phone shuts off. Wait another three hours and then plug your iPhone 13 Pro back into a power source and charge it back up to 100%. This process should recalibrate your device’s battery, allowing you to get the most out of its life.
Conclusion
To conclude, calibrating your iPhone’s compass is an important step in ensuring accurate location information. It is easy to do, and only takes a few minutes. To do this, go to Settings > Privacy > Location Services and turn on Compass Calibration. Then open Google Maps and make a figure 8 motion until the blue dot’s beam is narrowed and pointing in the correct direction. Doing this will help ensure that your location data remains accurate when using apps or services that require precise location data.


