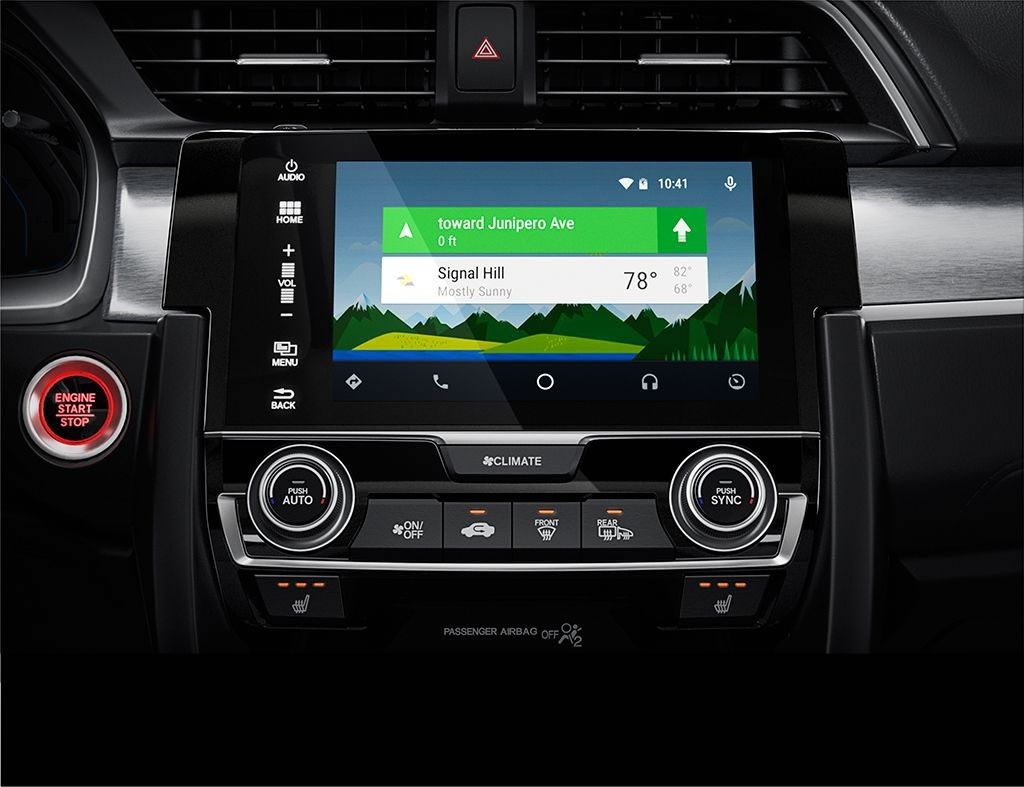
Android Auto is a feature that allows users to connect their Android devices to their car’s infotainment system, providing a more seamless and convenient experience while on the road. With Android Auto, users can access their favorite apps, navigate with Google Maps, make calls, send messages, and more, all through the car’s display.
One of the key features of Android Auto is the ability to customize the launcher, which allows users to choose which apps they want to appear on the screen. This can be done by accessing the Settings app on your Android device, going into the Connected devices section, tapping on Connection preferences, and then selecting Android Auto. From there, you can pick Customize launcher and checkmark the apps you want to show up on the screen. Additionally, you can also tap on Add shortcut to the launcher to add specific shortcuts for quick access to certain features or actions within apps.
For those who like to tinker with their Android device and explore advanced settings, the Developer options menu is a treasure trove of customization options. To access Developer options, you need to go to the Settings app, tap on About phone (or About device), and then scroll down to find Build number. Tap on Build number multiple times until a message appears saying that you have unlocked Developer options. Once unlocked, you can go back to the main Settings menu and you will find Developer options listed.
Within Developer options, there are various settings that can be adjusted to improve app performance, such as enabling USB debugging, limiting background processes, or tweaking animation scales. However, it is important to note that tinkering with these settings without proper knowledge can potentially cause issues or even render your device unusable. Therefore, it is recommended to only make changes if you have a good understanding of what each setting does and its potential impact on your device.
If you are interested in exploring even more advanced options, you can enable Developer Mode in the Android Auto app itself. To do this, open the Android Auto app on your phone, click on the hamburger icon at the top left corner to access the Settings, scroll to the bottom and tap on the Version option multiple times until Developer Mode is unlocked. Once enabled, you can access Developer settings by clicking on the kebab icon at the top right corner and selecting Developer settings.
In the Developer settings, you can find additional options that may not be available in the regular Android Auto settings. For example, you can enable “Unknown sources” to allow the installation of apps from sources other than the official Google Play Store. This can be useful if you want to try out apps or features that are not available through the regular channels.
Android Auto and its developer options provide a range of customization and performance optimization possibilities for users who like to delve into the inner workings of their Android devices. However, it is important to exercise caution and only make changes if you have a good understanding of the potential consequences.
What Does Developer Mode Do on an Android?
Developer mode, also known as Developer options, is a hidden menu on Android devices that provides advanced settings and options for developers to optimize their apps and improve overall system performance. By enabling developer mode, users gain access to a range of features and settings that are not typically available to regular users.
Here are some of the key functionalities and benefits of developer mode on Android:
1. USB Debugging: This option allows developers to establish a direct connection between their device and a computer for debugging purposes. It enables them to test and troubleshoot their apps more efficiently by analyzing log files and running debugging tools.
2. Mock Locations: With this option, developers can simulate different GPS locations on their device, which is useful for testing location-based apps or services without physically moving around.
3. Stay Awake: This feature prevents the device from going into sleep mode while it is connected to a charger or computer. It is particularly helpful for developers who need to keep the screen on during extended testing or debugging sessions.
4. Show Touches: Enabling this option displays a visual indicator on the screen whenever the user touches it. This is useful for developers to create instructional videos or provide demonstrations of app functionality.
5. Enable GPU Rendering: By enabling GPU rendering, developers can force the device to use the graphics processing unit (GPU) instead of the CPU for rendering graphics and animations. This can lead to improved performance in certain scenarios.
6. Limit Background Processes: This setting allows developers to limit the number of background processes running on the device, which can help identify and resolve performance issues caused by resource-intensive apps.
7. Debugging Over Wi-Fi: This option enables developers to connect their device to a computer for debugging purposes without using a USB cable. It allows for greater flexibility and convenience when testing apps wirelessly.
8. Show CPU Usage: Enabling this option displays real-time CPU usage information on the screen. It helps developers monitor and optimize their app’s resource consumption, ensuring efficient performance.
9. Force RTL Layout Direction: This feature allows developers to test how their app handles right-to-left (RTL) languages, such as Arabic or Hebrew. It flips the screen layout and text direction to simulate RTL locales.
10. Enable OEM Unlocking: This option allows the bootloader of the device to be unlocked, which is essential for rooting the device or installing custom ROMs. However, this should be done with caution, as it may void the device’s warranty and pose security risks.
Remember that developer options are intended for advanced users and developers who understand the implications of changing these settings. It’s important to exercise caution and only modify settings if you have the necessary knowledge and expertise.

Is It Safe to Enable Developer Mode in Android?
Enabling developer mode in Android can be both safe and risky, depending on how you use it and the actions you take within it. Here are the key points to consider:
1. Benefits of Developer Mode:
– Access to advanced settings: Developer options allow you to tweak various system settings that are not normally accessible. This can be useful for advanced users, developers, or those who want to customize their device extensively.
– Debugging tools: Developer options provide tools for debugging and troubleshooting Android apps. This can be helpful for app developers or if you encounter issues with certain applications.
– Performance optimization: Some developer options can be used to optimize system performance, such as enabling GPU rendering or adjusting animation scales.
2. Risks and Cautionary Measures:
– Bricking your device: Changing certain settings without proper knowledge can potentially brick your device, rendering it unusable. It’s important to exercise caution and avoid toggling settings that you are not familiar with.
– Security risks: Enabling certain options, such as USB debugging, can make your device more vulnerable to unauthorized access. It is recommended to only enable these options when necessary and disable them when not in use.
– Impact on device stability: Making incorrect changes in developer options can lead to system instability, crashes, or decreased performance. It’s advisable to research and understand the implications of any modifications you make.
3. Precautions to Take:
– Educate yourself: Before enabling developer options, it’s essential to understand what each setting does and the potential consequences of changing it.
– Proceed with caution: Only modify settings that you are confident about and have a clear understanding of their impact.
– Backup your data: It’s always a good practice to back up your important data before making any changes that could potentially affect the stability of your device.
– Disable options when not needed: If you enable certain options temporarily, remember to disable them once you have completed the intended task to minimize security risks.
Enabling developer mode in Android can be safe if approached with caution and knowledge. It provides access to advanced settings and debugging tools, but improper use or modifications can lead to device issues. As long as you are aware of the potential risks and take necessary precautions, exploring developer options can enhance your Android experience.
How Do You Enable Apps on Android Auto?
To enable apps on Android Auto, follow these steps:
1. Launch the Settings app on your Android device.
2. Scroll down and tap on “Connected devices.”
3. From the list of options, tap on “Connection preferences.”
4. Look for and select “Android Auto.”
5. In the Android Auto settings, find and tap on “Customize launcher.”
6. Here, you will see a list of apps that are compatible with Android Auto.
7. To enable an app, simply checkmark the box next to it. This will allow the app to appear on the Android Auto screen.
8. If you want to add a shortcut directly to the launcher, tap on “Add shortcut to launcher.”
9. This will give you the option to select any additional apps you want to include in the launcher.
10. Once you have checked all the apps you want to enable, exit the settings.
Now, when you connect your Android device to your car’s Android Auto system, the enabled apps will be visible and accessible on the Android Auto screen.
How Do You Enable Unknown Sources on Android Auto?
To enable unknown sources on Android Auto, you will need to follow these steps:
1. Open the Android Auto app on your phone by clicking on the hamburger icon located at the top left corner of the screen.
2. In the side menu that appears, scroll down to find the “Settings” option and tap on it.
3. Once you are in the Settings menu, scroll all the way down to the bottom until you see the “Version” option.
4. Tap on the “Version” option about 10 times consecutively. This will unlock the Developer Mode in Android Auto.
5. After unlocking Developer Mode, click on the kebab icon (three vertical dots) located at the top right corner of the screen.
6. In the menu that appears, select the “Developer settings” option.
7. Scroll down within the Developer settings menu until you find the “Unknown sources” option.
8. Enable the “Unknown sources” option by tapping on the toggle switch next to it.
9. Exit the Android Auto app completely by closing it from the recent apps or by restarting your phone.
10. Re-open the Android Auto app, and now you should have the “Unknown sources” option enabled, allowing you to install apps from sources other than the Google Play Store.
Please note that enabling unknown sources can pose security risks, as it allows the installation of apps that are not verified by Google. It is recommended to exercise caution and only install apps from trusted sources.
Conclusion
Android Auto is a powerful and convenient tool that allows users to seamlessly integrate their Android devices with their vehicles. It offers a wide range of features and functionalities, including navigation, media playback, messaging, and voice commands, all designed to enhance the driving experience and ensure safety on the road.
With its intuitive interface and hands-free operation, Android Auto provides easy access to essential apps and services while minimizing distractions. It allows users to stay connected and entertained while keeping their focus on the road.
Furthermore, Android Auto can be customized to suit individual preferences and needs. The Developer options menu provides advanced settings and configurations that can optimize app performance and enhance functionality. However, it is crucial to exercise caution and have proper knowledge before making any changes in the Developer options, as incorrect settings can potentially damage your device.
Android Auto is a valuable tool for anyone who wants to make their driving experience safer, more convenient, and more enjoyable. With its seamless integration, extensive features, and customizable options, it has become an essential part of modern vehicle technology.


