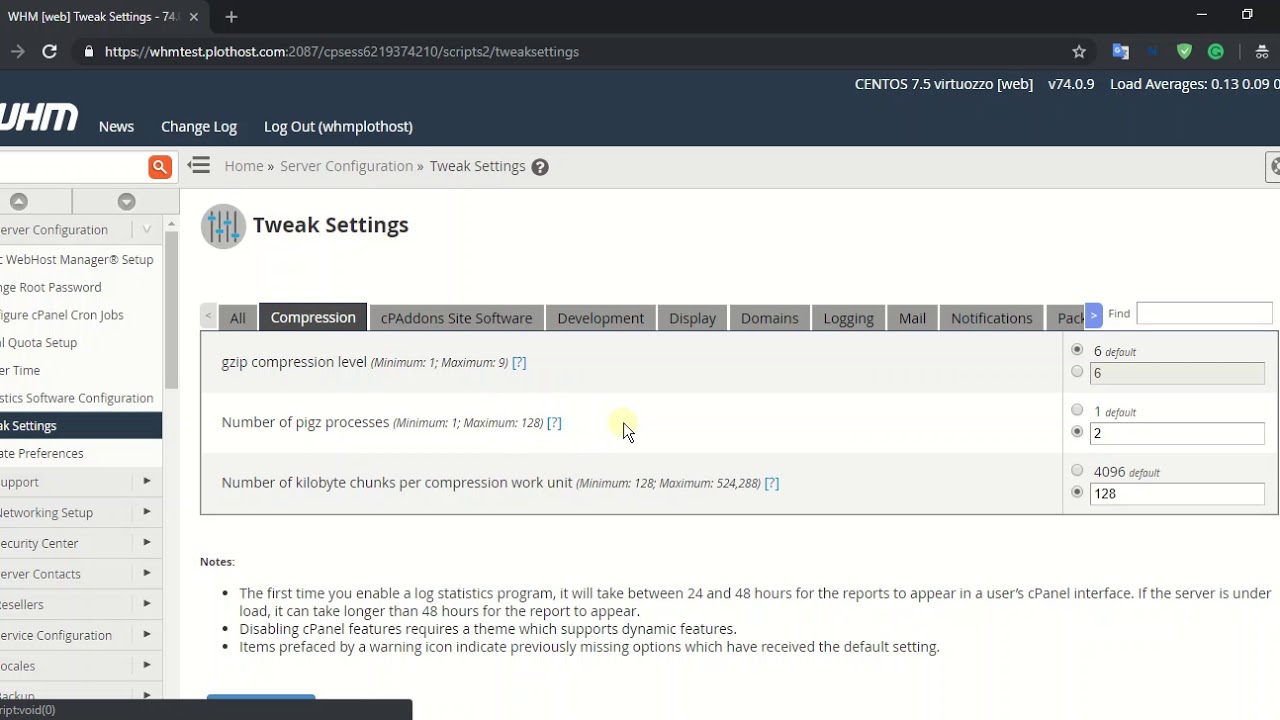
In the world of website hosting, server performance is key to ensuring a smooth and efficient experience for both website owners and visitors. One way to enhance server performance is by making use of tweak settings, which allow you to configure various aspects of your cPanel & WHM server.
Tweak Settings, found in WHM’s Security Center, offers a wide range of options that can be adjusted to optimize your server’s performance. In this article, we will focus on the Domains section of Tweak Settings, which relates specifically to the management of domain names and subdomains on your server.
To access Tweak Settings, go to WHM Home >> Security Center >> Security Advisor, and then select the “Security Advisor Tool”. From there, click on the “scan” button to start the scan. Once the scan is complete, you can proceed to make changes in Tweak Settings.
Let’s dive into the Domains section of Tweak Settings and explore some of the options you can tweak to improve your server’s performance:
1. Service Subdomains:
Enabling this option allows you to create service subdomains for various server services like cPanel, WHM, and webmail. By creating service subdomains, you can access these services easily using a subdomain URL (e.g., cpanel.yourdomain.com). This can help streamline access to essential server functionalities and enhance user experience.
2. Service Subdomain Creation:
Enabling this setting allows the automatic creation of service subdomains whenever a new account is created on the server. This eliminates the need for manual setup of service subdomains for each new account, saving time and effort for system administrators.
By enabling both the Service Subdomains and Service Subdomain Creation settings, you can ensure seamless access to server services for yourself and your clients.
It is important to note that while these settings can enhance server performance, they may not be suitable for every hosting environment. Carefully consider the needs of your server and the preferences of your clients before making any changes.
Remember, tweak settings should be adjusted with caution, as incorrect configuration can lead to unintended consequences or even server instability. It is recommended to consult with a knowledgeable system administrator or your hosting provider before making any significant changes.
Tweak Settings in cPanel & WHM offer a range of options to optimize your server’s performance. Specifically, the Domains section allows you to configure service subdomains, making it easier to access essential server services. However, it is crucial to approach these settings with care and seek professional advice if needed.
By taking the time to fine-tune your server’s configuration, you can ensure a smoother and more efficient hosting experience for yourself and your clients. So, go ahead and explore the Tweak Settings in WHM to maximize your server’s performance potential.

What is Tweak Setting?
Tweak Settings is a feature in cPanel and WHM that offers a wide range of configuration options for various aspects of your hosting environment. In particular, the Domains section within Tweak Settings focuses on settings related to domain names and subdomains on your server. These settings allow you to manage and customize the behavior of domains and subdomains hosted on your server.
Here are some of the key options available in the Domains section of Tweak Settings:
1. “Allow users to park subdomains of the server’s hostname”: Enabling this option allows users to park subdomains of the server’s hostname on their accounts. This can be useful if you want to allow users to create subdomains based on your server’s main domain name.
2. “Allow cPanel users to create subdomains across accounts”: Enabling this setting allows cPanel users to create subdomains that span across multiple accounts on the server. This can be helpful if you want to allow users to create subdomains that are not limited to their own account.
3. “Allow users to create top-level domains (TLDs)”: This option permits cPanel users to create domains with TLD extensions such as .com, .net, etc. Enabling this setting can be beneficial if you want to give users the ability to create their own top-level domains.
4. “Update document root”: When a subdomain is created, enabling this option updates the document root to match the subdomain name. This means that the subdomain will have its own separate directory for files, providing better organization and management.
5. “Proxy subdomains”: Enabling this setting allows proxy subdomains to function on the server. Proxy subdomains can be used to redirect traffic to other servers or services, enhancing the flexibility and scalability of your hosting environment.
These are just a few examples of the many domain-related settings available in Tweak Settings. By adjusting these configurations, you can tailor your hosting environment to meet your specific requirements and optimize the management of domains and subdomains on your server.

Where is Tweak Setting in CPanel?
In cPanel, the tweak settings can be found in the “Server Configuration” section. To access this, follow these steps:
1. Log in to your cPanel account.
2. Scroll down to the “Server Configuration” section.
3. Click on the “Tweak Settings” icon.
Alternatively, you can also use the search bar at the top of the cPanel interface to quickly find the “Tweak Settings” option.
Once you click on the “Tweak Settings” icon, you will be redirected to the Tweak Settings page. This page contains various categories and subcategories of settings that you can modify to customize your cPanel environment.
The Tweak Settings page is divided into multiple sections, such as:
1. System: This section includes settings related to system behavior and functionality, including PHP settings, email notifications, and server resources.
2. Domains: Here, you can manage settings related to domains, such as domain lookup behavior, domain parking, and subdomain settings.
3. Mail: This section allows you to configure settings for email accounts, spam filters, and mail delivery.
4. Security: In this section, you can enable or disable various security features, including password strength requirements, secure FTP (SFTP), and security tokens.
5. Stats and Logs: Here, you can manage settings related to website statistics and logs, including log rotation, bandwidth usage tracking, and statistics software configuration.
6. Notifications: This section allows you to configure notifications for various events and activities within your cPanel account.
7. FTP: Here, you can set up FTP-related settings, including anonymous FTP access and FTP session control.
8. SQL: This section includes settings related to MySQL and PostgreSQL databases, including database prefixing and remote database access.
9. PHP: Here, you can configure PHP-related settings, including PHP version, PHP extensions, and PHP error handling.
10. Software: This section allows you to manage various software settings, such as script installation, update preferences, and software module installations.
Within each section, you will find multiple options and checkboxes that you can modify according to your requirements. Make sure to read the descriptions and tooltips provided for each setting to understand their impact before making any changes.
Remember, tweaking settings in cPanel should be done with caution, as incorrect modifications can potentially affect the functionality and security of your website or server.
How Do You Optimize Your WHM Server?
To optimize your WHM server, you can make certain tweaks and adjustments to enhance its performance. Here is a detailed list of changes you can make:
1. Enable/Disable Services:
– Disable unnecessary services that are not being used to free up system resources.
– Enable essential services required for your server’s functionality.
2. PHP Configuration:
– Optimize PHP settings by adjusting memory_limit, max_execution_time, and other related parameters based on your server’s requirements.
– Enable opcode caching, such as APC or OPcache, to improve PHP performance.
3. MySQL Configuration:
– Adjust the MySQL configuration file (my.cnf) to optimize its performance.
– Modify settings like innodb_buffer_pool_size, query_cache_size, and max_connections to suit your server’s needs.
4. Apache Configuration:
– Fine-tune Apache settings by adjusting the MaxClients, KeepAliveTimeout, and other relevant directives.
– Enable HTTP compression and caching to reduce bandwidth usage and improve page load times.
5. Security Settings:
– Regularly update the server’s software and plugins to ensure they are up to date.
– Implement a firewall and configure it to only allow necessary incoming and outgoing connections.
– Enable security modules like mod_security to protect against common web vulnerabilities.
6. DNS Configuration:
– Ensure that your DNS resolver configuration is optimized for performance.
– Consider using a caching DNS server or DNS cluster for better DNS resolution times.
7. Disk Optimization:
– Utilize RAID configurations or solid-state drives (SSD) for improved disk I/O performance.
– Regularly monitor disk usage and clean up unnecessary files to free up disk space.
8. Monitoring and Logging:
– Set up server monitoring tools to keep track of resource usage and identify any bottlenecks.
– Enable logging for various services to troubleshoot issues and analyze server performance.
Remember, before making any changes, it is crucial to have a backup of your server and consult with a system administrator or experienced professional. Optimization may vary depending on your server’s specific requirements and workload.
How Do You Enable Subdomains in WHM?
To enable subdomains in WHM, follow these steps:
1. Log in to WHM (Web Host Manager) using your credentials.
2. Navigate to the “Server Configuration” section.
3. Click on “Tweak Settings”.
4. In the Tweak Settings interface, you will find various options. Look for the “Domains” section.
5. Enable the “Service subdomains” option by checking the box next to it.
6. Additionally, enable the “Service subdomain creation” option to allow the creation of service subdomains.
7. Once you have enabled these options, click on the “Save” button to apply the changes.
By enabling these settings, you will have the ability to create and use subdomains on your WHM server.
Conclusion
Tweak settings play a crucial role in optimizing server performance and enhancing the overall efficiency of domain management. By accessing the Tweak Settings interface in WHM, system administrators can have granular control over various aspects of domain and subdomain creation.
Enabling service subdomains is a recommended practice for cPanel & WHM version 76 and later. This feature allows for the creation of subdomains specifically dedicated to hosting essential services, improving organization and making it easier to manage multiple domains.
Additionally, the service subdomain creation setting further enhances control by enabling or disabling the creation of service subdomains. This ensures that only necessary subdomains are created and unnecessary ones are avoided, reducing clutter and potential security risks.
By making changes to these tweak settings, server administrators can optimize server performance, streamline domain management, and enhance security. However, it is essential to exercise caution and make changes at your own responsibility, as improper configuration may lead to undesired consequences.
Tweak settings provide a valuable tool for system administrators to fine-tune domain management and improve server performance. By utilizing these settings effectively, server administrators can create a more efficient and secure environment for hosting domains and subdomains.


