Are you ready to switch to a new iPhone? If so, you’re probably wondering how to transfer your email accounts and messages over to the new device. Don’t worry – it’s easy! Here’s a step-by-step email migration guide on how to transfer email accounts to a new iPhone during the initial setup for your new iPhone!
Preparing Your Old iPhone
First, let’s start with preparing your old iPhone. You’ll need to make sure that you know your email account information. Start by gathering your email settings – which email service are you using (Gmail, Yahoo, etc.), and what is your username and password?
You will also need access to the phone number or email address you set up with two-factor authentication, if you enabled that for Gmail, iCloud, or any other service provider. If you don’t have access, go to your security settings for your iCloud, Gmail, or any other email account and either add a different number or disable 2FA.
Once you have that information, you are ready to start transferring your emails.
Setting Up Email Accounts on the New iPhone
Now, it’s time for the email setup on your new iPhone.
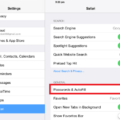
- Start by going to your email settings. Go to Settings > Mail to find them.
- Then, click on Accounts and then on Add Account.
- Select the email service provider you want to use, or click on Other if you can’t see it.
- Enter your email address and password.
- Enter the 2FA code you receive, if you enabled 2FA.
It’s that simple!
Using Email Provider Apps
You can also download third-party email provider apps, like the Gmail or Yahoo Mail app, if you want to use your service provider’s proprietary app instead of the iPhone’s built-in Mail app. The Gmail/Yahoo/Outlook app setup – or the setup for any email app – is pretty much the same across the board. Just find the app in the App Store and download it. Then, enter your email address and password, and you will be ready to go!
If you set up two-factor authentication, you may also need to receive enter the confirmation code you received.
Syncing Email Accounts
By default, your email app will populate with old emails and fetch new data that arrives. Automatic email sync is enabled by default. However, you may be able to adjust your email sync settings later and turn it off, depending on the app you are using. It’s not advisable to do so, though, as you will miss out on email notifications
Troubleshooting Email Transfer Issues
If you are facing email transfer issues, it’s usually due to syncing problems. This is usually caused by a poor internet connection, if you are just setting up the app for the first time. So, start by troubleshooting your internet connection.
You also need to check that you have signed in to the same account! Some people mistakenly sign in to another email account they have and then have trouble finding the specific email they were looking for.
Restoring Email from Backup
On an iPhone, you don’t need to manually restore emails from a backup. Email recovery is as simple as logging into your account. All major email service providers keep a backup of the emails in the cloud, so when you log into your account on a new device, you will see them. On desktop, though, some email service providers, like Outlook, allow you to manually export or import emails to and from a file.
Regular Maintenance for Optimal Performance
Some email service providers only keep emails for a certain period of time. In addition, some email providers only give you a limited amount of storage space. It’s important to clear old emails to ensure you have enough space for your emails.
In addition, once we are on that topic, it’s a good idea to follow iPhone storage management best practices, such as deleting unused apps and uploading images to cloud storage solutions, to ensure your phone has enough space for everything.
Conclusion
We hope you managed to perform a successful email transfer and a seamless email migration during your new iPhone setup. Fortunately, it’s rather easy – it’s as simple as signing in to the same account with your email address and password. Every major email service provider keeps a copy of your emails in the cloud, so they will be restored to your new device automatically.



I will immediately grasp your rss feed as I can’t in finding your email subscription link or newsletter service. Do you’ve any? Please let me understand so that I may subscribe. Thanks.