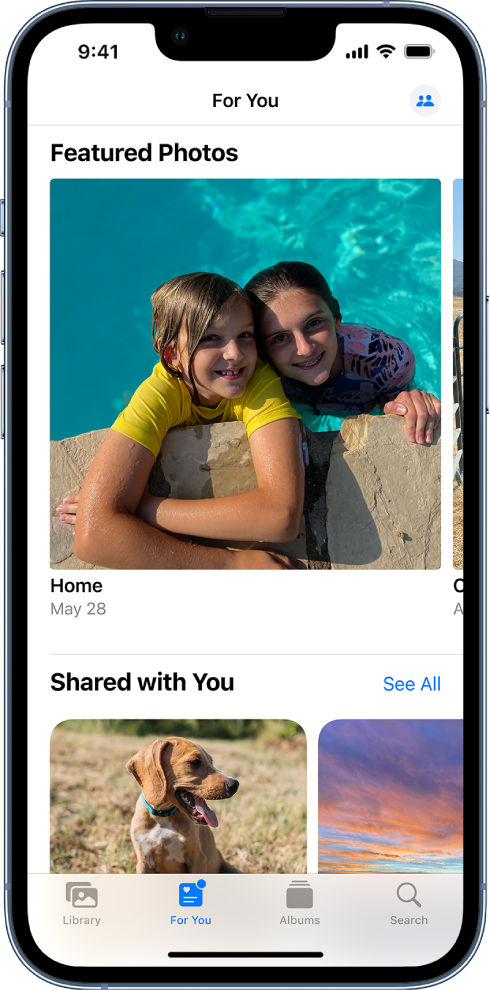
Shared Photos, also known as Shared Library, is a convenient feature offered by Apple that allows you to share your photo albums with selected individuals or your entire family. It enables you to easily share and view photos across multiple devices, making it a great tool for keeping everyone connected and updated with the latest memories. However, if you no longer wish to share your photos or want to disable this feature, here’s a step-by-step guide on how to turn off Shared Photos on your Apple devices.
To begin, open the Settings app on your iPhone, iPad, or iPod touch. Scroll down and tap on “Photos.” In the Photos settings, you’ll find an option called “Shared Library.” Tap on it.
Within the Shared Library settings, you’ll see the option to “Leave Shared Library.” By tapping on this, you are essentially removing yourself from any shared albums or libraries that you were previously part of. Keep in mind that leaving a shared library means you will no longer have access to the photos shared within it, and others won’t have access to your shared photos either.
After leaving the Shared Library, go back to the main Settings screen and tap on your Apple ID, located at the top of the settings menu. From there, select “Family Sharing.”
Within Family Sharing settings, you’ll see a list of all the family members who are part of your shared group. Find your name on the list and tap on it.
In your personal Family Sharing settings, you’ll find an option to “Stop Family Sharing.” Tap on it to proceed. This action will remove you from the family group and cease sharing any content, including shared photos, with other family members.
Now that you have disabled Family Sharing, you can go back to the main Settings screen and navigate to your iCloud settings. Tap on your name, then select “iCloud” from the list of options.
Within the iCloud settings, locate and tap on “Photos.” Here, you’ll find the option to enable or disable “Shared Albums.” By turning on this feature, you can continue to create and manage shared albums with specific individuals or groups. However, if you wish to completely turn off shared albums, simply toggle the switch to the off position.
By following these steps, you can easily disable Shared Photos and remove yourself from any shared libraries or family groups. Remember that disabling Shared Photos will prevent you from accessing shared albums and sharing your own photos with others. However, you can always re-enable this feature in the future if you change your mind.
It’s important to note that the steps provided may vary slightly depending on your device’s iOS version. However, the general process should remain similar across different versions.

How Do You Turn Off Shared Photos On Your iPhone?
To turn off shared photos on your iPhone, follow these steps:
1. Open the Settings app on your iPhone.
2. Scroll down and tap on “Photos”.
3. In the Photos settings, look for the option called “Shared Albums” or “Shared Photo Library” and tap on it.
4. On the next screen, you will see a list of shared albums or libraries that you are a part of.
5. To leave a shared album or library, tap on the album or library name that you want to turn off.
6. Inside the album or library, you will find an option to “Leave Shared Album” or “Leave Shared Library”. Tap on this option.
7. A confirmation prompt will appear, asking if you want to leave the shared album or library. Tap on “Leave” to confirm your action.
8. Once you leave the shared album or library, you will no longer have access to the shared photos and they will be removed from your device.
By following these steps, you will be able to turn off shared photos on your iPhone and remove yourself from any shared albums or libraries.
How Do You Turn Off Family Sharing Photos?
To turn off family sharing for photos, follow these steps:
1. Open the Settings app on your device.
2. Scroll down and tap on your name or Apple ID at the top of the screen.
3. In the next screen, you’ll see various options related to your Apple ID. Look for the “Family Sharing” option and tap on it.
4. On the Family Sharing page, you’ll see a list of family members who are part of the sharing group. Tap on your own name from the list.
5. In the next screen, you will find a switch labeled “Photos” with a green color indicating it’s currently enabled. Tap on this switch to turn it off.
6. A pop-up message will appear asking if you want to stop sharing your photos. Confirm your choice by tapping on the “Stop Sharing” button.
By following these steps, you will successfully turn off family sharing for photos. This means that your photos will no longer be accessible to other family members in your sharing group.
How Do You Turn On Shared Photos On Your iPhone?
To enable shared photos on your iPhone, iPad, or iPod touch, follow these steps:
1. Open the Settings app on your device. It can be identified by the grey gear icon.
2. Look for your name or Apple ID at the top of the Settings menu and tap on it. This will take you to your Apple ID settings.
3. In the Apple ID settings, you will see an option called “iCloud”. Tap on it to proceed.
4. Scroll down and locate the “Photos” option. Tap on it to access the photo settings within iCloud.
5. Within the Photos settings, you will find a toggle switch labeled “Shared Albums”. Make sure this switch is turned on by tapping on it. When enabled, it will turn green.
Once you have turned on the Shared Albums feature, you can start creating and sharing albums with friends and family. You can invite others to view and contribute to these shared albums by tapping on the “People” tab within the album and selecting the “Invite People” option.
In addition to enabling Shared Albums, you can also customize other photo-related settings within iCloud, such as optimizing device storage, enabling My Photo Stream, and more. Feel free to explore these options to enhance your photo-sharing experience.
Remember, turning on Shared Albums will allow you to share your photos with others and view photos shared by them. Make sure you have a stable internet connection and enough iCloud storage space to accommodate the shared photos.
Conclusion
Shared Photos is a convenient feature that allows you to easily share and access photos with others. By enabling Shared Albums in your iCloud settings, you can create albums that can be shared with specific people or made available to anyone with the album link. This makes it easy to collaborate on photo collections, share memories with friends and family, or simply access your photos from multiple devices.
Additionally, the Shared Library feature allows you to share your entire photo library with selected individuals, giving them the ability to view, like, and comment on your photos. This is particularly useful for keeping loved ones updated on important events or simply sharing moments of joy with those who are far away.
If, however, you find that you no longer wish to be a part of someone else’s Shared Library or Family Sharing, you can easily leave these settings. By going to your device’s Settings and accessing the respective options, you can stop sharing your photos or exit from Family Sharing altogether.
Shared Photos is a fantastic feature for enhancing collaboration, communication, and sharing among friends and family. It provides a seamless way to connect through photos and memories, making it a valuable addition to the iCloud ecosystem.


