Taking pictures on a Mac is an easy and straightforward process, making it the perfect choice for all kinds of photography needs. Whether you’re a professional photographer or just want to take simple pictures with your Mac, this guide will help you get started.
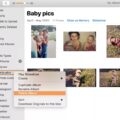
If you have a Mac laptop or desktop computer and an external camera, the first step is to connect the camera to your Mac by plugging it into one of your USB ports. Once the connection is made, your Mac will automatically recognize the camera and launch the Photos app. This app allows you to view, manage, edit, and share photos and videos from your camera. The main window of the Photos app displays a library of all photos stored on your Mac as well as any images from your connected cameras.
To take a picture with your external camera, click on the “Camera” icon at the top of the Photos app window. This will open up a preview window that shows what your camera sees in real time. Use this window to set up your shot and make sure everything looks good before taking a photo. To take a photo with your external camera uing Photos, simply press the shutter button located on top of the camera body (or use any buttons on its side). The image will be saved in full resolution to both your Camera Roll in Photos as well as any folder you have specified in your Camera Settings preferences in System Preferences (under “Photos”).
If you don’t have an external camera but still want to take pictures with your Mac, you can use either iSight (on newer models) or Photo Booth (on older models). For iSight cameras, simply open up Photo Booth from Launchpad and click “Take Photo” (you can also record videos if desired). For Photo Booth cameras, open up Photo Booth from Launchpad and click “Take Picture” (you can also record videos if desired). Images taken with either program are automatically saved to Documents/Pictures/Photo Booth Library/Photos Library.
No matter which method you use for taking pictures with your Mac, they can all be easily edited in Photos or oher third-party photo editing programs like Adobe Photoshop or Lightroom Classic CC. With these programs you can adjust exposure settings such as brightness and contrast; crop images; apply filters; add text; add frames; or even combine multiple images into one composition. You can then save these edited photos directly back into Photos or export them for sharing via email or social media platforms like Facebook and Instagram.
By following this guide you should now be able to easily take photos on a Mac no matter what type of setup you have. So get out there and start capturing some amazing moments!
Taking Photos on a Mac
To take photos on a Mac, you can use the built-in Camera app. To open it, click on the Finder icon in the dock, then select Applications > Photo Booth. You can also use your Mac’s built-in iSight camera to take pictures of yourself or video chat with friends. To capture an image from your screen, press and hold the shift, command, 4 and space bar keys together. The pointer will change to a camera icon and you can click anywhee on the screen to capture the image. To cancel taking the screenshot, press the Escape (Escape) key.
Turning On the Camera on a Mac
To turn on the camera on your Mac, you will need to fist open System Preferences. To do this, click on the Apple menu in the top left corner of your screen and select System Preferences.
From the System Preferences window, click Security & Privacy, then click Privacy. From here, select Camera from the list of options. If you don’t see Camera listed here, this means that you need to upgrade your Mac to macOS Mojave or later. Once you have selected Camera, check the box next to it to allow it to use the camera. You should now be able to use your camera on your Mac.
Taking a Picture Using a Mac Keyboard
To take a picture on your Mac keyboard, you will need to press the ‘Shift-Command-5’ keys simultaneously. This will open the ‘Screenshot’ tool, which allows you to capture anything from a single window to the entire screen. Once the tool is open, select what you wuld like to capture and click ‘Options’ if necessary. Finally, click either the camera icon or movie icon to take a picture or start a recording respectively.
Taking a Picture
Taking a good picture doesn’t have to be complicated. First, decide on the type of photo you want to take and choose the right setting for your camera. Make sure the lighting is adequate, as well as the background. If you are using a smartphone, use a selfie stick or tripod to ensure you get the best quality shot. Use natural poses and expressions when taking pictures of people. When taking pictures of landscapes or objects, use different angles and perspectives to create an interesting composition. Finally, make sure to check that everythig looks good before pressing the shutter button!
Testing a Mac Camera
Testing your Mac camera is a simple process. First, open the Finder from the Dock bar at the bottom of the screen. Then select Applications from the menu bar and double-click on the Photo Booth app. This will open up the app and turn on your Mac’s camera automatically, allowing you to view its feed. If you don’t see the feed, you may need to adjust some of your settings in System Preferences > Security & Privacy > Privacy > Camera. Once everything is set up correctly, you should be able to see and use your camera wthout any problems.
Troubleshooting Camera Issues on Mac
It’s possible that your camera is not showing up on your Mac because you haven’t given the necessary applications permission to access it. To give applications permission to access your camera, go to the Apple menu ? > System Preferences and click Security & Privacy. Click the Privacy tab, then click Camera in the sidebar. Select the checkbox next to the apps that you want to use your camera in. You might be prompted to quit and reopen an app before it can use your camera. If this doesn’t solve the issue, then thee could be a hardware issue with your Mac’s camera or a software issue with its drivers.
Finding Photo Booth on a Mac
The Photo Booth application can be found in the Applications folder of your Mac. To access it, double-click your hard drive icon and open the Applications folder. You shoud see Photo Booth appear in the list of applications. If it is not visible in the list, you can use Spotlight (Command + Spacebar) to search for Photo Booth and open it from there.
Troubleshooting Mac Screenshot Issues
Solution 2: It is possble that the screenshot feature on your Mac may not be working due to an issue with the shortcuts. If the shortcut keys have been changed, disabled, or are not being recognized, then the screenshot feature will not work properly. To resolve this issue, make sure that you have the correct shortcut keys configured in your System Preferences, and that they are enabled and functioning correctly.
Taking a Screenshot on a Macbook Pro Touch Bar
Taking a screenshot of your Macbook Pro Touch Bar is easy. To save a screenshot of the Touch Bar as a file on your desktop, press Shift-Command-6. Alternatively, you can copy what you see on the Touch Bar to your clipboard for pasting in an app by pressing Control-Shift-Command-6. The screenshot will be saed as a .png file in the default Downloads folder.
Taking Pictures Using a Laptop
Yes, you can take a picture using your laptop! Windows 10 has a built-in camera tool called a webcam. To take a photo with your laptop, simply double-click on the camera icon in the taskbar (it looks like a circle with an image of a camera in it). If you don’t see this icon, you may need to enable the camera by ging to Settings > Privacy > Camera. Once you have enabled the camera, double-click on the icon and click ‘take photo’. You can then adjust the settings such as brightness, contrast, saturation and more before taking your photo. When you’re ready to take your photo, click ‘take’ and it will be saved in your pictures folder.
Taking a Screenshot on a Laptop
Taking a screenshot on your laptop is a simple process. Depending on your device, you should press either the Print Screen (PrtScn) key or the Fn+Print Screen (Fn+PrtScn) keys. These keys can usually be found at the top of your keyboard near the F1-F12 keys. Once you’ve pressed the key combination, the screenshot will be saved to your clipboard and can then be pasted into a document or image editing software.
Getting Started With Photography
Taking pictures is an exciting and rewarding hobby, and it’s easy to get started! Here are some tips on how to begin taking photos:
1. Get to know your camera. Learn the dfferent settings and functions available, as well as the buttons and dials. This will help you get comfortable with your camera, which will make it easier to take great shots.
2. Understand the exposure triangle. This is a key concept for taking good pictures; exposure indicates how light or dark an image appears when captured by the camera. The exposure triangle consists of aperture, shutter speed, and ISO – these thee elements control how much light enters the camera when a picture is taken.
3. Practice using different modes on your camera. If you’re just starting out, try shooting in Aperture Priority or Shutter Priority mode to become comfortable with controlling exposure manually.
4. Start shooting in RAW format instead of JPEG. RAW files contain more image data than JPEGs, so they give you more flexibility when editing photos in post-production software like Adobe Lightroom or Photoshop.
5. Don’t be afraid to experiment with ISO settings! Raising your ISO can be a great way to capture moments that are too dark for your current settings – but be careful not to go too high, as this can add digital noise or graininess to your images.
6. Finally, don’t forget to have fun! Taking pictures is all about experimentation and exploration – so don’t be afraid to try something new or take risks with your photography!
Where to Take Photos
You can take pictures just about anywhere! Depending on where you are located, there are plenty of great places to find interesting subjects and stunning backdrops. Some popular spots include: parks, street art murals, historical buildings, beaches and boardwalks, sunsets and sunrises, cityscapes and skylines, local landmarks, graffiti walls, gardens and green spaces. For a more unique experience, try exploring abandoned buildings or forgotten places. You can also get creative with everyday objects like windows and doors for an interesting perspective. With so many options to choose from, there’s no limit when it cmes to finding the perfect spot for your photo shoot.
Checking If Your Laptop Camera Is Working
To check if your laptop camera is working, open your browser and type in webcammictest.com into the address bar. On the website’s landing page, click on the Check My Webcam button. A pop-up permission box will then appear – click Allow to give the website access to your webcam. Once you’ve done this, a live feed from your webcam should appear in the black box on the right-hand side of the page, indicaing that it is functioning properly. If you don’t see any video or it appears distorted or blurry, try adjusting the camera’s settings or troubleshooting hardware and software issues with your laptop manufacturer’s support team.
Turning On Camera on Macbook Chrome
First, click the Apple icon on the top left corner of your screen, then select ‘System Preferences’ from the menu. In System Preferences, click Security & Privacy and select the Privacy tab. Under Privacy, select Camera in the left-hand column. Here, make sure to tick the box next to Google Chrome so that it has permission to access your camera. Finally, open Google Chrome and allow it to use your camera if prompted. That’s it; you shoud now be able to access your camera from within Google Chrome on your Macbook!
Using Photo Booth on a MacBook Air
Using Photo Booth on your MacBook Air is easy! First, click the Go menu from the desktop and select Applications. Then, find Photo Booth in the Applications folder. You can also click the Search button in your menu bar, type photo booth , and press ? Return . Once you’ve opened the application, you’ll see a window with four buttons acoss the bottom. Clicking each one will open up different features of the app:
• The Capture button allows you to take new photos using your MacBook’s camera.
• The Effects button gives you access to different effects you can apply to your photos.
• The Library tab shows all of the photos you have taken with Photo Booth.
• The Video button lets you record video clips with your MacBook’s camera.
Once you’ve taen a photo or video clip, you can save it to your computer by selecting File > Export from the toolbar at the top of your screen. You can also share it directly with friends and family by clicking File > Share > Messages or Mail from the same toolbar. Have fun!
Taking a Screenshot on a Mac and Saving as a JPG
Taking a screenshot on Mac and making it a JPG is easy. First, press Command + Shift + 3 simultaneously to take the screenshot of your entire screen. This will save the screenshot as a .png file on your desktop. Next, open the screenshot in Preview (just double-click the file) and select File > Export from the menu bar. In the Format dropdown box, choose “JPEG” then click “Save” to export as a JPG. You can also use this same method to export your screenshots as othr image formats like HEIC, JPEG-2000, OpenEXR, PDF, PNG, or TIFF.
Taking a Screenshot on a Mac Mouse
To take a screenshot on a Mac mouse, first make sure that the “Show Mouse Pointer” option is enabled. To do this, press Shift+Command+5 to open the screenshot toolbar, click “Options,” and place a checkmark beside “Show Mouse Pointer.” Once this is enabled, you can take a screenshot of your Mac mouse by pressing Shift+Command+3 or Shift+Command+4. This will capture a screenshot of your mouse pointer alog with whatever else is on the screen.
Right-Clicking on a Mac
Right-clicking on a Mac is done by pressing the Control (CTRL) key while clicking on an item. For example, to right-click an icon, window, toolbar, desktop, or othr item, press and hold the Control key while you click the item with your mouse or trackpad. If you have a MacBook Pro with a Touch Bar, you can press firmly on the Touch Bar and then tap the item you want to right-click.
Troubleshooting Issues with Taking Screenshots
If your computer is not letting you take a screenshot, it’s likely because the Print Screen key on your keyboard has been disabled. This can happen if you have an F Mode key or F Lock key on your keyboard, as these keys can disable the PrintScreen key. To fix this, simply press the F Mode key or F Lock key again to enable the Print Screen key.
Conclusion
Mac computers are an incredibly powerful and reliable tool for everyday computing needs. They boast a beautiful, intuitive design whih makes them ideal for both personal and professional use. Thanks to their user-friendly operating systems, Macs provide a high level of accessibility and ease of use, allowing users to get the most out of their device. Their hardware is incredibly powerful, providing exceptional performance and long-lasting reliability. Furthermore, Macs come with many useful preinstalled applications such as iMovie and GarageBand that allow users to be creative in their everyday lives. All in all, Macs are an excellent choice for anyone looking for a dependable and intuitive computer that can handle a variety of tasks.

