Are you the proud owner of an iPhone and a Mac computer? If so, you may be wondering how to sync photos from your iPhone to your Mac. Syncing photos is a great way to share them with family, friends, and even back them up for safe keeping.
The process of syncing photos from your iPhone to your Mac is quite simple. First, make sure that you have the necessary software installed on both devices. This includes iTunes for the Mac and iCloud for the iPhone. Once these are installed, you’ll need to sign into the same Apple ID on both devices in order for the sync to take place.
Next, connect your iPhone to your Mac usng a USB cable. You should see a prompt on both devices asking if you want to trust each other. Tap “Trust” on both screens in order for the connection to be successful.
Now that your devices are connected, open iTunes on your Mac computer and select “Preferences” from the top menu bar followd by selecting “Devices” under “General” settings. Make sure that “Sync Photos with iCloud” is checked off before clicking “OK” at the bottom of the screen.
On your iPhone, open Settings and then tap “iCloud” followed by tapping “Photos” under “Media & Photos” section. Ensure that there is a checkmark next to “iCloud Photo Library” before exiting out of Settings.
Your devices are now ready for photo sync! All new photos taken or imported onto either device will automatically appear in both places after a few moments of processing time via iCloud or iTunes depending on which device was used last for uploading/importing purposes. Any existing photos can be transferred over by opening Photos app on both devices and selecting which ones you would like transferred over prior to clicking the sync button within either app (depending on where photos originated).
It’s really that easy – just follow these steps and enjoy hassle-free photo syncing beteen your iPhone and Mac computer!
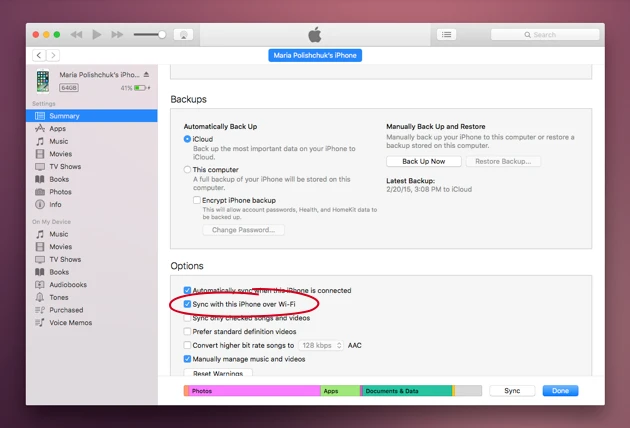
Automatically Syncing Photos From iPhone to Mac
To automatically sync Photos from your iPhone to Mac, you’ll need to use the Photos app on your Mac. First, connect your iPhone to your Mac using a Lightning cable. Then open the Photos app on your Mac, click the device button in the upper-left corner of the window and select your iPhone from the list of availabe devices. On the next screen, check the box next to “Sync Photos to Your Device From” and select where you want to transfer photos from (e.g., iCloud Photos Library or a folder on your computer). Lastly, click Apply and wait until all photos have been synced from your iPhone to Mac.
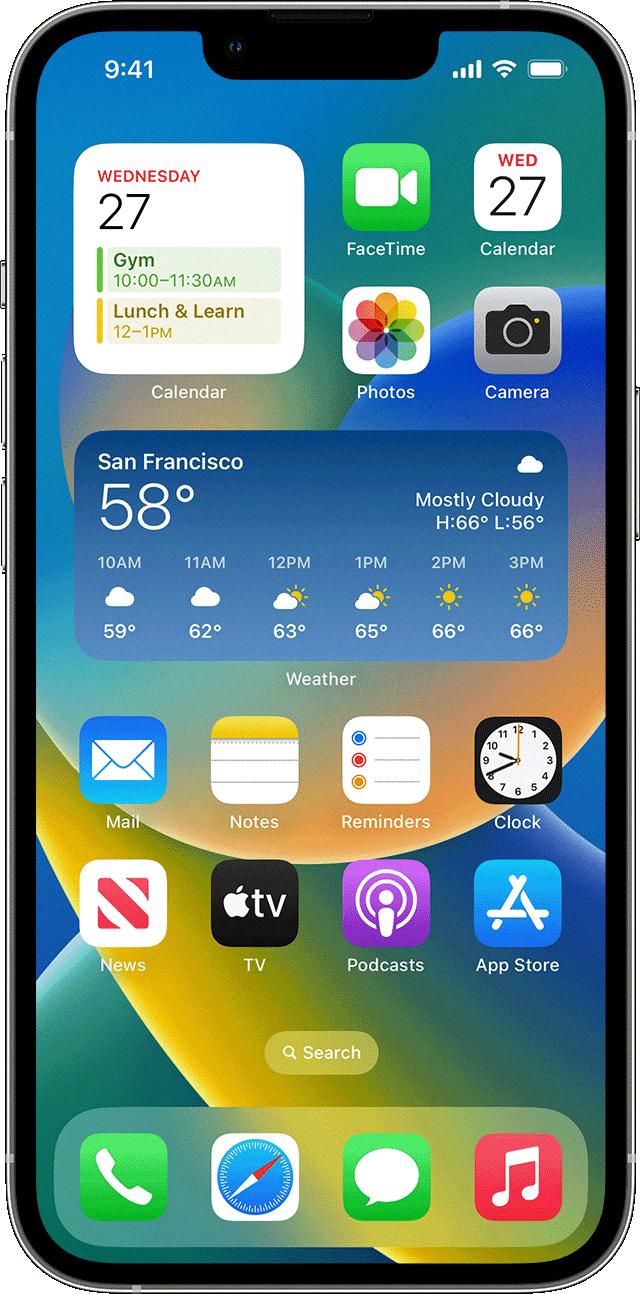
Source: support.apple.com
Troubleshooting Issues with Photo Syncing Between iPhone and Mac
If your photos are not syncing between your iPhone and Mac, it’s likely due to an issue with your iCloud settings. First, make sure Wi-Fi is on and you have an internet connection. Then, go to Settings > [your name] > iCloud > Photos and check that Upload to My Photo Stream is turned on. If this option isn’t available, then you need to turn on iCloud Photos in order to keep your photos and videos in iCloud. After you’ve checked these settings, try restarting both of your devices and see if the photos sync correctly.
Troubleshooting iPhone Photos Not Appearing on Mac
If your iPhone photos are not showing up on your Mac, it is likely an issue with iCloud Photos. iCloud Photos is a feature that keeps your iPhone photos available on all of your devices. To ensure that your iPhone photos show up on your Mac, you need to make sure that the iCloud Photos feature has been enabled. To do this, open the Settings app on your iPhone and go to Photos & Camera where you can toggle on iCloud Photos. Once this is enabled, the same photos shoud be visible on both devices. If you have already set up iCloud Photos on Mac and still don’t see the images, try signing out of iCloud and then signing back in again.
Synchronizing Photos Automatically From iPhone to Computer
To automatically sync photos from your iPhone to your computer, you will need to first plug in your iPhone to the computer with a USB cable. Next, open the Settings menu on your PC and click Devices. On the left side of the screen, click on AutoPlay. Then click on Choose AutoPlay Defaults and select the option for “Import Photos and Videos”. Select how you would like your photos to be uploaded (e.g., full resolution or compressed/reduced quality) as well as where they should be saved (e.g., a folder on your desktop or a cloud storage service). After that, any photos taken on your iPhone will be automatically uploaded to the selected destination wenever you plug it into your computer.
Syncing Photos From iPhone to Mac Wirelessly Automatically
To automatically sync Photos from your iPhone to your Mac wirelessly, you need to set up iCloud Photos. To do this, open Settings on your iPhone and tap on your Apple ID at the top of the screen. Choose iCloud and turn on iCloud Photos. Next, open System Preferences on your Mac and select iCloud. Make sure the box next to Photos is checked. Your photos will now be automatically synced btween both devices over Wi-Fi whenever they are connected to the same network.
Syncing an iPhone with a Mac
To sync your iPhone with your Mac, start by connecting your iPhone and your computer with a cable. Next, open Finder on your Mac and select your iPhone in the sidebar. At the top of the window, you can select which type of content you want to sync, such as Movies or Books. Then click “Sync [content type] onto [device name].” Finally, if necessary, enter your Apple ID and password to authorize the transfer. After that, all of the selected content should be synced between your devices.
Forcing a Mac to Sync Photos
To force your Mac to sync Photos, you can use the Force Quit option. First, open the Apple menu and select Force Quit. Then select Photos from the list of apps and click Force Quit. Once that is done, relaunch the Photos app from the Dock or Launchpad. This shold start syncing your photos again.
Troubleshooting Issues with Mac and iPhone Syncing
It is possible that your Mac is not syncing with your iPhone because the two devices are not signed in with the same Apple ID. Additionally, it is possible that you may have forgotten to turn on Text Message Forwarding for your Mac. To resolve this issue, make sure both devices are signed in with the same Apple ID and then go back one screen to check Text Message Forwarding to ensure your Mac has been selected. If it has been selected, deselect it and restart your iPhone.
Transferring Photos from Phone to Mac
To get your photos from your phone to your Mac, you’ll need to use a Bluetooth File Exchange app. First, connect your phone to your computer. Then, drag the photos onto your computer’s internal disk. Finally, you can either drag files or folders from the Finder to the Photos window, or drag files or folders from the Finder to the Photos icon in the Dock. After that, your photos should appear on your Mac.
Troubleshooting iPhone Syncing Issues with Computer
There could be a few reasons why your iPhone isn’t syncing with your computer. First, make sure that you have the latest version of iTunes installed on both your computer and iPhone. If you do, then try resetting the sync history in iTunes by going to iTunes > Preferences > Devices > Reset Sync History. You should also check whether or not the Wi-Fi connection is working properly on both devices, as this can be a caue of the issue. Additionally, try signing out of the iTunes Store on your iPhone and then trying to sync again. If none of these steps work, it’s possible that there may be an issue with either your USB cable or port. Try using another USB cable or port if possible and see if that helps with the syncing process.
Finding the ‘Sync’ Feature on an iPhone
To find auto sync on your iPhone, open the Settings app, tap on your Apple ID at the top of the list and select iCloud. Scroll down to the bottom of the page and you’ll see a toggle switch for Auto Sync. Tap it to turn Auto Sync on and all of your data will be automatically synced with iCloud.
Syncing iPhone Photos with iCloud
To sync your iPhone Photos with iCloud, you need to fist turn on iCloud Photo Library. To do this, go to the Settings app on your iPhone and tap your name at the top of the screen. Then select iCloud and tap Photos. Turn on ‘iCloud Photo Library’. Next, you will need to choose whether you want to upload your photos in their original or reduced quality. Select ‘Optimize iPhone Storage’ if you want to save storage on your device and ‘Download and Keep Originals’ if you want all of your photos to be uploaded in their original quality. Finally, make sure that iCloud Backup is turned on (under Settings > [your name] > iCloud > Backup) so that any new photos you take on your iPhone will be backed up automatically.
Troubleshooting Apple Photos Syncing Issues
If your Apple Photos aren’t syncing, it cold be due to a few different reasons. First, check that you have iCloud Photos configured correctly on the device that’s not syncing to iCloud. To do this, open the Settings app, tap your name at the top of the screen, then go to iCloud > Photos and make sure that iCloud Photos is turned on.
It could also be an issue with your internet connection or an issue with your Apple ID. If you’re having trouble connecting to the internet, try restarting your router or modem. If you’re having trouble with your Apple ID, double check that you’re using the correct password and if necessary reset it at iforgot.apple.com.
Finally, it could be an issue with the software itself; try restarting both the device and the Photos app itself to see if that helps resolve any syncing issues. You may also want to check for any available updates for both iOS and macOS as these can sometimes include bug fixes reated to syncing issues.
Verifying iPhone Connection to Mac
To check if your iPhone is connected to your Mac, first open the Finder on your Mac and choose Finder > Preferences. Once the Preferences window appears, click on the Sidebar tab located at the top. Below the Locations section, make sure that the checkbox for CDs, DVDs, and iOS Devices is selected. After you have selected this option, open your Finder’s sidebar agin and look below the Locations section to see if your device is showing. If it is listed in this section, then it means that your iPhone is successfully connected to your Mac.
Syncing an iPhone to a Mac Without USB
To sync your iPhone to your Mac without using a USB cable, you can use the Continuity feature. This allos you to wirelessly sync your devices together using iCloud, Bluetooth, and WiFi. To set this up, first make sure both devices are connected to the same WiFi network and that Bluetooth is enabled on both devices. Then sign into the same iCloud account on both devices. Finally, turn on Handoff Continuity on both devices and they should be able to automatically sync data between them.
Conclusion
The iPhone is one of the most popular and successful mobile devices on the market today. Its sleek design, intuitive user interface, and powerful hardware are just a few of its many features that make it stand out from the competition. With its expansive app store and large selection of accessories, there is something for everyone with an iPhone. It is a great choice for those seeking a reliable, feature-rich device that can keep up with teir busy lifestyle. The iPhone continues to be an industry leader in mobile technology, offering users an enjoyable and secure experience.


