Backing up your iPad Pro to an external hard drive is a great way to keep your important files and data safe. External hard drives are reliable, portable, and easy to use, making them a great choice for backing up your iPad Pro. In this blog post, we’ll discuss how to back up your iPad Pro to an external hard drive in a few simple steps.
First off, you’ll need an external hard drive that is compatible with the iPad Pro. Many external hard drives come with USB-C ports, which are compatible with the iPad Pro. Once you have selected a compatible external hard drive, you’ll need to connect it to your iPad Pro uing the USB-C or Lightning cable that came with the device.
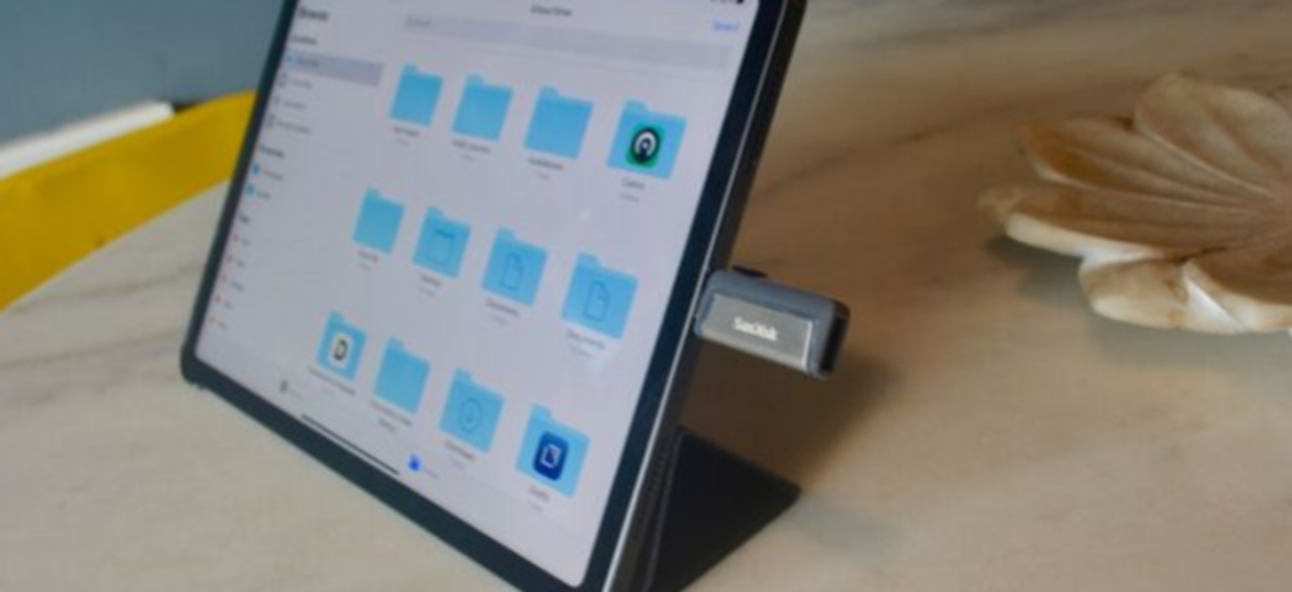
Once the external hard drive is connected to your iPad Pro, open the Files app on your device and locate the file or folder you want to back up. Tap and hold on the item until a menu appears. Select Copy from the menu and then select the name of your external hard drive from the sidebar (located below Locations). Select a location for whre you want to save this item on your external hard drive and then tap Paste.
Your file or folder will now be saved onto your external hard drive! You can repeat this process for any other items that you would like to back up onto your device. Additionally, if you want to make sure all of your important data is backed up regularly, you can set up iCloud backup on your device so that all of your data is automatically backed up daily when connected to power and Wi-Fi. This ensures that all of your important files and data are securely stored away from potential disasters or accidents that cold occur with physical storage devices like an external hard drive.
Backing up your iPad Pro onto an external hard drive is an effective way of protecting important information and files from potential disasters or accidents while also providing portability for those who need their data on-the-go. With just a few simple steps, anyone can easily back up their device onto an external hard drive!
Transferring Files From iPad Pro to External Hard Drive
To transfer files from your iPad Pro to an external hard drive, begin by connecting the external hard drive to your device usig a USB cable. Once the connection is established, open the Files app on your iPad Pro and locate the file you wish to transfer. Touch and hold the file, then tap Copy. Tap the name of the device (in the sidebar, below Locations), select a location for the file, touch and hold the screen, then tap Paste. This will copy the file from your iPad Pro to your external hard drive. Disconnecting your device from your external hard drive will complete the transfer process.
Backing Up an iPad Pro
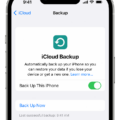
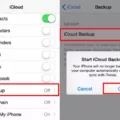
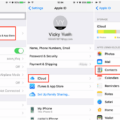
Backing up your iPad Pro is a simple process and only takes a few steps. First, go to Settings > [your name] > iCloud > iCloud Backup. Make sure iCloud Backup is turned on. Once enabled, your iPad Pro will automatically back up daily when it’s connected to power, locked, and connected to Wi-Fi. If you woud like to perform a manual backup, simply tap Back Up Now. That’s all there is to it! With your iPad Pro backed up, you can rest assured that your important data will be safe should anything happen to your device.
Backing Up an Entire iPad
Backing up your iPad is a great way to ensure that you don’t lose any of your important data or settings. To backup your entire iPad, you will need to use iCloud. First, make sure your iPad is connected to a Wi-Fi network. Then, go to Settings > [your name] > iCloud and make sure that iCloud Backup is turned on. Once this is done, you can tap on the “Back Up Now” option which will begin backing up all of the content on your iPad to your iCloud account. It’s important to keep your Wi-Fi connection active during the backup process so that it doesn’t get interrupted. Once the backup process has been completed, all of the data from your iPad shold be saved safely in iCloud for future retrieval.
Can an iPad Pro Write to an External Hard Drive?
Yes, iPad Pro models running iPadOS 13 and lter can write to external hard drives. To do this, you need to connect the hard drive to your iPad Pro’s USB-C port using a compatible USB-C cable. Once connected, you can access, share, and copy files between the hard drive and your iPad. Keep in mind that if you are using an older model of iPad Pro, it may not have a USB-C port and thus may not be able to write to an external hard drive.
Backing Up an iPad Pro
There are a few potential reasons why you may not be able to back up your iPad Pro. First, make sure that all available updates for your device have been downloaded and installed. Next, try to back up on another Wi-Fi network in case the current one is causing an issue. Additionally, check that you have enough iCloud storage available for the backup as this coud be preventing the process from completing. If you still need help after trying these steps, then contact Apple Support for further assistance.
Transferring Photos from iPad to External Hard Drive
Yes, you can transfer photos from your iPad to an external hard drive. To do so, open the Photos app on your iPad and select the photos you want to transfer. Tap the Share button in the bottom left corner and then tap Options, to select your photo options. Once you have everything set, tap Save to Files and choose your external hard drive as the destination. Finally, tap Save and wait for the transfer to complete.
The Importance of Backing Up an iPad
Backing up your iPad is an essential step in protecting your data. If your device is ever lost, stolen, or damaged, you will still be able to access your important information if it is backed up. By backing up your iPad, you can also quickly and easily transfer all of your information to a new device if needed. Additionally, backups can also provide an easy way to restore accidentally deleted files or settings. Backups can save you time and hassle by ensuring that all of your data is safe and secure.
Checking If iPad is Backed Up
The best way to know if everything on your iPad is backed up is to go to Settings > [your name] > iCloud. Tap Manage Account Storage, then tap Backups. Here you will be able to view all of the backups stored in iCloud for your device. You can then select a particular backup and view the details of what information it contans and when the backup was made. This will tell you which files and data have been backed up, so that you can make sure that all of your important information is safe and secure.
Transferring Data From an iPad
Transferring everything from your iPad is a simple process that can be done with iCloud, iTunes, or Finder.
If you want to transfer everything via iCloud, the first step is to make sure that your iPad is connected to Wi-Fi and then sign in to iCloud with the same Apple ID on both devices. Then, go to Settings > [Your Name] > iCloud and turn on all of the services you woud like to transfer. Once you’ve done that, go back to the main Settings page and select General > Reset > Erase All Content and Settings. The device will then be reset and you’ll have the option to restore from your iCloud backup when setting it up again.
Alternatively, if you’d prefer to use iTunes or Finder for transferring data from your iPad, make sure that the latest version of iTunes or Finder (depending on which one you’re using) is installed on your Mac or PC. Then connect both devices using a USB cable and open iTunes or Finder. Select your device in iTunes or Finder and click “Restore Backup” in the Summary section. Select the most recent backup of your iPad from the list of aailable backups and click “Restore.” After restoring from iTunes or Finder, all of your data will be transferred over onto your new device.
Saving Everything on an iPad Before Selling It
Before you sell your iPad, it’s important to back up all of your data and settings. This will ensure that the next owner will not have access to any of your personal information.
To back up your iPad, you shold first connect it to a power source and connect it to the internet either via WiFi or cellular data. Then, go to Settings > your name at the top of the page > iCloud > iCloud Backup. Here, you can turn on iCloud Backup. Once enabled, your iPad will automatically back up once a day while it is locked and connected to power and the internet.
You can also back up manually by tapping “Back Up Now.” Once you’ve backed up evrything on your iPad, go to Settings > General > Reset > Erase All Content and Settings. This will ensure that all of your personal information is securely deleted from the device before you sell it.

