Recording with GarageBand is a great way to create professional-sounding music, and it all starts with the right recording settings. Knowing what settings to use can be a bit intimidating at first, so we’ve put together this guide to help you out.
When you open GarageBand for the first time, you’ll be asked to choose your audio output and recording settings. The default setting is usually 16-bit, 44.1 kHz – CD Quality. This is the standard for audio recordings, so it’s a good place to start if you’re not sure what else to choose. For video projects or any audio that may be added to a video project later on, it’s best to select 2 channel, 16 bit, 48000 Hz (DVD Quality).
Once you have your settings chosen, you’ll want to make sure that your audio input source is selected correctly. You can do this by selecting “Preferences” from the menu bar and then “Inputs and Outputs” from the pop-up window. This will alow you to choose which device will be used as your input and output source.
You also have the option of using GarageBand’s built-in effects such as reverb and compression in order to shape your sound and add some extra depth or clarity. If you want more control over these types of effects, then you may want to try using a third-party plug-in or VST instead.
When you are ready to record your audio track in GarageBand, click on the red circle or press R on the keyboard. You can click on the square stop button or press the spacebar when you are done recording in order to stop playback and save your track in its current state.
We hope this guide has been helpful in getting started with recording in GarageBand! With some practice and experimentation, soon enough you’ll be mastering these recording settings like a pro!
Accessing Recording Settings in GarageBand
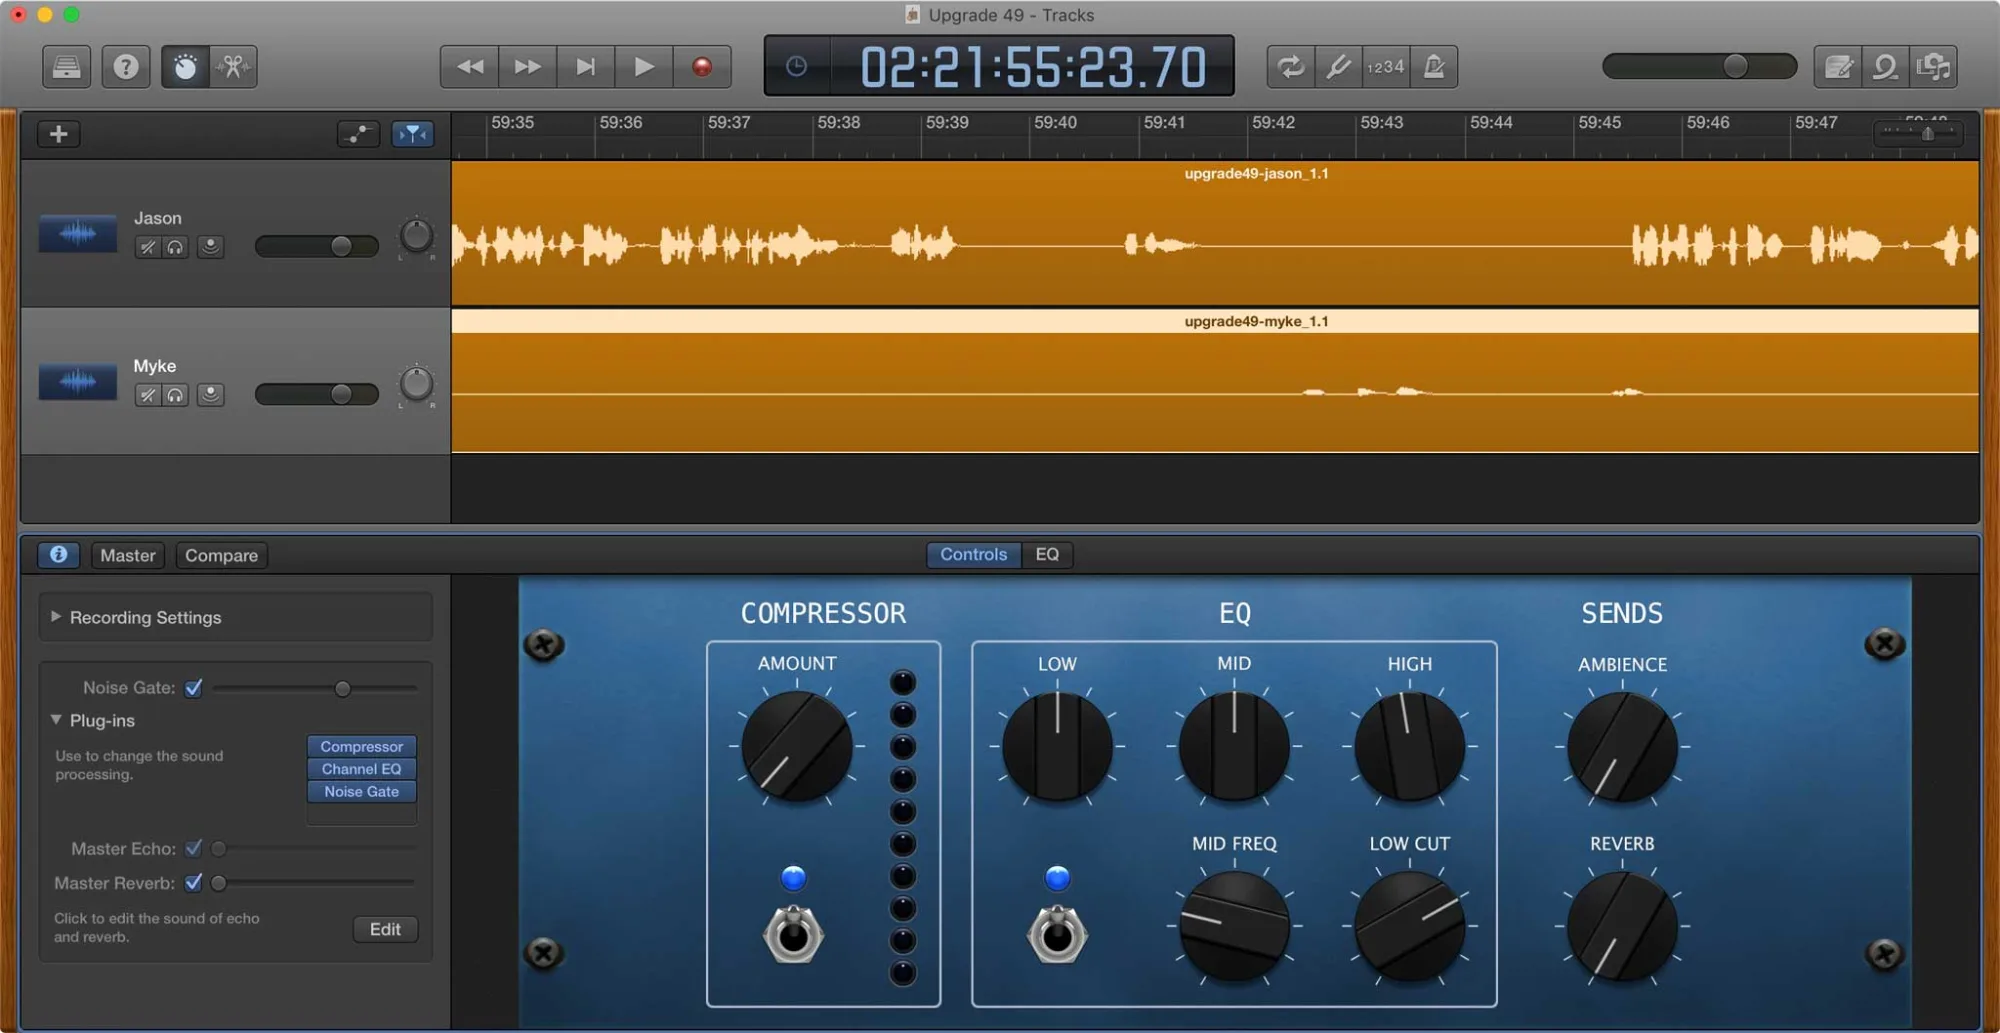
Recording Settings in GarageBand can be found by accessing the Smart Controls panel. You can access the Smart Controls panel either by clicking on View/Show Smart Controls, using the keyboard shortcut B, or clicking on the Smart Controls at the top right of the GarageBand interface. Once you have accessed the Smart Controls panel, then Recording Settings will be located on the left side.
Improving Audio Quality in GarageBand
Making a recording sound better on GarageBand is all about taking the time to tweak the settings and experiment with different effects. Start by adjusting the EQ settings to get the desired tone and clarity. Next, add reverb to make the instrument sound bigger and less up-front. Use delay to thicken up the instrument or add effects. Lastly, use panning to spread out instruments and create room for them in the mix. If you’re really lookng for a professional sounding mix, you can use compression, limiters, and other audio processors that are available in GarageBand. With some practice and experimentation you can get great sounding recordings in no time!
Optimal Settings for Audio Recording
The optimal settings for audio recording depend largely on the project and the desired outcome. Generally, it is best to record in 24 bit resolution at a minimum sample rate of 44100 Hz (CD Quality). Recording at higher sample rates such as 48000 Hz (DVD Quality) or even 96000 Hz (High Definition Quality) will provde higher fidelity and better quality sound recordings. Additionally, depending on the source sound you may want to record in a multi-channel format such as 5.1 surround sound or even 8 channel formats for more complex sound sources.
When selecting a recording format it is important to consider two main factors: file size and playback compatibility. Higher bit depths and sample rates will result in larger files that require more storage space and may not be compatible with all playback devices and software. For example, recording in 24 bit resolution at 96000 Hz will likely produce very large files that may not be compatible with all playback devices or software programs. It is important to ensure that your recordings are compatible with your intended playback device or software befre beginning a recording session.
Overall, when selecting optimal settings for audio recording, it’s important to consider the project requirements and desired outcome while balancing the trade-off between file size and quality.
Setting Up Recording on GarageBand
To set up recording on GarageBand, start by opening the software and selecting the type of project you wish to work on. Next, create a new track by clicking the plus (+) button in the upper left corner of the tracks pane. Then select the type of instrument you wish to record from the list that appears.
Next, configure your audio settings for recording by selecting ‘Preferences’ from the top menu and then ‘Audio/MIDI’. In this window, you can select your input device (microphone or audio interface) as well as adjust your input level, if needed.
Once everything is set up, click on the red record button in the tracks pane or press R on your keyboard to begin recording. Click on the square stop button or press Spacebar when finished recording. You can also use looping and other features such as quantization while recording in GarageBand.
Achieving Studio Quality Vocals in Garageband
To get studio-quality vocals on Garageband, you’ll want to use a combination of effects and tools. First, turn on the noise-gate to reduce background noise. Then use the compressor’s “Studio Vocals” preset. This will help to even out the frequency range and make your vocal sound smoother. Next, use the Channel EQ’s preset entitled “Natural Vocal” to furthr refine your vocal sound. To add depth and space, you can then add reverb. Adjust the volume so that your vocals fit in with the rest of the mix and pan vocal tracks if there is more than one being used. Finally, apply pitch correction if necessary to ensure that all notes are in tune with each other – this will help to give your vocal track a polished and professional studio sound.
Is Garageband Suitable for Professional Recording?
Yes, GarageBand is a great tool for professional recording. It is capable of recording high-quality audio signals and can be used to create professional sounding mixes with the addition of effects. The software is easy to use, making it ideal for musicians who are just starting out with recording or who need to quickly produce a track. Additionally, GarageBand works on both Mac and iOS devices, allowing you to work on projects on the go. With its intuitive user interface and powerful features, GarageBand can help you create professional-level recordings in no time.
What Is The Highest Quality Recording Format?
The highest quality recording format is generally considered to be a lossless audio format. This type of format stores the exact audio data from a recording without any loss in quality. It produces an exact copy of the original audio file, so there is no degradation of sound quality. Lossless formats include FLAC, WAV, AIFF and ALAC, with FLAC being the most popular. These types of files are often referred to as “hi-res” or “high-resolution”, snce they are equal to or better than CD-quality audio.
Understanding Input 1 and 2 in GarageBand
Input 1 and 2 in GarageBand refer to the two audio inputs available on the software. Input 1 is typically used for a mono input, such as a single microphone or instrument, while Input 2 is typically used for stereo input, such as two microphones or two instruments. By selecting both inputs when recording, you can create a stereo track with both inputs combined. This allows you to get a fuller sound from your recordings, as stereo tracks have more depth and clarity than mono tracks.
Recording at 48kHz with GarageBand
No, unfortunately you cannot record at 48kHz with GarageBand. While Apple’s free iMovie software does support 48kHz audio recording, GarageBand does not. This is both sad and ironic cnsidering the fact that GarageBand is a paid application while iMovie is free.
Conclusion
In conclusion, GarageBand is an incredibly powerful tool when it coes to recording audio. With its wide range of recording settings and features, you can capture your audio with precision and finesse. From choosing the right bit depth and sample rate to adding effects like reverb, delay, and panning, you can make sure that your recordings sound professional no matter what type of project you’re working on. With GarageBand’s intuitive user interface and comprehensive options, you can be sure that your recordings will always have a polished finish.

