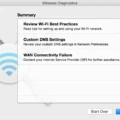
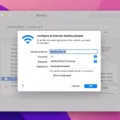
In today’s technologically advanced world, a reliable and stable internet connection is essential for both work and leisure activities. However, there may be instances where you encounter issues with your Wi-Fi connection on your Mac, specifically when it is not configured properly. In this article, we will guide you through the steps to configure Wi-Fi on your Mac, ensuring a seamless and hassle-free internet experience.
To begin, click on the Apple menu located at the top-left corner of your screen, then select System Preferences from the drop-down menu. Once the System Preferences window opens, click on the Network icon, which can be found in the Internet & Wireless section.
In the Network window, you will see a list of available network services on the left-hand side. Click on the plus (+) button at the bottom left to add a new service. A pop-up menu will appear, displaying various network interface options. From this menu, select Wi-Fi.
After selecting Wi-Fi, you will be presented with several configuration options. Firstly, click on the Apple icon located at the top-left corner of your screen, then choose System Preferences. Alternatively, you can also access System Preferences by selecting it from the Dock or by searching for it in Spotlight.
In the System Preferences window, locate and click on the Network icon. Within the Network window, you will find a list of available network services on the left-hand side. Select the Wi-Fi option from this list.
Once you have selected Wi-Fi, you will see a drop-down menu labeled Network Name. Click on this menu and choose the Wi-Fi network you wish to connect to. If the network you want is not listed, ensure that your Mac is within range of the wireless network and try again.
If the chosen Wi-Fi network is secured with a password, you will be prompted to enter it. Simply type in the password and click on the Join button to connect to the network. It is important to ensure that you enter the password correctly to establish a successful connection.
After entering the password and clicking Join, your Mac will attempt to connect to the selected Wi-Fi network. Once connected, you will see a green dot next to the Wi-Fi option in the Network preferences window, indicating a successful connection.
Before concluding, it is worth noting that if you do not see the Wi-Fi option in the Network preferences window, there may be several reasons for this. One possibility is that your Mac is not within range of any Wi-Fi networks. Ensure that you are in an area with a strong Wi-Fi signal and try again.
Additionally, if you are connecting to a wireless network created by an AirPort base station or AirPort Time Capsule, restarting the device by unplugging the power cord might resolve any connectivity issues.
Configuring Wi-Fi on your Mac is a relatively straightforward process that can be done through the Network preferences in the System Preferences window. By following the steps outlined in this article, you can ensure that your Mac is properly configured and connected to your desired Wi-Fi network, allowing for a seamless internet experience.

How Do You Fix Wi-Fi Not Configured On Your Mac?
To fix the issue of Wi-Fi not configured on your Mac, follow the steps below:
1. Click on the Apple menu located at the top-left corner of your screen.
2. From the drop-down menu, select “System Preferences.”
3. In the System Preferences window, click on “Network.” This will open the Network settings.
4. On the left-hand side, you will see a list of network interfaces. Click on the “+” button at the bottom left corner to add a new network service.
5. A new window will appear. From the “Interface” drop-down menu, select “Wi-Fi.”
6. Give a name to your Wi-Fi service, such as “Wi-Fi Configuration” or any other name you prefer.
7. Click on the “Create” button.
Now, you will see the Wi-Fi service added to the list of network interfaces on the left-hand side of the Network settings.
To configure the Wi-Fi settings, follow these additional steps:
1. Select the Wi-Fi service from the list of network interfaces.
2. Click on the “Advanced” button at the bottom right corner.
3. In the Wi-Fi settings window, go to the “Wi-Fi” tab.
4. Click on the “+” button at the bottom left corner to add a new Wi-Fi network.
5. Select the desired Wi-Fi network from the list and click on the “Join” button.
6. If the network is secured, enter the network password when prompted.
7. Once you have joined the Wi-Fi network, click on the “OK” button to save the settings.
8. Close the Network settings window.
Your Wi-Fi should now be configured on your Mac. It will automatically connect to the selected network whenever it is available.
How Do You Configure Wi-Fi On Your Mac?
To configure your Wi-Fi on your Mac, follow these steps:
1. Click on the Apple icon located at the top left corner of your screen.
2. From the drop-down menu, select “System Preferences…”
3. In the System Preferences window, click on the “Network” icon.
4. On the left panel, you will see a list of network connections. Select “Wi-Fi” from the list.
5. Once you have selected Wi-Fi, you will see a variety of options on the right-hand side of the window.
6. Click on the “Network Name” drop-down menu and select the Wi-Fi network you want to connect to. This will display a list of available networks.
7. If the network you want to connect to is not listed, click on the “+” button at the bottom left corner to add the network manually.
8. If the Wi-Fi network you selected is secured, you will be prompted to enter the password. Enter the correct password and click “Join.”
9. After joining the Wi-Fi network, you can further customize your Wi-Fi settings by clicking on the “Advanced” button. This will allow you to configure advanced network settings such as DNS, TCP/IP, and Proxies if necessary.
10. Once you have entered the desired settings, click “OK” to save the changes.
11. click on the “Apply” button to apply the new Wi-Fi settings.
By following these steps, you will be able to configure your Wi-Fi connection on your Mac and connect to the desired network effortlessly.
Why is Your Mac Not Finding Wi-Fi?
There are several reasons why your Mac may not be able to find Wi-Fi. Here are some possible causes and troubleshooting steps:
1. Wi-Fi signal strength: Ensure that your Mac is within range of the wireless network. If you are too far away from the Wi-Fi router or access point, the signal may be too weak for your Mac to detect. Try moving closer to the router and see if the Wi-Fi network appears.
2. Airplane mode or Wi-Fi turned off: Check if Airplane mode is enabled on your Mac. If it is, disable it. Also, make sure that Wi-Fi is turned on in the Network settings of your Mac. You can access the Network settings by clicking on the Apple menu, selecting “System Preferences,” and then clicking on “Network.”
3. Network settings: Sometimes, the Wi-Fi service may not be available in the Network settings. If you don’t see Wi-Fi in the Network settings, you can try resetting the network settings on your Mac. To do this, go to the Network settings, click on the gear icon at the bottom left, and select “Set Service Order.” Then, drag Wi-Fi to the top of the list and click “Apply.”
4. Router or access point issues: Restart the router or access point by unplugging the power cord and plugging it back in after a few seconds. This can help resolve any temporary issues with the network device.
5. Wireless interference: Other electronic devices, such as cordless phones, microwave ovens, and Bluetooth devices, can cause wireless interference. Try moving your Mac away from such devices or turning them off temporarily to see if it improves the Wi-Fi detection.
6. Software updates: Ensure that your Mac has the latest software updates installed. Sometimes, outdated software can cause Wi-Fi connectivity issues. Go to the Apple menu, select “System Preferences,” and click on “Software Update” to check for any available updates.
7. Keychain issues: Occasionally, keychain entries related to Wi-Fi networks can cause connectivity problems. You can try removing the network’s keychain entry and reconnecting to the Wi-Fi network. Open “Keychain Access” from the Utilities folder in the Applications folder, search for the Wi-Fi network name, delete the entry, and then try connecting again.
If none of these troubleshooting steps resolve the issue, you may need to contact your Internet service provider or Apple support for further assistance.
Conclusion
Configuring Wi-Fi on a Mac is a simple process that can be done through the Network settings in System Preferences. By following the steps outlined above, you can easily connect to a Wi-Fi network and ensure a stable and reliable internet connection on your Mac.
However, if you are unable to see the Wi-Fi option in the Network settings, there may be some troubleshooting steps you can take. One option is to restart any AirPort base station or AirPort Time Capsule that you are connecting to, as this may resolve any connectivity issues.
Furthermore, it is important to ensure that your Mac is within range of the wireless network you are trying to connect to. If you are too far away, the signal strength may be weak and cause connection problems. Moving closer to the router or access point can help improve the signal and establish a successful connection.
Configuring Wi-Fi on a Mac is a straightforward process that can be accomplished with a few simple steps. By following the guidelines provided, you can easily connect to a Wi-Fi network and enjoy a seamless internet experience on your Mac.


