One common issue that Mac users may encounter is a camera that is not working. This can be quite frustrating, especially if you rely on your camera for video calls, taking photos, or other important tasks. In this article, we will explore some possible causes for this problem and provide potential solutions to help you get your camera up and running again.
First, let’s check the camera settings on your Mac. To do this, go to the Apple menu and click on “System Preferences”. Then, select “Security & Privacy” and click on “Privacy”. From there, choose “Camera” and make sure that the apps you want to use your camera in are turned on. If necessary, you may need to quit and reopen an app before it can access your camera.
If the camera settings are correctly configured, but the camera still doesn’t work, you can try restarting the camera using Terminal. To do this, open Terminal by going to Applications > Utilities > Terminal in Finder. In the Terminal window, type in the command “sudo killall VDCAssistant” and press Enter. You may be prompted to enter your password. Once you’ve entered your password, open the FaceTime app again, and the camera should start working.
Sometimes, the camera may not work due to an application that was previously using it or a lack of necessary permissions. In this case, you can manually control access to the camera by going to the Privacy & Security settings. Under the Camera section, you can turn access on or off for each specific app.
It’s also worth mentioning that Screen Time, a feature that allows you to manage and restrict app usage, could potentially prevent the camera from being used. If you have Screen Time enabled, make sure to check its settings and ensure that camera access is allowed.
If none of the above solutions work, there may be a more serious issue with your Mac’s hardware or software. In such cases, it is recommended to contact Apple Support or visit an authorized service provider for further assistance.
A non-working camera on your Mac can be a frustrating problem, but there are several potential solutions to try. By checking camera settings, restarting the camera using Terminal, controlling app access, and considering Screen Time restrictions, you can troubleshoot and resolve the issue in many cases. If all else fails, contacting Apple Support or a service provider is the next step.
Why is Your Mac Camera Not Working?
There could be several reasons why your Mac camera is not working. Here are some possible causes:
1. Privacy settings: Your camera might be disabled in the privacy settings of your Mac. To check this, go to the Apple menu , then click on System Preferences. Next, click on Security & Privacy, then select Privacy. From there, click on Camera and make sure that the apps you want to use your camera with are enabled.
2. App permissions: Some apps require explicit permission to access your camera. If you haven’t granted permission to a specific app, it won’t be able to use your camera. To grant permission, go to the Privacy settings as mentioned above and enable the app in the Camera section.
3. Camera hardware issues: It’s possible that there is a hardware problem with your camera. To troubleshoot this, try using your camera with different apps to see if it works. If it doesn’t work in any app, there might be a hardware issue that requires professional assistance.
4. Software conflicts: Sometimes, conflicts between software can cause issues with the camera. Try restarting your Mac to see if it resolves the problem. If not, you may need to troubleshoot further by checking for any conflicting software or performing a system update.
5. Outdated software: Ensure that your macOS is up to date. Software updates often include bug fixes and improvements that can address camera-related issues.
6. Physical damage: If your camera has been physically damaged, it might not work correctly. Inspect your camera for any visible damage or contact Apple Support for assistance.
7. Other hardware or software issues: If none of the above solutions work, it’s possible that there are other underlying hardware or software issues causing the problem. In such cases, it is recommended to contact Apple Support or take your Mac to an authorized service provider for further diagnosis and repair.
Remember, troubleshooting steps may vary depending on your specific Mac model and macOS version. It’s always a good idea to consult official Apple documentation or support resources for accurate and up-to-date information.
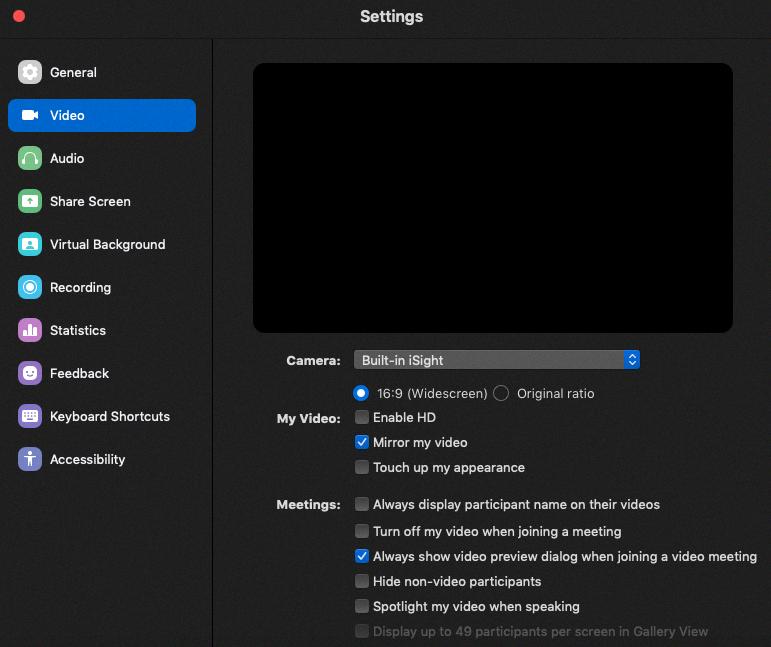
How to Enable Camera On Mac?
To enable the camera on your Mac, follow these steps:
1. Click on the Apple menu located in the top-left corner of your screen.
2. From the drop-down menu, select “System Preferences.”
3. In the System Preferences window, click on “Security & Privacy.” If you can’t find it, scroll down or use the search bar at the top right corner of the window.
4. In the Security & Privacy settings, click on the “Privacy” tab.
5. From the left sidebar, click on “Camera.” If you are using an older version of macOS, you may need to upgrade to macOS Mojave or later to see this option.
6. On the right side, you will see a list of apps that have requested camera access or have been granted access in the past.
7. To enable camera access for an app, make sure the checkbox next to the app’s name is selected. If the checkbox is already selected, it means the app has camera access.
8. If you want to disable camera access for an app, simply uncheck the checkbox next to the app’s name. This will revoke the app’s access to your camera.
9. Repeat steps 7 and 8 for each app that you want to enable or disable camera access.
10. Once you have made the changes, close the Security & Privacy settings window.
By following these steps, you can easily enable or disable camera access for specific apps on your Mac, providing you with control over which apps can use your camera.
How to Reset Your Mac Camera?
To reset your Mac camera using Terminal, follow these steps:
1. Open Terminal: Go to Applications > Utilities > Terminal in Finder.
2. Type the command: “sudo killall VDCAssistant” (without the quotes) and press Enter.
3. A pop-up window will appear asking for your password. Enter your Mac’s password and press Enter.
4. After entering the password, Terminal will execute the command and restart the VDCAssistant process, which manages the camera on your Mac.
5. Once the process is complete, you can open FaceTime or any other application that uses the camera to check if it is working properly.
6. If the camera still doesn’t work, you can try restarting your Mac and repeat the steps above.
By following these steps, you can reset your Mac camera using Terminal and hopefully resolve any issues you may be experiencing.
Why Does Your Macbook Camera Say No Camera Connected?
There can be several reasons why your MacBook camera may display the message “no camera connected.” Here are some possible causes:
1. Hardware issue: Ensure that your MacBook has a built-in camera or an external camera connected. If you have a MacBook model without a built-in camera, you may need to connect an external camera. Check if the camera is properly connected or try reconnecting it to resolve any potential hardware problems.
2. Camera privacy settings: macOS has privacy settings that control which applications can access your camera. If these settings are not configured correctly, your MacBook may display the “no camera connected” message. To check the privacy settings, go to System Preferences > Security & Privacy > Privacy tab > Camera. Make sure the relevant applications are allowed to access the camera.
3. Application-specific issue: Some applications may require camera access permissions individually. If you receive the “no camera connected” message only when using a particular application, it could be due to that application’s settings. Check the app’s preferences or settings to ensure it has camera access permission.
4. Conflicting applications: If another application is already using the camera, it may prevent other applications from accessing it. Make sure you close any other applications that may be using the camera and try again.
5. Screen Time restrictions: If Screen Time is enabled on your MacBook, it could restrict camera access for certain apps or during specific time periods. To check Screen Time settings, go to System Preferences > Screen Time > Content & Privacy > Allowed Apps. Ensure that the relevant apps are allowed to access the camera.
6. Outdated software: Ensure that your macOS and camera drivers are up to date. Outdated software can sometimes cause compatibility issues, leading to the “no camera connected” error. Check for software updates in the App Store and update your macOS to the latest version.
If none of these suggestions resolve the issue, it is advisable to contact Apple Support or visit an authorized service provider for further assistance.
Conclusion
If your Mac camera is not working, there are several steps you can take to troubleshoot the issue. Firstly, check your privacy settings by going to System Preferences and clicking on Security & Privacy. From there, navigate to the Camera tab and ensure that the necessary apps have permission to access the camera.
If the camera still doesn’t work, you can try restarting it using Terminal. Open Terminal from the Utilities folder in your Applications, and type in the command “sudo killall VDCAssistant”. After entering your password, open FaceTime or the app you want to use the camera with, and it should start working again.
It’s also important to note that certain apps may still appear to be using the camera even if they are not actively using it. In this case, you may need to force quit those apps or restart your Mac entirely.
Additionally, Screen Time settings may restrict camera usage, so ensure that it is not interfering with the camera functionality.
If all else fails, it may be worth considering contacting Apple Support or visiting an authorized service provider to diagnose and resolve any hardware issues that could be causing the problem.
By following these steps and troubleshooting methods, you should be able to resolve the issue with your Mac camera not working and resume using it for your desired applications.

