As iPhones continue to make advances in technology, it’s no surprise that they have become one of the most popular devices for creating videos. If you’re an iPhone user who wants to take your videos to the next level, then you should definitely consider using the Ken Burns effect.
The Ken Burns effect is a type of video editing technique that allows you to zoom in or out of a particular frame or section of a clip. This makes it easier to capture important details and add a sense of motion to your video. It’s also great for creating interesting and engaging visuals that are sure to catch people’s attention.
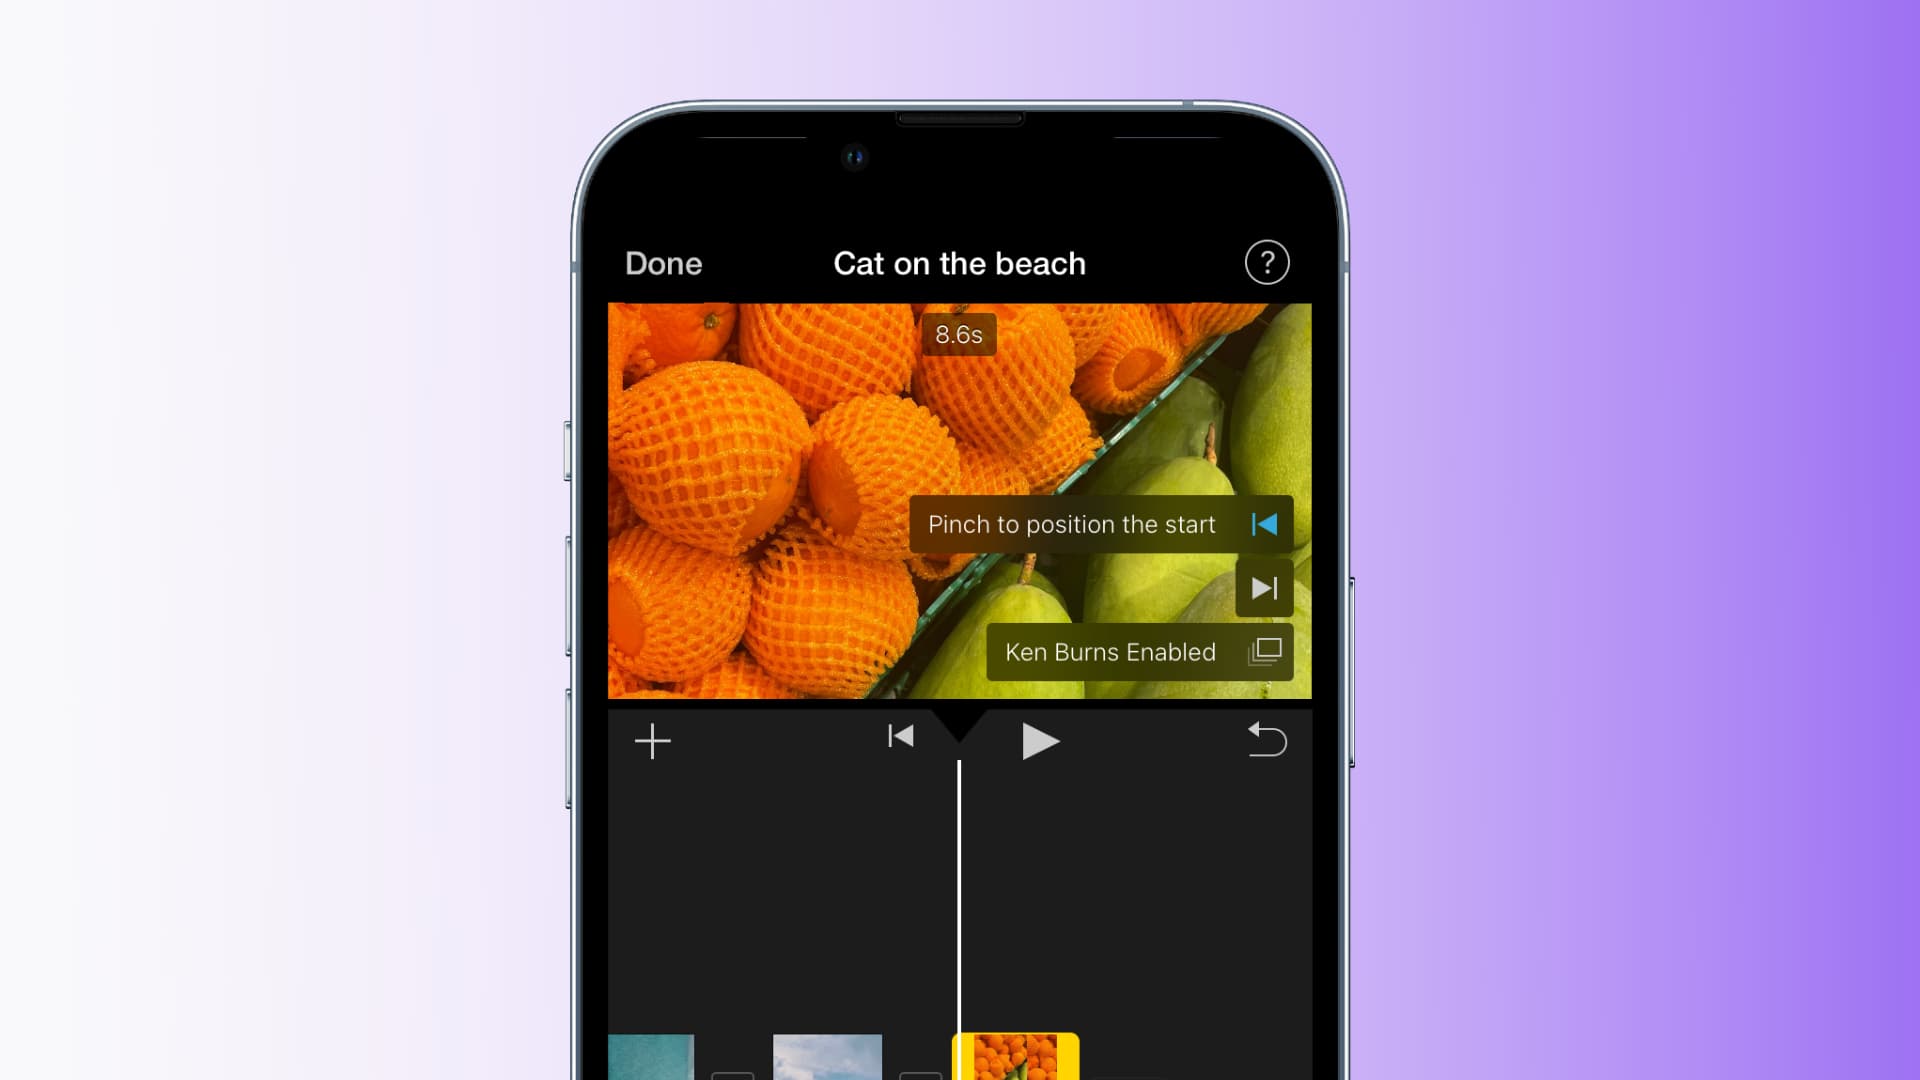
Fortunately, iPhones now come with an intuitive app called iMovie that makes it easy to add the Ken Burns effect to any clip or photo. All you need to do is select the clip or photo in the timeline, click on the cropping button, and then click on the Ken Burns button located at the top. Once enabled, you can pinch the viewer in order to place the Ken Burns header at either the start or end of your chosen image or clip.
Using this feature is a great way to add some extra creativity and flair to your videos without needing any complicated software or equipment. Plus, with iMovie’s simple interface and intuitive controls, it’s easy for even beginners to get started right away!
So if you’re looking for an easy way to make your iPhone videos look more professional and dynamic, then be sure to give the Ken Burns effect a try!

Using Ken Burns in iMovie
Yes, you can use the Ken Burns effect on a video clip in iMovie. To do this, select the clip in the timeline and click on the Cropping button to show the cropping controls. Then, click on the Ken Burns button to open up a slider that allows you to adjust the zoom level of your video clip. You can also adjust the start and end frames of your video to determine where you want the camera to zoom in or out from. Finally, click on the Apply button to add the effect to your clip.
How To Use Ken Burns Effect On An iPhone
To do the Ken Burns effect on iPhone using the iMovie app, open your movie project and tap on the photo you want to adjust in the timeline. The Ken Burns effect controls will appear in the lower-right corner of the image in the viewer. From there, you can drag or pinch to zoom in or out on any portion of the photo and use two-finger drag to pan across different parts of it. You can also adjust when each effect starts and ends by dragging on each side of a blue line that appears at the bottom of the photo. Finally, press ‘Done’ when you are satisfied with your edits.
Does IMovie Offer Video Effects?
Yes, iMovie has a variety of video effects that can be used to enhance the look and feel of your video clips. These include filters, color corrections, blurring effects, fast and slow motions, split screens, picture-in-picture effects, and more. You can also customize the intensity of the effects to get the exact look you want.
Locating Ken Burns in iMovie
Ken Burns is located in iMovie as a type of cropping tool. To access it, you must first select a still image in the project browser and then press the C key or click the Crop button. Once you do, you’ll see a Ken Burns button (labeled A) appear in the viewer. Clicking this will enable you to use the Ken Burns effect to zoom and pan on your still image.


