Taking screenshots on an iPhone has become an essential feature for many users. Whether you want to capture a funny meme, save an important message, or share a stunning photo, knowing how to take a screenshot is crucial. But what if you want to crop the screenshot to focus on a specific area? In this article, we will explore how to crop screenshots on an iPhone.
Before we dive into the process, it’s important to note that the method slightly differs depending on the iPhone model and the iOS version you are using. For instance, iPhone 8 and below have a different method compared to iPhone X and later models. Additionally, iOS 16 and later versions introduced a slight delay in cropping screenshots.
Let’s start with the older iPhone models, iPhone 8 and below. To take a screenshot, simultaneously press the home button and the power/sleep button. Once you capture the screenshot, you can access it by tapping the thumbnail that appears in the bottom left corner of your screen. This will open the screenshot in preview mode.
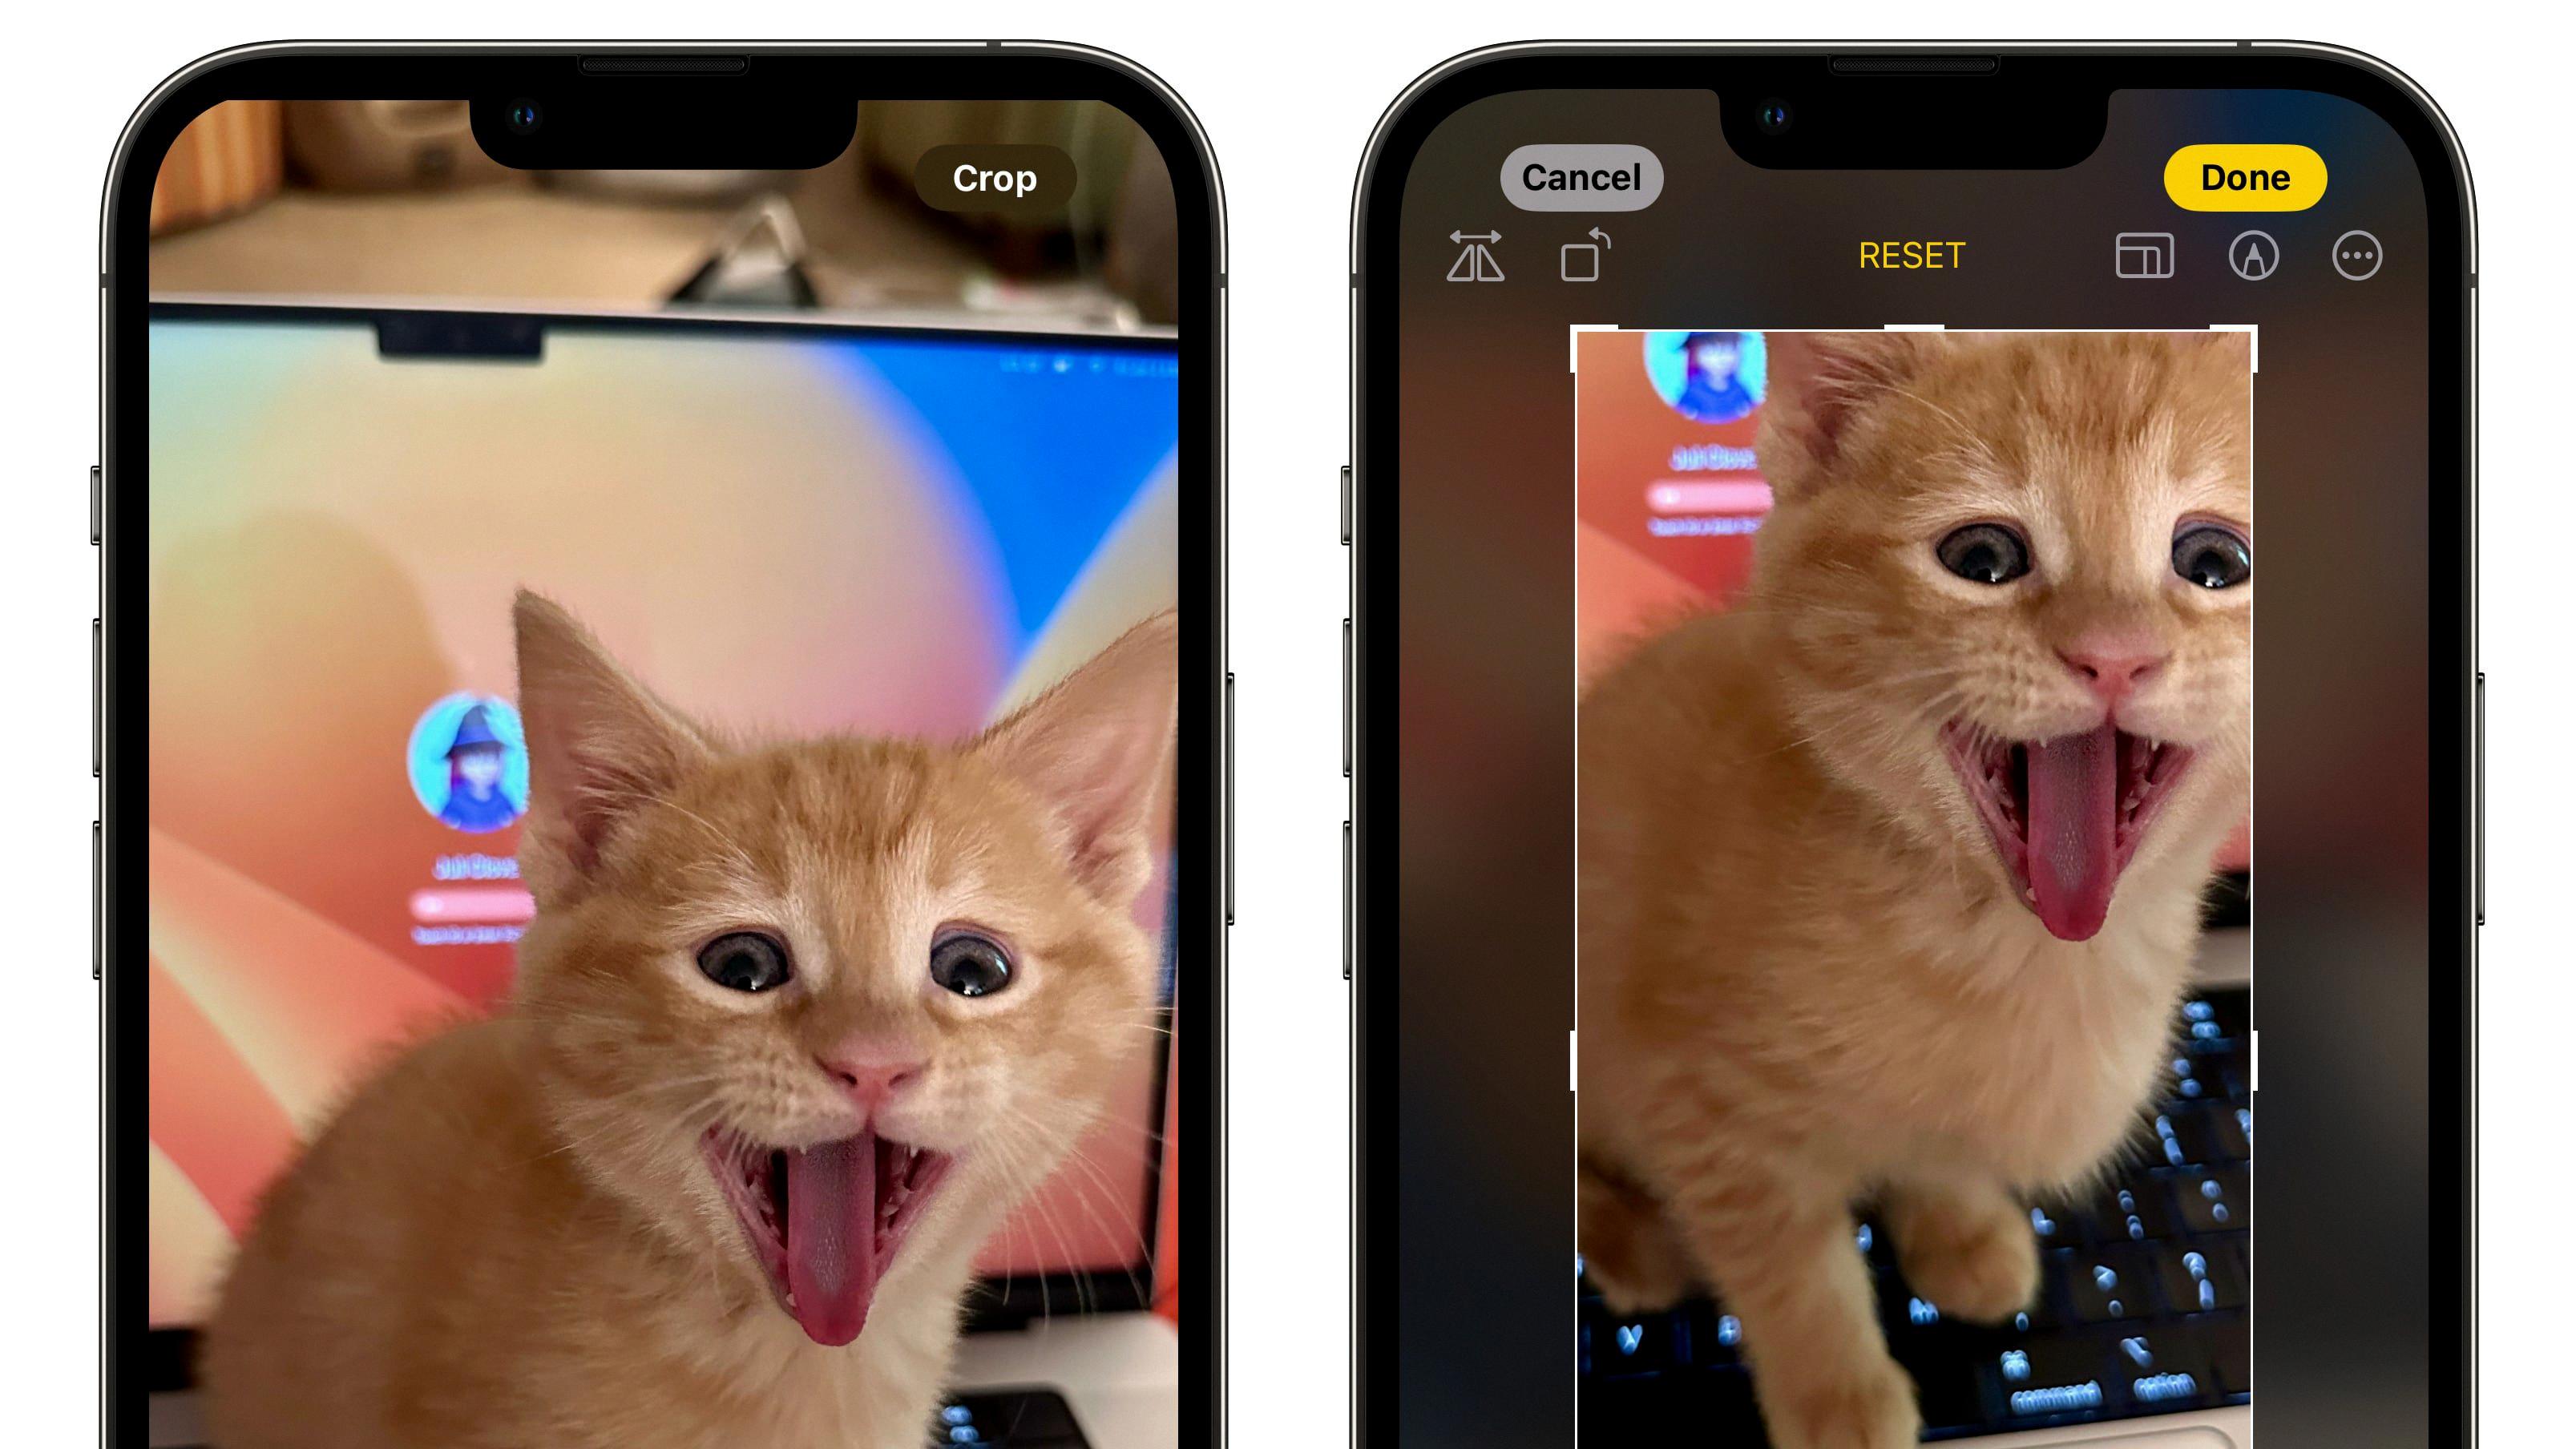
To crop the screenshot, tap on the “Edit” option located at the top right corner of the screen. This will open the editing tools. Look for the crop tool, which is represented by a square icon with overlapping lines. Tap on it to activate the cropping feature.
With the cropping tool selected, you can now adjust the size and position of the crop box. Simply drag the corners or sides of the box to resize it, and drag the box to move it around the screenshot. This allows you to select the specific area you want to keep in the screenshot.
Once you are satisfied with the cropping, tap on the “Done” button located at the bottom right corner of the screen. This will save the cropped screenshot to your Photos app. You can now access the cropped screenshot in your Photos app and share it or use it as needed.
Now, let’s move on to the newer iPhone models, iPhone X and later. Taking a screenshot on these models is slightly different. You need to simultaneously press the side button and the volume up button. The rest of the process, including accessing and cropping the screenshot, remains the same as mentioned earlier.
However, if you are using iOS 16 or later versions, there is a small delay in the cropping feature. After capturing the screenshot, you need to wait for about three to five seconds for the image to appear cropped before saving it. This delay ensures that the screenshot is properly cropped and avoids any accidental cropping.
Cropping screenshots on an iPhone is a straightforward process. Whether you have an older iPhone model or the latest one, you can easily crop screenshots to focus on specific areas. Just remember the slight differences in the button combinations and the delay in iOS 16 and later versions. With this knowledge, you can capture and crop screenshots effortlessly, enhancing your iPhone experience.
Can You Crop A Screenshot?
It is possible to crop a screenshot on Windows using the built-in functionality. To do so, you can follow these steps:
1. Take a screenshot of the entire screen by pressing the Windows key and the PrtScn (Print Screen) key simultaneously. This will capture the entire screen and save it to your clipboard.
2. Open an image editing program such as Microsoft Paint or any other image editor of your choice.
3. Paste the screenshot from your clipboard onto the image editing program by pressing Ctrl + V or by selecting the “Paste” option from the program’s menu.
4. Once the screenshot is pasted, you can use the selection tools provided by the image editing program to crop the image. In Microsoft Paint, for example, you can select the “Select” option from the menu and choose either the rectangular selection or free-form selection tool.
5. Use the selected tool to highlight the area of the screenshot you want to remove. You can adjust the selection by dragging the edges or corners of the selection box.
6. After selecting the desired area, choose the “Crop” option from the program’s menu or right-click on the selected area and select “Crop” from the context menu. This will remove the highlighted portion of the screenshot, leaving you with the cropped image.
7. save the cropped screenshot by selecting the “Save” or “Save As” option from the program’s menu. Choose a suitable file name and location for the cropped image, and select the desired file format (e.g., JPEG, PNG, etc.).
By following these steps, you can effectively crop a screenshot on Windows using the built-in functionality provided by image editing programs like Microsoft Paint.

How Do You Snip On IPhone?
To take a screenshot on an iPhone, follow these steps:
1. Locate the buttons: On iPhones with Face ID (iPhone X and newer models), press and hold the Side button (located on the right side of the device) and the Volume Up button (located on the left side of the device) simultaneously. On iPhones with a Home button (iPhone 8 and older models), press and hold the Side (or Top) button and the Home button simultaneously.
2. Capture the screenshot: Once you have located the buttons, press and release them simultaneously. You will see a quick flash on the screen, indicating that the screenshot has been taken.
3. Preview the screenshot: After capturing the screenshot, a preview thumbnail will appear in the bottom left corner of the screen. You can tap on it to open the screenshot in the Markup tool, where you can make edits, add text, or crop the image.
4. Access the screenshot: The screenshot will also be saved to your Photos app automatically. You can find it by opening the Photos app and navigating to the “Screenshots” album.
That’s it! You have successfully taken a screenshot on your iPhone. It’s a convenient way to capture and share information or save important moments on your device.
Why Are My Screenshots Not Cropping IOS 16?
There could be several reasons why your screenshots are not cropping in iOS 16. Let’s explore some possible causes:
1. Delayed cropping feature: In iOS 16 and later versions, Apple introduced a delay in the cropping feature for screenshots. This means that after taking a screenshot, you will need to wait for a few seconds before the image appears cropped and ready to be saved. This delay was implemented to allow users to review and make adjustments to the screenshot before saving it.
2. User error: It’s possible that you might not be following the correct procedure for cropping screenshots in iOS 16. Ensure that you are using the proper gestures or buttons to initiate the cropping process. You can try using the new crop button that appears in the screenshot preview mode to crop the image.
3. Software glitch: Like any software, iOS 16 may have occasional glitches or bugs that can affect the cropping functionality. Try restarting your device or updating to the latest iOS version to see if the issue gets resolved.
4. Insufficient storage space: If your device’s storage is nearing its limit, it could impact the cropping feature. Make sure you have enough available storage space to allow for proper screenshot cropping.
5. Third-party apps or settings: If you have installed any third-party apps or made custom settings changes on your device, they could potentially interfere with the cropping functionality. Consider disabling any recently installed apps or reverting any custom settings to see if that resolves the issue.
To summarize, the delayed cropping feature introduced in iOS 16, user error, software glitches, insufficient storage space, and third-party apps or settings can all contribute to screenshots not cropping properly. By being aware of these factors and following the correct procedure, you should be able to successfully crop your screenshots in iOS 16.
Conclusion
Cropping screenshots on an iPhone can be done easily using the built-in functionality of the device. On Windows, you can simply press the Windows key and the PrtScn key together to capture the entire screen, and then use image editing software like Paint to crop the screenshot. On an iPhone, the process is slightly different depending on the version of iOS you have. For iOS 16 and later, you need to wait for the screenshot to appear cropped before saving it, which usually takes a few seconds. This delay was introduced to ensure that the image is properly cropped. It’s worth noting that this feature was not present in earlier versions of iOS. By following these steps, you can effectively crop screenshots on your iPhone and use them for various purposes.


