Overclocking your PC can provide a noticeable boost in performance, but it also comes with its fair share of risks. One of the most significant risks is the increase in temperature that overclocking can cause, particularly for your CPU and other hardware components. However, it is important to note that these risks are relatively rare, and it is highly unlikely that you will “fry” your CPU or completely crash your computer by overclocking it.
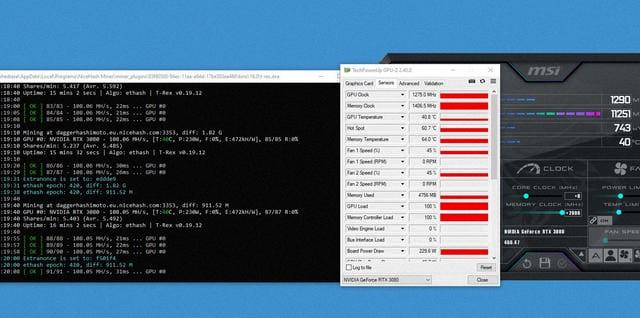
If you suspect that your CPU is overclocked and want to check its clock speed, there are a few simple ways to do so. One of the quickest methods is to use the Task Manager. Simply press CTRL+ALT+DEL to bring up the Task Manager, then click on the “Performance” tab. From there, you can take a look at the clock speed and compare it to the stock or turbo speed of your CPU. Alternatively, you can utilize utilities like CPU-Z or GPU-Z to check your clock speeds.
While overclocking can offer increased performance for certain applications, it is not a necessity for all users. However, if you are running applications that can benefit from overclocking, there is no reason to leave that extra performance on the table. That being said, it is crucial to exercise caution and not push your components too far. Extreme overclocking can lead to a shorter lifespan for your hardware and decrease the overall stability of your system.
Disabling overclocking is not always necessary, but it is important to carefully consider the potential risks and benefits. If you find that overclocking is not providing significant improvements for your specific needs, it may be best to stick with the default settings. Ultimately, the decision to overclock or disable overclocking should be based on your individual requirements and preferences.
Does Overclocking Hurt Your PC?
Overclocking does not typically hurt your PC. However, there are some risks involved, primarily related to the increased temperature of your CPU or other hardware components. Let’s delve into the details:
1. Increased temperature: When you overclock your PC, you push your hardware to operate at higher frequencies or voltages than the manufacturer’s specifications. This can result in increased heat production. If not properly managed, excessive heat can potentially damage your components over time.
2. Thermal throttling: To mitigate the risks of overheating, modern CPUs and GPUs are equipped with built-in thermal protection mechanisms. When temperatures reach unsafe levels, these components will automatically reduce their clock speeds, resulting in lower performance. While this protects your hardware from damage, it can impact the overall performance gains you hoped to achieve from overclocking.
3. Stability issues: Overclocking may cause stability issues if your hardware cannot handle the increased clock speeds. In such cases, your computer may experience crashes, freezes, or even the infamous “blue screen of death.” These issues are usually resolved by adjusting the overclock settings or reverting to default values.
4. Voiding warranties: It’s important to note that overclocking often voids the warranty on your hardware. Manufacturers typically do not cover any damage caused by overclocking, as it is considered outside the scope of normal operation.
To summarize, while it is rare to permanently damage your PC by overclocking, there are potential risks involved, mainly related to increased temperatures and stability issues. If you decide to overclock, it is crucial to monitor your hardware temperatures, ensure proper cooling, and be prepared to adjust your settings if any issues arise.

How Do You Tell If Your PC is Overclocked?
To determine if your PC is overclocked, you can follow these steps:
1. Open the Task Manager by pressing CTRL+ALT+DEL and selecting Task Manager.
2. In the Task Manager window, click on the “Performance” tab.
3. Look for the CPU section and check the clock speed displayed. If the clock speed is higher than the stock or turbo speed of your CPU, it indicates that your PC is overclocked.
Alternatively, you can use third-party utilities like CPU-Z or GPU-Z to check the clock speeds of your CPU and GPU.
These tools provide detailed information about your hardware, including clock speeds, voltage settings, and other relevant data. By using these utilities, you can easily determine if your PC is overclocked.
Remember that overclocking involves running your hardware at higher speeds than the manufacturer’s specifications. While it can enhance performance, it also increases the risk of instability and potential damage to your components. So, if you are not sure about whether your PC is overclocked or not, it’s recommended to consult an expert or refer to the system documentation to avoid any unwanted issues.
Should Overclock Be On or Off?
Overclocking is the process of increasing the clock speed of your computer’s components, such as the CPU, GPU, or RAM, to achieve higher performance. Whether you should enable or disable overclocking depends on your specific needs and circumstances.
Advantages of overclocking:
1. Increased performance: Overclocking can provide a significant boost in performance for tasks that are CPU or GPU intensive. This can be beneficial for tasks like gaming, video editing, 3D modeling, and other demanding applications.
2. Cost-effective: Overclocking allows you to get more performance out of your existing hardware without having to spend money on new, faster components.
3. Customizability: Overclocking gives you the ability to fine-tune your system’s performance to match your specific requirements. You can adjust clock speeds, voltage, and other settings to optimize performance for different tasks.
Disadvantages of overclocking:
1. Increased heat and power consumption: Overclocking generates more heat and requires more power, which can lead to higher temperatures and increased energy consumption. This can potentially reduce the lifespan of your components and increase your electricity bill.
2. Reduced system stability: Overclocking pushes your hardware beyond its designed limits, which can result in system instability. This can lead to crashes, freezes, and other issues that can negatively impact your user experience.
3. Voided warranties: Overclocking may void the warranty of your components, as it is considered an alteration of the original specifications.
Ultimately, the decision to enable or disable overclocking should be based on your specific needs and the potential risks involved. If you require the additional performance and are willing to accept the potential drawbacks, then overclocking can be beneficial. However, if stability and component lifespan are more important to you, it may be best to leave overclocking off.
Conclusion
If you have decided that overclocking is not necessary or beneficial for your PC, disabling it is a straightforward process. To disable overclocking, follow these steps:
1. Restart your computer and enter the BIOS or UEFI settings. This is typically done by pressing a specific key during the boot process, such as Del, F2, or F10. The key to access the BIOS may vary depending on your computer manufacturer.
2. Once you are in the BIOS settings, navigate to the section related to overclocking or CPU settings. The exact location and naming of this section may differ depending on your motherboard manufacturer.
3. Look for an option that allows you to disable or reset the overclocking settings. This option may be labeled as “Reset to Defaults,” “Load Optimized Defaults,” or something similar. Select this option to revert the CPU and other hardware settings back to their default values.
4. Save the changes and exit the BIOS settings. Typically, you can do this by pressing the F10 key or selecting the “Save and Exit” option.
5. After restarting your computer, the overclocking settings should be disabled, and your CPU and other hardware components will operate at their stock speeds.
It’s important to note that disabling overclocking will not have any negative impact on your computer’s performance. In fact, it may even improve system stability and longevity, as running hardware at higher speeds can generate more heat and stress on the components.
By following these steps, you can easily disable overclocking and return your PC to its default settings. This is particularly useful if you are experiencing stability issues or if you simply no longer require the extra performance boost that overclocking provides.


