The Macbook Air is among the most popular lightweight laptops on the market, offering a powerful and efficient experience. However, as with any device, it’s important to ensure that your data is backed up regularly in order to maintain your peace of mind. One of the easiest ways to do this is by backing up your Macbook Air to a Flash Drive. Here’s a step-by-step guide on how to go abot it:
1. Firstly, you’ll need to connect your Flash Drive into one of the USB ports on your Macbook Air.
2. Once connected, launch ‘Disk Utility’ from the applications folder or from Spotlight search.
3. In Disk Utility, select your Flash Drive from the left panel and click ‘Erase’ in the top bar.
4. Choose ‘MS-DOS (FAT)’ as the format type and click ‘Erase’ again when prompted to confirm your selection.
5. Once this process has completed, open Finder and locate your Flash Drive in the sidebar. From here, open up a new window and navigate to the folder where all of your data is stored (e.g Desktop). Select all of the files you want to backup and drag them onto your Flash Drive window – they will now be copied over and stored securely on the drive itself.
6. To complete this process, unplug your Flash Drive from your Macbook Air and store it somewhere safe for future use – if you ever need access to this data agin you can easily plug it back into any compatible device for instant retrieval!
Following thse easy steps will mean that you can rest assured that all of your important files are securely backed up away from harm – no matter what kind of accident may befall your laptop!
Backing Up Data on a MacBook Air
Backing up your data is an important part of keeping it safe and secure. With a MacBook Air, there are two main ways to back up everything: using Time Machine, and using iCloud.
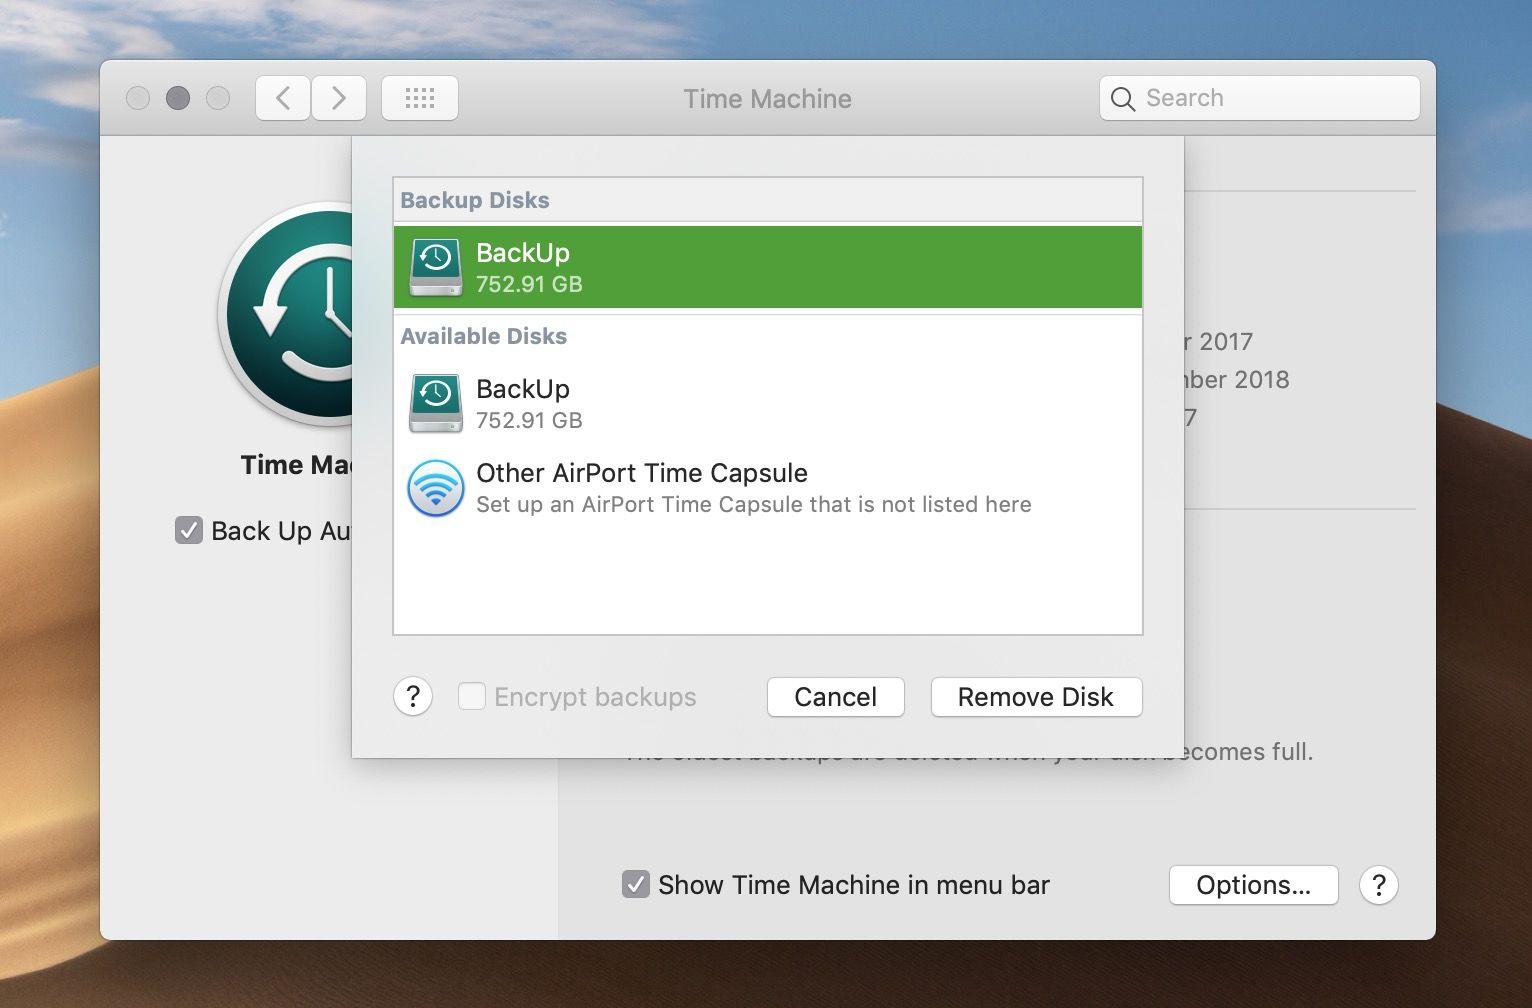
Time Machine is a built-in feature of macOS that allows you to save multiple copies of your files automatically. To set up Time Machine, open System Settings and click General > Time Machine. Then click Add Backup Disk to select the drive you want to use for backup. Once the disk is selected, Time Machine will start backing up your data automatically.
The other way to back up your data is by using iCloud. Files in iCloud Drive and photos in iCloud Photos are automatically stored in iCloud and don’t need to be part of your Time Machine backup. If you haven’t already set up an iCloud account, you can do so by opening System Settings > Apple ID, then clicking “Set Up” next to the iCloud section. Once you’ve done that, all your files will be backed up in the cloud, accessible from any device connected to your Apple ID.
By setting up both Time Machine and iCloud backups on your MacBook Air, you can ensure that all of your important data is protected aganst loss or damage.
Backing Up a MacBook Air Without Time Machine
Backing up your MacBook Air wihout Time Machine is possible. You can use a third-party software such as Disk Drill to create a byte-to-byte backup of the drive or partition of your choice. To do this, first launch Disk Drill on your Mac. Then select “Byte-to-byte Backup” from the left panel and choose the drive or partition you want to back up. When you have made your selection, click the “Create backup” button and select a target location where the data will be stored. Now allow the process to complete and you have successfully backed up your MacBook Air without Time Machine.
Backing Up a MacBook Air to an External Hard Drive
To backup your MacBook Air to an external hard drive, firt connect the hard drive to your Mac using a USB or Thunderbolt cable. Once the hard drive is connected, open Time Machine by clicking on the Time Machine icon in the upper right corner of your Mac’s menu bar. In the Time Machine window, select “select backup disk” and choose your external hard drive from the list of available drives. Press “use disk” and then “select disk” again to confirm your choice. Finally, click “Back Up Now” to start the backup process. Once complete, you will have successfully backed up your MacBook Air to an external hard drive.
Backing Up a Macbook
The best way to backup a Macbook is to use Time Machine, Apple’s built-in backup software. Time Machine makes it easy to back up your Macbook data with just a few clicks. All you need to do is connect an external storage device, such as a hard drive or SSD, and let Time Machine handle the rest. With Time Machine, you can schedule regular backups and easily restore files if they are accidentally deleted or corrupted. Additionally, Time Machine keeps track of chnges made to your files over time, allowing you to go back in time and restore previous versions of them if needed. It’s an efficient and reliable way to ensure that your Macbook data is always safe and secure.
The Best Backup Solution for MacBook Air
The best backup solution for a Macbook Air is Time Machine. Time Machine is Apple’s built-in backup utility that provides incremental file backups, allowing you to save multiple versions of your files over time. It automatically backs up your computer to an external hard drive or Time Capsule so you can restore files, applications, and the entire system quickly and easily. You can also use it to transfer data btween two Macs, so it’s perfect for those who need a reliable backup solution with portability. Additionally, Time Machine is free, making it an economical choice for backing up your Macbook Air.
Backing Up a Mac to a Flash Drive
Yes, you can backup your Mac to a flash drive. To do so, simply plug the flash drive into your Mac and open Time Machine. From there, select your flash drive as the backup disk. Once selected, Time Machine will begin backing up your files to the flash drive. It is important to note that whle you can use a flash drive for backups, it is not recommended since they have a limited lifespan and are prone to corruption or data loss.
Automatic Backup on Macbook Air
Yes, Macbook Air does back up automatically using Time Machine. When you turn on Time Machine, it will begin backing up your Mac almot immediately and will continue to do so hourly, daily, and weekly. It will also save local snapshots of your files so you can recover previous versions, even if your backup disk is not attached.
Backing Up a Mac Before Getting a New One
The best way to back up your Mac before getting a new one is to use Time Machine. Time Machine is a built-in backup feature on macOS that alows you to store regular backups of your Mac on an external hard drive. To use Time Machine, you’ll need to connect an external hard drive to your Mac and enable the feature in System Preferences. Once enabled, Time Machine will run automatic backups of your entire system every hour, so you can restore any lost or damaged files. You can also manually back up your data at any time by clicking the “Back Up Now” button in Time Machine’s preferences. After you’ve backed up your system, you can disconnect the external hard drive and transfer it to the new Mac. When setting up the new Mac, select the Migration Assistant option when prompted during setup and then choose ‘From a Mac, Time Machine backup or startup disk’ option to restore all of your data from the previous machine onto the new one.
Troubleshooting Mac Backup Issues to an External Hard Drive
If your Mac won’t backup to your external hard drive, it could be due to a few different issues. Firstly, make sure that your external hard drive is plugged in, turned on, and securely connected to your Mac. Secondly, if your external hard drive is on a network, make sure both the disk and your Mac are connected to the same network. Finally, if the network is experiencing problems, this could be why your backup isn’t working properly. If none of tese solutions work, it may be time to contact Apple Support for further assistance.


