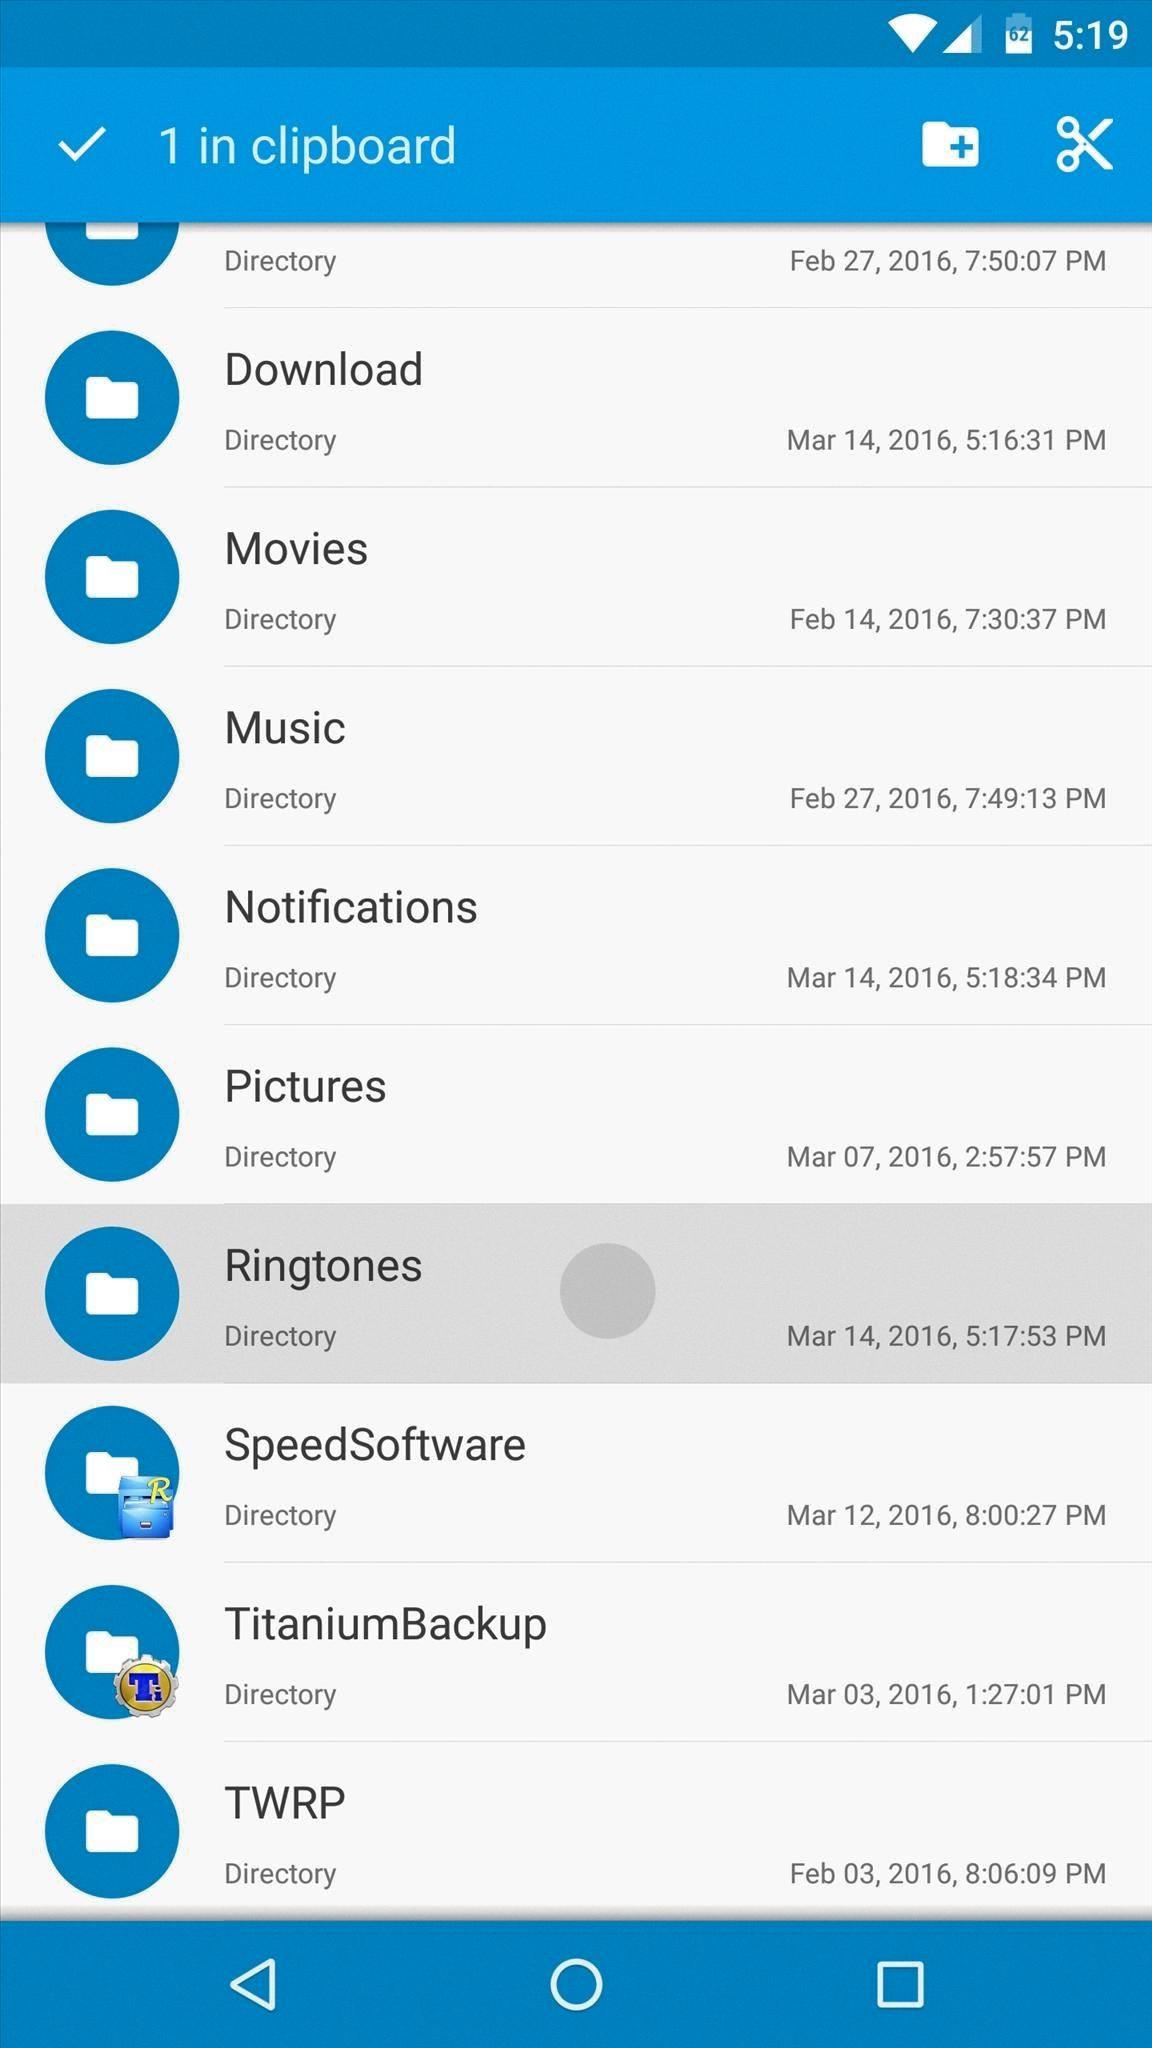
Ringtones have become an integral part of our mobile phone experience. They allow us to personalize our devices and add a touch of our own personality. But have you ever wondered where these ringtones are stored on your Android device? In this article, we will explore the storage location of ringtones on Android and how you can access and manage them.
When it comes to Android devices, ringtones are typically stored in a specific directory within the device’s file system. This directory is called “/system/media/audio/ringtones.” It is the designated location where all the default and user-added ringtones are stored.
To access this directory and manage your ringtones, you will need a file manager app. There are many file manager apps available on the Google Play Store, such as ES File Explorer, Solid Explorer, or File Manager by Xiaomi. Once you have installed a file manager app, follow these steps to locate your ringtones:
1. Open the file manager app on your Android device.
2. Navigate to the root directory or the main storage location of your device. This is usually labeled as “Internal Storage” or “SD Card.”
3. Look for the “system” folder and open it.
4. Within the “system” folder, locate and open the “media” folder.
5. Inside the “media” folder, you will find the “audio” folder. Open it.
6. within the “audio” folder, you will see the “ringtones” folder. This is where all your ringtones are stored.
Once you have located the “ringtones” folder, you can manage your ringtones in various ways. You can add new ringtones by simply copying the audio file to this folder. You can also delete or rename existing ringtones by selecting the desired file and using the available options within the file manager app.
It’s worth noting that the process of accessing and managing ringtones may vary slightly depending on the file manager app you are using. However, the general steps mentioned above should help you find the “ringtones” folder on your Android device.
In addition to the default ringtones stored in the “/system/media/audio/ringtones” directory, many Android devices also come with pre-installed ringtones that are stored in a separate location. These pre-installed ringtones are usually located in the “/system/media/audio/notifications” or “/system/media/audio/ui” directories. These directories contain notification sounds and system UI sounds, respectively.
Ringtones on Android devices are stored in the “/system/media/audio/ringtones” directory. By using a file manager app, you can easily access and manage your ringtones, including adding new ones or deleting existing ones. So go ahead and personalize your Android device with your favorite ringtones!
How Do I Copy Ringtones From My Android?
To copy ringtones from your Android device, you can follow the steps below:
1. Connect your Android device to your computer using a USB cable.
2. On your Android device, swipe down from the top of the screen to access the notification panel.
3. Tap on the USB connection notification and select “File Transfer” or “Transfer files” option.
4. On your computer, open the file explorer or Finder (for Mac).
5. Locate your Android device in the list of connected devices or under “This PC” (Windows) or “Devices” (Mac).
6. Click on your Android device to open it and navigate to the “Ringtones” folder.
7. Open another file explorer or Finder window and locate the folder on your computer where you have the ringtones you want to copy.
8. Select the desired ringtones and drag them to the “Ringtones” folder on your Android device.
9. Wait for the transfer to complete, and once done, safely disconnect your Android device from the computer.
10. On your Android device, go to the “Settings” app and select “Sound” or “Sound & vibration.”
11. Tap on “Phone ringtone” or “Default ringtone,” depending on your device.
12. Select the newly copied ringtones from the list of available options.
13. Exit the settings, and your new ringtones will be set and ready to use.
Alternatively, if you want to copy ringtones between Android devices, you can use Bluetooth or a file-sharing app. Here’s how to use Bluetooth:
1. Enable Bluetooth on both Android devices by going to the “Settings” app and searching for “Bluetooth.”
2. Pair the two Android devices by selecting the other device’s name in the list of available devices.
3. On the device from which you want to copy the ringtones, go to the file manager app or the “Settings” app and locate the ringtones you want to share.
4. Select the ringtones and tap on the share icon (usually represented by three dots or an arrow pointing upwards).
5. In the share menu, choose “Bluetooth” as the sharing method.
6. Select the name of the other Android device from the list of available devices.
7. On the receiving device, accept the incoming Bluetooth transfer request.
8. Wait for the transfer to complete, and once done, the ringtones will be saved on the receiving device.
9. On the receiving device, go to the “Settings” app, select “Sound” or “Sound & vibration,” and set the newly copied ringtones as the default or specific ringtone as desired.
By following these steps, you can easily copy ringtones from one Android device to another using a USB connection or Bluetooth.

How Do I Retrieve A Deleted Ringtone?
To retrieve a deleted ringtone on an Android device, you can follow these steps:
1. Open the Google Play Store on your device.
2. Search for a ringtone app that allows you to download or create custom ringtones.
3. Install the app of your choice and open it.
4. Browse through the available ringtones or use the app’s features to create a custom ringtone.
5. Once you have found or created the desired ringtone, select it and choose the option to set it as your default ringtone.
Alternatively, if you have previously backed up your device, you may be able to restore the deleted ringtone from the backup. To do this, follow these steps:
1. Go to the Settings menu on your Android device.
2. Scroll down and tap on the “System” or “Backup” option.
3. Look for the “Backup and Restore” or “Backup and Reset” option and tap on it.
4. If you have enabled automatic backups, your device should display a list of available backups.
5. Select the most recent backup that includes the deleted ringtone and initiate the restore process.
Please note that the exact steps may vary slightly depending on your device model and Android version. It’s always a good idea to consult your device’s user manual or the manufacturer’s support website for specific instructions.
Conclusion
Ringtones play an essential role in personalizing our mobile devices and adding a touch of uniqueness to our phone calls and notifications. They allow us to express our individuality and style by choosing a sound that reflects our personality or interests.
With the advancement of technology, it has become easier than ever to customize our ringtones. Most smartphones offer a wide range of pre-installed ringtones to choose from, covering various genres and styles. Additionally, users can download and install third-party apps or websites that provide an extensive selection of ringtones to suit their preferences.
Furthermore, users can even create their own custom ringtones by editing and converting their favorite songs or sounds. This adds a personal touch to their device, making it truly unique and tailor-made to their liking.
It is important to note that while ringtones are a fun and creative way to personalize our phones, it is essential to be mindful of the volume and appropriateness of the chosen tones. In certain environments, such as offices or public spaces, it is courteous to keep our ringtones at an appropriate level or switch to silent mode to avoid disturbing others.
Ringtones are an integral part of the mobile experience, allowing us to customize and personalize our devices to suit our preferences. Whether it’s a catchy tune, a favorite song, or a sound effect, ringtones add a touch of individuality to our mobile devices and enhance our overall user experience.


