Spotify Widget for Windows: A Comprehensive Guide
If you’re a Windows user and a fan of Spotify, you’ll be delighted to know that there is a Spotify widget available for Windows 11 and Windows 10. This widget allows you to have quick and easy access to your favorite Spotify music right from your desktop. In this article, we will guide you through the process of downloading and using the Spotify widget on your Windows device.
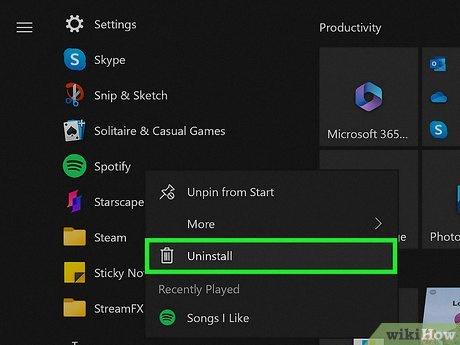
To get started, head over to the official website of Spotify or visit the Microsoft Store. You can download the Spotify app from either of these sources. Once you have the app installed on your device, sign in to your Spotify account or create a new one if you don’t have an account already.
Now, let’s dive into the steps of adding the Spotify widget to your Windows desktop. Press the Win + G keys on your keyboard to open the Game Bar. On the left side of the Game Bar, you’ll find an icon for the Widget Menu. Click on this icon to open the Widget Menu.
In the Widget Menu, you will see a list of available widgets. Look for Spotify in the list and click on it. This will add the Spotify widget to your desktop.
Now, let’s explore how you can play your favorite Spotify music using the widget. Open the Windows Media Player on your device and click on the “Open Files” option. Here, you can add the Spotify music files that you want to play. Once you’ve added the files, click on the Play button to start playing the songs.
To access the Spotify mini player, click on the Mini player button located at the bottom right corner of the Windows Media Player. Alternatively, you can press Ctrl+M on your keyboard to open the mini player.
Now, let’s discuss how to link your Spotify account to the Game Bar. In the Widget Menu, click on the Spotify widget to open the pop-up screen. Here, you will find the “Link Account” option. Click on this button and enter your Spotify account details to log in.
It’s worth noting that these instructions are accurate as of the last update in October 2020. Please ensure that you have the Chrome browser installed on your device to enjoy the full functionality of the Spotify widget.
Once you have the Spotify widget set up, you’ll notice a useful feature at the bottom next to the song banner. This button allows you to access a floating mini player. Simply click on the button, and you’ll see the mini player with the song banner. Hovering over the mini player with your mouse enables you to pause, play, skip to the previous or next song.
The Spotify widget for Windows is a convenient tool that allows you to access and control your favorite Spotify music right from your desktop. By following the steps outlined in this article, you can easily install and use the Spotify widget on your Windows 11 or Windows 10 device. Enjoy your music!
Is There A Widget For Spotify On Windows?
There is a widget for Spotify on Windows. You can download it from the official website or the Microsoft Store. Once you have it installed, you will need to sign in or sign up to Spotify in order to use it.
To add the Spotify widget on Windows 11 or Windows 10, follow these steps:
1. Press the Win + G keys on your keyboard to open the Game Bar.
2. Click on the Widget Menu icon located on the left side of the Game Bar.
3. From the list of available widgets, choose Spotify.
By adding the Spotify widget, you can conveniently access and control your Spotify music directly from your Windows desktop. It provides quick access to play/pause, skip tracks, and adjust the volume without having to open the Spotify application separately.

How Do I Get Spotify Mini Player On Windows 10?
To get the Spotify mini player on Windows 10, you can follow these steps:
1. Open the Spotify desktop app on your Windows 10 computer.
2. Log in to your Spotify account if you haven’t already.
3. Go to the Spotify settings by clicking on the downward-facing arrow next to your profile picture in the top-right corner of the app.
4. In the settings menu, scroll down and find the “Display Options” section.
5. Toggle on the “Show desktop overlay when using media keys” option. This will enable the mini player to appear when you use media keys (play, pause, next, previous) on your keyboard.
6. You can also adjust the position of the mini player on the screen by clicking on the “Change position” button and dragging the mini player to your desired location.
7. Additionally, you can customize the appearance of the mini player by clicking on the “Customize appearance” button. This allows you to choose between a light or dark theme for the mini player.
8. Once you have made your desired changes, close the settings menu.
9. Now, when you play a song on Spotify using the desktop app, you can press the media keys on your keyboard to control the playback, and the mini player will appear on your screen, allowing you to see the current song playing and control the playback without having to switch to the main Spotify window.
By following these steps, you can easily get the Spotify mini player on your Windows 10 computer and enjoy a convenient way to control your Spotify playback while working on other tasks.
How Do I Get Spotify Overlay On My Computer?
To get the Spotify overlay on your computer, you can follow these steps:
1. First, click on the Widget Menu icon on your computer. This icon is usually located on the toolbar or taskbar of your screen.
2. From the list of overlays that appears, select Spotify. This will open up a pop-up screen.
3. On the pop-up screen, you should see an option called “Link Account.” Click on this button to proceed.
4. A login screen will appear where you need to enter your Spotify account details. Fill in your username and password, and then click on the “Log In” button.
5. Once you have successfully logged in, your Spotify account will be linked to Game Bar, and the Spotify overlay will be activated on your computer.
Please note that these steps may vary slightly depending on your operating system and the version of Game Bar you are using.
How Do I Open Spotify In Floating Window?
To open Spotify in a floating window, follow these steps:
1. Open the Google Chrome browser on your computer. Make sure you have the browser installed before proceeding.
2. Go to the Spotify website (https://www.spotify.com/) and log in to your account. If you don’t have an account, you can create one for free.
3. Once you’re logged in, locate the song or playlist you want to play in the floating window. You can search for specific songs or browse through your playlists.
4. On the song or playlist page, look for the song banner or album cover. It typically appears at the top of the page and displays the artwork for the currently playing song.
5. To open Spotify in a floating window, look for a small button located at the bottom left corner of the song banner. This button resembles a square with an arrow pointing upwards. Click on this button.
6. After clicking the button, a floating mini player will appear at the bottom right corner of your screen. This mini player will feature the song banner, and when you hover over it with your mouse, you can pause, play, skip to the previous or next song.
By following these steps, you can open Spotify in a floating window using the Google Chrome browser. This feature allows you to continue browsing or working on other tasks while still having easy access to music playback controls.
Conclusion
The Spotify widget for Windows is a convenient tool that allows users to easily access and control their Spotify music directly from their desktop. It can be downloaded from the official website or the Microsoft Store, and users need to sign in or sign up to Spotify to use it.
For Windows 11/10 users, adding the Spotify widget is as simple as pressing the Win + G keys, clicking on the Widget Menu icon on the left side, and choosing Spotify from the list. This will enable the widget, which can be accessed by clicking on the Widget Menu icon and selecting Spotify from the overlays.
For Windows Media Player users, Spotify music files can be added by opening Windows Media Player and clicking on Open Files. Once the Spotify songs are added, they can be played by clicking on the Play button. The mini player can be opened by clicking on the Mini player button at the bottom right or by pressing Ctrl+M.
To link your Spotify account to Game Bar, click on the Link Account option that appears when selecting Spotify from the overlays. Fill in your account details and click Log In.
Additionally, if you have the Chrome browser, you can use the floating mini player by clicking on the button next to the song banner. This will display a mini player at the bottom right of your screen, allowing you to pause, play, skip to the previous or next song by hovering over it with your mouse.
The Spotify widget for Windows provides a convenient and user-friendly way to access and control your Spotify music without the need to open the Spotify app. Whether you prefer using the Windows widget or the floating mini player in Chrome, these options make it easier than ever to enjoy your favorite music while working or browsing the web.


