If you’re experiencing issues with your Roku remote, don’t worry, you’re not alone. Many users have faced problems with their Roku remote, and there are several steps you can take to troubleshoot and repair it.
First, try performing a power drain on your Roku remote. To do this, remove the batteries from the remote, press and hold any button on the remote for 10-30 seconds, and then reinsert the batteries and test the remote. This can often fix issues caused by aberrant charge buildup in components.
If your remote uses standard batteries, another troubleshooting step is to slide open the battery cover, remove the batteries for a moment, and then reinsert them. With a Roku simple remote, you can immediately try to control your streaming device. If the pairing screen doesn’t pop up, try the following steps. Remove the batteries from your Roku remote, then reinsert them. Reboot the Roku device (if it doesn’t have a physical button, unplug and re-plug in its power supply.) Hold down the pairing button while the device starts up.
If the light on your Roku remote is flashing, the remote is in pairing mode. Remove the batteries and reinsert them. If it keeps flashing, unplug the TV, wait for 30 seconds, then plug it back in.
Another common issue with Roku remotes is a problem with the IR sensor. The IR sensor is what receives the signal from your remote and communicates it to the Roku device. If the sensor is dirty or blocked, it can cause issues with the remote. Try cleaning the sensor with a soft, dry cloth, and make sure there are no obstructions blocking the signal.
If none of these steps work, it may be time to replace your Roku remote. You can purchase a replacement remote from Roku’s website or from a third-party retailer.
If you’re experiencing issues with your Roku remote, there are several steps you can take to troubleshoot and repair it. From performing a power drain to cleaning the IR sensor, there are many potential solutions. If all else fails, it may be time to purchase a replacement remote.
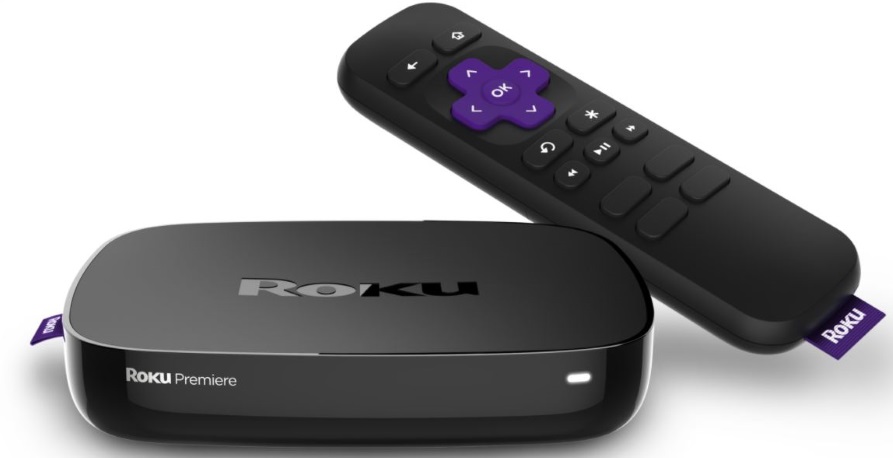
Repairing a Roku Remote
To repair your Roku remote, you can follow these steps:
1. Check the batteries: First, make sure that the batteries in your Roku remote are fresh and installed correctly. If the batteries are old or not inserted properly, your remote may not work.
2. Reset the remote: If your Roku remote is still not working, try resetting it. To do this, remove the batteries from the remote, then press and hold any button on the remote for 10-30 seconds. Reinsert the batteries and test the remote.
3. Check for obstructions: Make sure that there are no obstructions between your Roku device and the remote. Sometimes, objects such as furniture or walls can interfere with the remote signal.
4. Pair the remote: If your Roku remote is not responding, you may need to pair it with your Roku device. To do this, press and hold the pairing button on the back of your Roku device for 5 seconds or until the pairing light starts flashing. Then, press and hold the pairing button on your remote for 5 seconds or until the remote pairing light starts flashing.
5. Replace the remote: If none of the above steps work, you may need to replace your Roku remote. You can purchase a replacement remote from the Roku website or from a retailer that sells Roku products.
By following these steps, you should be able to repair your Roku remote and get back to enjoying your favorite streaming content.
Troubleshooting an Unresponsive Roku Remote
To fix an unresponsive Roku remote, you can follow these steps:
1. Check the power source: Make sure the remote has enough battery power. If it uses replaceable batteries, remove and reinsert them to ensure a good connection.
2. Restart the Roku: Restart your Roku streaming device by unplugging it from the power source, waiting for a few seconds, and then plugging it back in.
3. Pair the remote: If the remote is still not responding, try pairing it with the Roku device. To do this, press and hold the pairing button on the back of the remote until the LED light flashes. Then, release the button and wait for the remote to reconnect.
4. Reset the remote: If the above steps do not work, reset the remote. To do this, remove the batteries from the remote, press and hold the pairing button for 5 seconds, and then release it. The LED light should flash three times, indicating that the remote has been reset.
5. Replace the remote: If none of the above steps work, you may need to replace the remote. Contact Roku customer support or purchase a new remote from the Roku website or a retail store.
By following these steps, you should be able to fix an unresponsive Roku remote and get back to enjoying your favorite streaming content.
Troubleshooting a Roku Remote That Won’t Connect
To fix a Roku remote that won’t connect, you can try the following steps:
1. Remove the batteries from your Roku remote and reinsert them. This can help reset the remote and establish a new connection.
2. Reboot your Roku device. If your Roku device doesn’t have a physical button, unplug and re-plug in its power supply. This can help reset the connection between the device and the remote.
3. Hold down the pairing button while the device starts up. The pairing button is usually located on the back or bottom of your Roku remote. By holding it down while the device starts up, you can force the remote to reconnect with the device.
4. Check the line of sight between the remote and the Roku device. Make sure there are no obstructions blocking the signal, and that you are within a reasonable distance from the device.
5. Replace the batteries in the remote. If the batteries are low or dead, the remote may not be able to establish a connection with the Roku device.
If these steps do not work, you may need to contact Roku customer support for further assistance.
Troubleshooting Roku Remote Recognition Issues
To get your Roku to recognize your remote, follow these steps:
1. Make sure the remote has fresh batteries and is not too far from the Roku device.
2. If the light on the remote is flashing, it means it is in pairing mode. Remove the batteries and reinsert them. This should stop the flashing.
3. If the remote is still not recognized, try resetting the Roku device. You can do this by unplugging it from the power source and waiting for 30 seconds before plugging it back in.
4. Once the Roku device has restarted, try pairing the remote again. Press and hold the pairing button located inside the battery compartment. The light on the remote should start flashing again. Wait for the Roku device to recognize the remote and confirm the pairing.
5. If the remote still does not work, you may need to replace the batteries or consider purchasing a new remote.
Conclusion
Repairing a Roku remote can be a simple process with a few troubleshooting steps. It is important to try a power drain on the remote and troubleshoot the batteries before attempting any other solutions. Rebooting the Roku device and holding down the pairing button can also help with pairing issues. If the light on the remote is flashing, it may be in pairing mode, and unplugging the TV can help reset the connection. By following these steps, most issues with a Roku remote can be resolved quickly and easily. It is always important to refer to the manufacturer’s instructions for specific troubleshooting steps and to seek assistance from a professional if needed.

