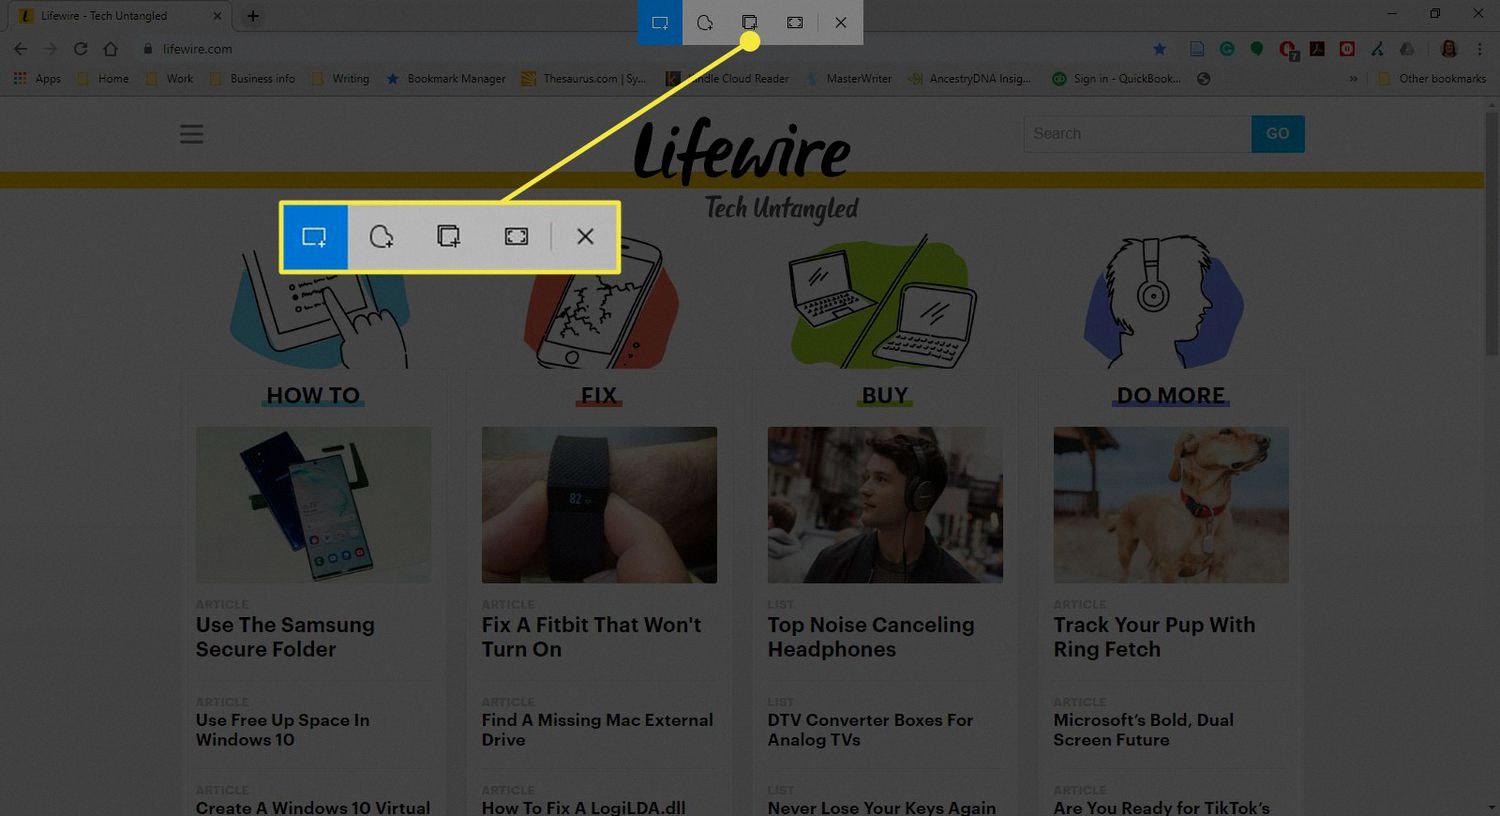
A screenshot is a useful tool that allows you to capture a portion of your computer screen and save it as an image. Whether you want to show a specific section of a webpage, highlight an error message, or share an interesting image, taking a screenshot is a quick and easy way to do it. In this article, we will explore how to take a crop screenshot using different methods.
Method 1: Using Keyboard Shortcuts
One common method to capture a screenshot is by using keyboard shortcuts. On a Mac, simply press and hold the Shift, Command, and 4 keys simultaneously. This will activate a crosshair cursor on your screen. Click and drag the cursor to select the area you want to capture. Once you release the mouse or trackpad button, the screenshot will be saved as an image file on your desktop.
Method 2: Using the Print Screen Button
If you’re using a Windows computer, you can use the Print Screen button (PrtSc) on your keyboard to capture a screenshot. This button is usually located on the upper-right side of most keyboards or next to the Space Bar on some. Pressing the PrtSc button will copy an image of your entire screen to the clipboard. You can then open an image editing software or a document and paste the screenshot by pressing Ctrl + V.
Method 3: Cropping the Screenshot
Once you have captured a screenshot, you may want to crop it to focus on a specific area. This can be done using various image editing software or built-in tools on your computer. On a Mac, open the screenshot in the Preview application. Click on the “Show Markup Toolbar” button, which looks like a toolbox icon. From the toolbar, select the Crop tool and adjust the selection to the desired area. click on the “Crop” button to save the cropped screenshot.
On Windows, you can use the built-in Paint application to crop your screenshot. Open the screenshot in Paint and click on the “Select” button in the toolbar. Choose the “Rectangular selection” option and drag the cursor to select the area you want to crop. Then, click on the “Crop” button in the toolbar to save the cropped screenshot.
Conclusion
Capturing and cropping screenshots can be a valuable skill when you need to save or share specific parts of your screen. Whether you’re using keyboard shortcuts or the Print Screen button, taking a screenshot is a simple process. Additionally, cropping the screenshot allows you to focus on the most important details. So, next time you need to capture an image from your screen, give these methods a try and save yourself time and effort.
How Do I Take A Cropped Screenshot On Mac?
To capture a specific portion of your Mac screen, you can follow these steps:
1. Press and hold the Shift, Command, and 4 keys simultaneously.
2. A crosshair cursor will appear on your screen.
3. Click and drag the crosshair to select the area you want to capture.
4. While dragging, you can adjust the selection by holding the spacebar and moving the cursor.
5. Release the mouse or trackpad button to capture the screenshot.
If you see a thumbnail of the captured screenshot in the corner of your screen, you can click on it to edit it further. Otherwise, the screenshot will be saved on your desktop as a PNG file by default.
In summary:
1. Press Shift + Command + 4.
2. Drag the crosshair to select the desired area.
3. Release the mouse or trackpad button to capture the screenshot.

How Do You Capture A Screenshot On A PC?
To capture a screenshot on a PC, you can use the ‘Print Screen’ button (PrtSc). This button is typically located on the upper-right side of most keyboards, or sometimes next to the Space Bar. Pressing the ‘Print Screen’ button will copy an image of your entire screen to the clipboard.
Once you have captured the screenshot, you can open an image editing software such as Microsoft Paint or Adobe Photoshop, and then press ‘Ctrl + V’ to paste the screenshot from the clipboard onto the canvas. Alternatively, you can also paste the screenshot directly into a document or email by pressing ‘Ctrl + V’.
If you only want to capture a specific area of the screen instead of the entire screen, you can use the ‘Alt + Print Screen’ combination. This will capture only the active window or the window that is currently in focus.
In some cases, you may have a dedicated ‘Fn’ (Function) key on your keyboard. In such situations, you may need to use the ‘Fn + Print Screen’ combination to capture a screenshot.
It’s worth noting that the captured screenshot is saved to the clipboard, and you will need to paste it into an application or save it as an image file to retain it for later use.
Conclusion
Capturing a portion of the screen can be done in two ways. The first method is by using the keyboard shortcut Shift + Command + 4 on a Mac. By pressing and holding these three keys together, a crosshair will appear on the screen. You can then drag the crosshair to select the specific area you want to capture. Once you have selected the area, release the mouse or trackpad button to take the screenshot. If a thumbnail of the screenshot appears in the corner of your screen, you can click on it to edit the screenshot before saving it.
The second method is using the “Print Screen” button, also known as PrtSc, which is typically located on the upper-right side of most keyboards. Pressing this button will copy an image of your entire screen to the clipboard. You can then paste the screenshot into a document or image editing software by using the keyboard shortcut Ctrl + V.
Both methods provide a convenient way to capture and save a portion of the screen, whether it is for documentation, sharing information, or troubleshooting purposes. By following these simple steps, you can easily capture and utilize screenshots to enhance your productivity and communication.


