Are you looking for a way to download music from Home Sharing to your iPhone? Home Sharing is a great feature of Apple’s iTunes that lets you share music from one computer to another. With Home Sharing, you can move your entire music library from one device to the next, including all of your favorite playlists and songs.
In this blog post, we’ll show you how to download music from Home Sharing to your iPhone. We’ll walk you through the steps required to set up Home Sharing on both your computer and your iPhone as well as how to transfer the music files over once everything is in place. Let’s get started!
Step 1: Set Up Home Sharing on Your Computer
The first step in downloading music from Home Sharing is to make sure the feature is enabled on both your computer and your iPhone. On your computer, open iTunes and select “Preferences” from the drop-down menu at the top left of the screen. Then select “Sharing” and check the box next to “Share my library on my local network.” Once that’s done, click “OK.”
Step 2: Set Up Home Sharing on Your iPhone
Next, you need to set up Home Sharing on your iPhone. To do this, open the Settings app and tap “Music.” Scroll down until you see “Home Sharing” and enter the same Apple ID that was used when setting up Home Sharing on your computer in Step 1. Once that’s done, tap “Done” at the top right of the screen.
Step 3: Transfer Music Files
Open up the Music app on your iPhone and select “Library” at the bottom of the screen. Next, tap “Shared Library” at the top left of the screen and select which library you want to access (in this case it will be either yours or whoever else’s who has shared their library with you). Finally, select any song or album that you want to download by tapping it twice then select “Download” at the bottom right corner of the screen when selecting an individual song or album cover respectively.
And that’s it! You now know how to download music from Home Sharing directly onto your iPhone without having to use a USB cable or connect any other external device – just follow these simple steps and enjoy having all of your favorite tunes right at your fingertips!
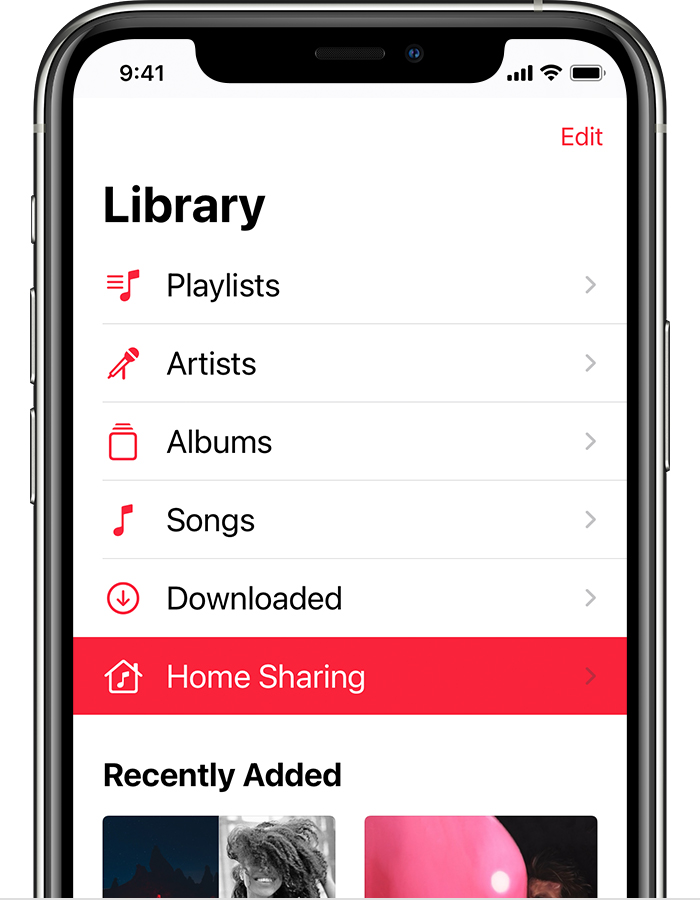
Transferring Music from Home Sharing to iPhone
Transferring music from Home Sharing to your iPhone is a simple process. First, you will need to make sure that both the iPhone and the computer you are transferring from are connected to the same Wi-Fi network. Then, on the iPhone, open Settings > Music and scroll down to find Home Sharing. If it already shows your Apple ID, you can skip this step. Otherwise, sign in using your Apple ID and password.
Next, open iTunes on your computer and select File > Home Sharing > Choose Photos to Share with Apple TV. Select the checkboxes next to the albums or playlists you wish to transfer and then click “Done”.
Finally, open the Music app on your iPhone and select Library > Shared > Choose what appears in this list. All of the music that is shared with Home Sharing should appear here; simply select it and then click “Done”. Your music will now be available for download on your iPhone!
Downloading Family Shared Music to an iPhone
To download family shared Music to your iPhone, first open the iTunes Store and tap on More. Tap on Purchased and select a family member. Then, choose Music from the list of categories, select the purchased item you would like to download, and tap the download button (the cloud with a downward arrow). When prompted, enter your Apple ID password. Your music will then be downloaded to your iPhone.
Transferring iTunes Library Using Home Sharing
To transfer your iTunes library with Home Sharing, make sure Home Sharing is enabled on the computer you want to import to. Then open the iTunes app, and choose a shared library from the pop-up menu at the top left. Click the Show pop-up menu at the bottom of the iTunes window, then choose “Items not in my library.” Select the items you want to import, then click Import. Once this is done, all of the selected items will be transferred to your new device’s iTunes library.
Conclusion
In conclusion, downloading music from Home Sharing to your iPhone is an easy and convenient way to access all of your favorite songs. With just a few simple steps, you can easily access your library of music from any other device that has Home Sharing enabled. Not only is this great for staying in touch with your favorite music, but it also allows you to save space on your phone by not having to store the music directly. With Home Sharing, you can now take advantage of the amazing convenience it provides and enjoy music anywhere you go!

