Microphones are an essential component of our Android devices, allowing us to communicate, record audio, and use voice commands. However, there may be instances when the microphone is turned off or inaccessible, preventing us from using its functionalities. In this article, we will explore the steps to turn on the microphone on Android devices, ensuring that we can make the most out of this feature.
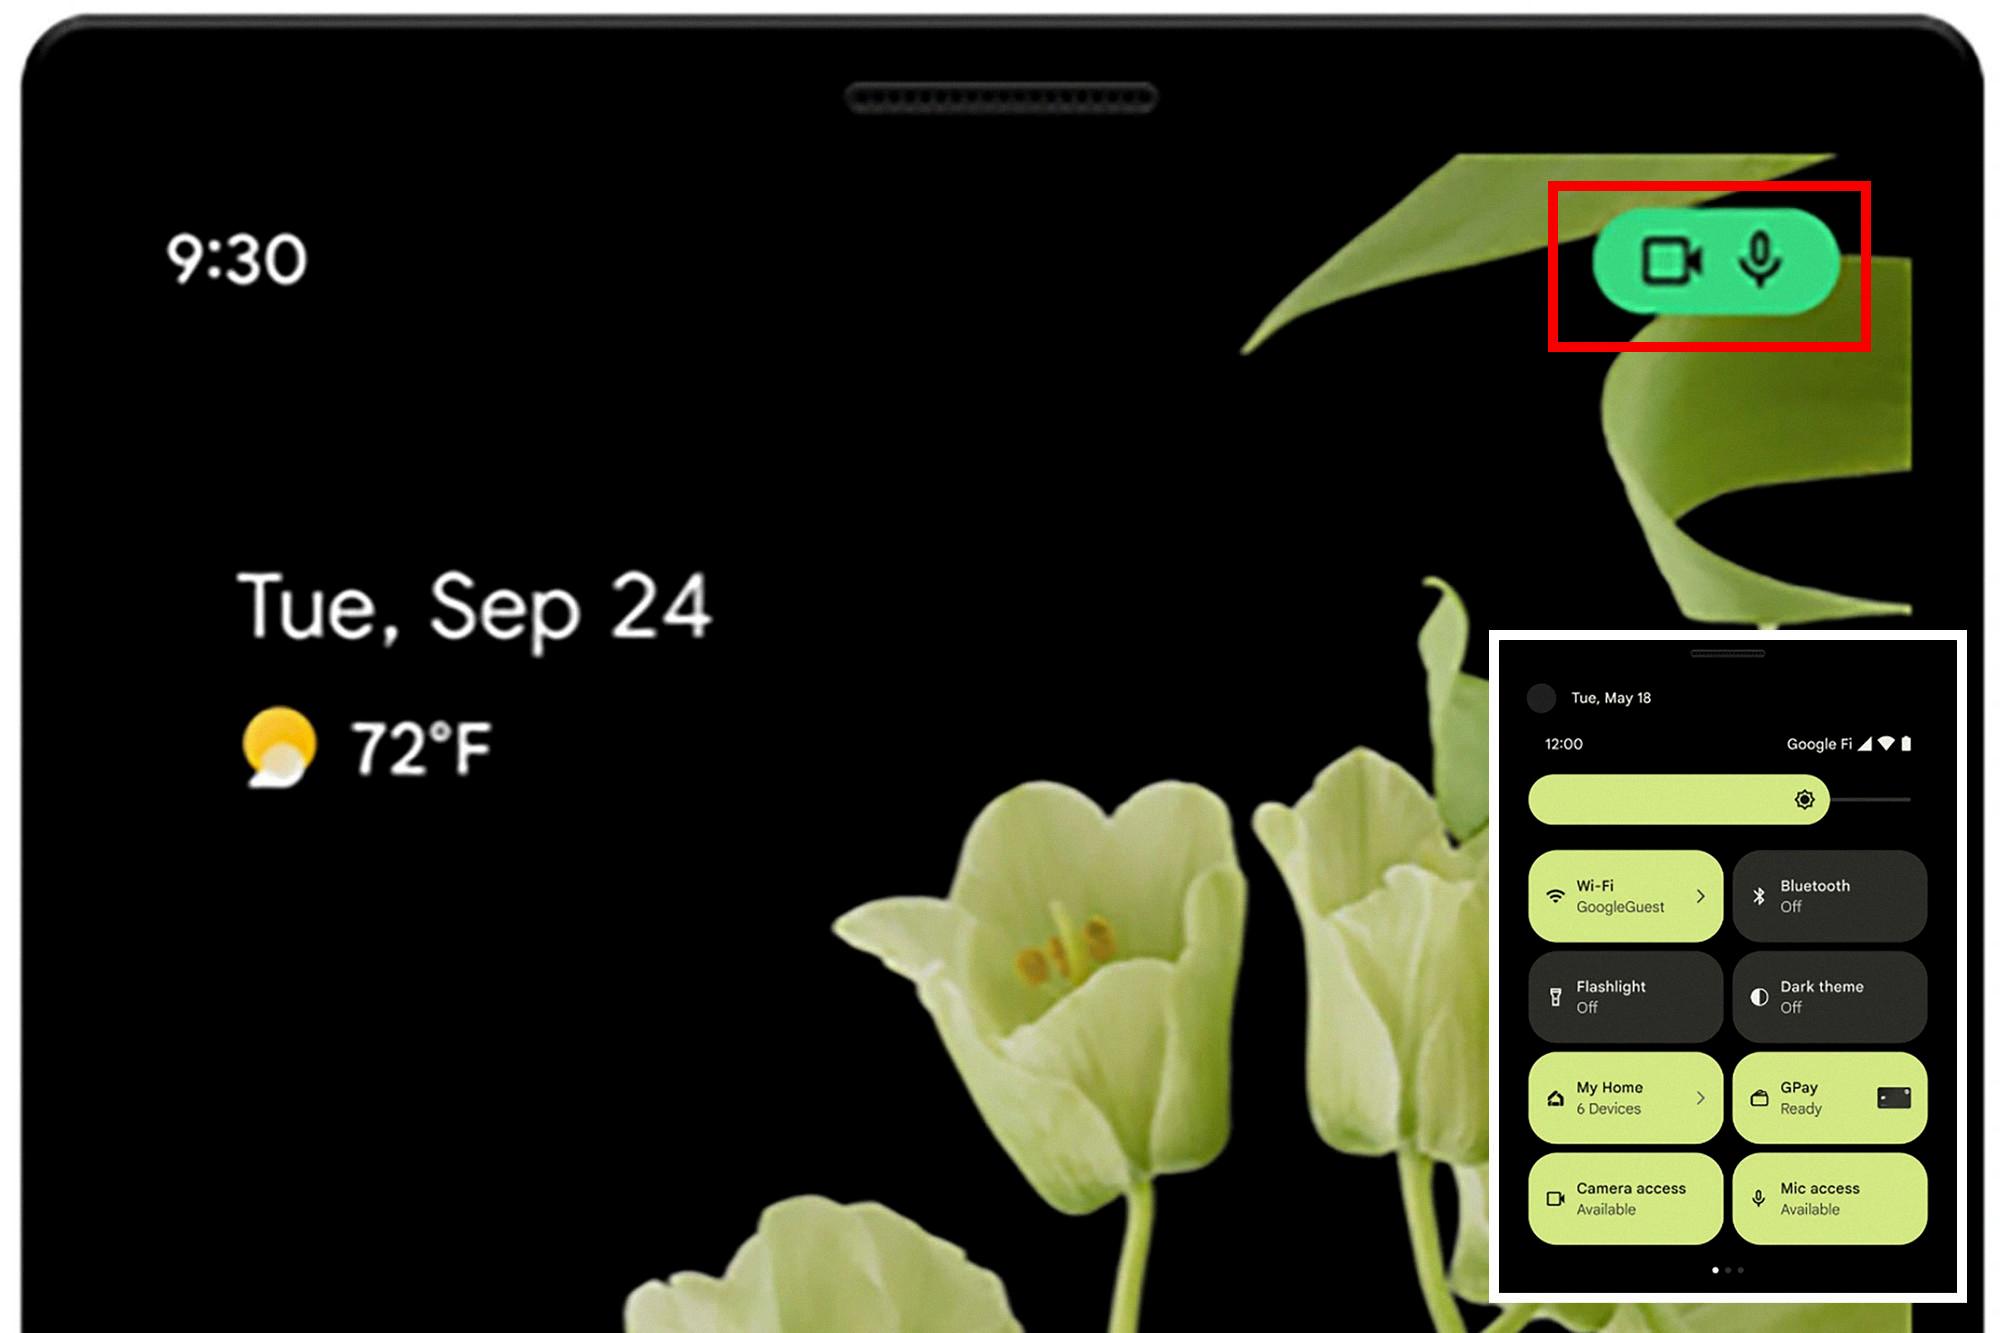
To begin, let’s first check if the microphone access is enabled on your Android device. Start by swiping down on your screen to access the quick settings menu. Look for the microphone icon and ensure it is not crossed out or disabled. If it appears to be disabled, tap on the microphone icon to enable it.
If you’re unable to find the microphone icon in the quick settings menu, you can access the microphone settings through the device settings. Simply navigate to the Settings app on your Android device and search for “Microphone” in the search bar. Tap on the search result that says “Microphone Privacy” or “Microphone Settings.”
Once you are in the microphone settings, you will see a toggle switch to enable or disable microphone access for your apps. Make sure the toggle switch is turned on to allow apps to access your microphone. If it is already turned on, you can try toggling it off and then back on to refresh the settings.
In some cases, certain apps may have their own microphone permissions. To ensure that these apps can access your microphone, you can go to the app settings individually and grant microphone access. To do this, navigate to the Settings app, then select “Apps” or “Applications.” Find the app you want to grant microphone access to and tap on it. Look for the “Permissions” or “App Permissions” section and make sure the microphone permission is enabled.
It is worth noting that the steps mentioned above may vary slightly depending on the version of Android you are using and the manufacturer of your device. However, the general concept of enabling microphone access remains the same.
Having the microphone turned on and accessible on your Android device is crucial for various functionalities. By following the steps outlined above, you can easily enable microphone access and make the most out of this feature. So, go ahead and ensure that your microphone is turned on to enjoy seamless communication, audio recording, and voice commands on your Android device.
How Do I Turn On The Microphone On An Android Phone?
To turn on the microphone on an Android phone, follow these steps:
1. Unlock your Android phone and go to the home screen.
2. Swipe down from the top of the screen to open the notification panel.
3. Look for the gear-shaped icon labeled “Settings” and tap on it. This will open the Settings menu.
4. In the Settings menu, scroll down and locate the section labeled “Apps” or “Applications.” Tap on it to access the application settings.
5. Within the application settings, you may need to scroll horizontally or vertically to find the specific app you want to enable the microphone for. Once you locate the app, tap on it to open its settings.
6. In the app settings, look for the “Permissions” or “Permissions & Privacy” section. Tap on it to view and manage the app’s permissions.
7. Within the permissions section, you should see a list of permissions the app requires, including the microphone permission. Tap on the microphone permission to enable it for the app.
8. You may be presented with a dialogue box asking for your confirmation to grant the microphone permission. Tap on “Allow” or “Grant” to enable the microphone for the app.
9. After granting the microphone permission, you can exit the app settings and return to the home screen.
10. Now, when you open the app that requires the microphone, it should be able to access and utilize the microphone on your Android phone.
Please note that the steps may vary slightly depending on the Android version and device model you are using. If you cannot find the specific options mentioned, try looking for similar options or consult the user manual or support documentation for your specific device.
How Do I Enable My Microphone Settings?
To enable your microphone settings, follow these steps:
1. Click on the Start button on your computer.
2. Go to the Settings option. It is usually represented by a gear icon.
3. In the Settings menu, locate and click on the Privacy option.
4. Within the Privacy settings, navigate to the Microphone tab.
5. You will see an option titled “Allow access to the microphone on this device.” Click on the Change button next to it.
6. Ensure that the toggle switch for “Microphone access for this device” is turned on. This will grant permission for applications to use your microphone.
7. Additionally, you can also scroll down to see a list of apps that have access to your microphone. You can individually toggle their switches on or off based on your preference.
By following these steps, you will be able to enable your microphone settings and allow applications to access your microphone for various purposes.
Why Is My Android Microphone Not Working?
There could be several reasons why your Android microphone is not working. Here are some possible causes:
1. Microphone access: Make sure that microphone access is enabled for the specific app or function you are trying to use. Go to Settings > Apps > [App Name] > Permissions and check if the microphone permission is allowed.
2. App issues: The problem may be specific to the app you are using. Try force-closing the app and reopening it. If that doesn’t work, uninstall and reinstall the app to see if it resolves the issue.
3. Software update: Check if there are any pending software updates for your Android device. Sometimes, microphone issues can be resolved by installing the latest updates, as they may contain bug fixes and improvements.
4. Physical obstructions: Ensure that there are no physical obstructions blocking the microphone on your device. Dust, debris, or a protective case can sometimes interfere with the microphone’s functionality. Clean the microphone area gently and remove any obstructions.
5. Audio settings: Double-check the audio settings on your device. Go to Settings > Sound > Advanced > Sound quality and effects, and make sure that any audio enhancement features are disabled. Adjust the volume levels and ensure that the microphone is not muted.
6. Third-party apps: If you have recently installed any third-party apps that are related to audio or call management, they may be conflicting with the microphone. Try uninstalling those apps to see if it resolves the issue.
7. Hardware problems: If none of the above steps resolve the problem, there may be a hardware issue with your microphone. In this case, it is recommended to contact the manufacturer or visit a professional technician to diagnose and repair the hardware problem.
Remember to test the microphone after each troubleshooting step to see if the issue is resolved. If the problem persists, it is advisable to seek further assistance from the device manufacturer or a professional technician.
How Do I Turn On Google Microphone?
To enable your microphone in Google Chrome, follow these steps:
1. Open Google Chrome on your computer.
2. Click on the three vertical dots at the top-right corner of the browser window to open the menu.
3. From the menu, select “Settings.”
4. Scroll down to the bottom of the Settings page and click on “Advanced.”
5. In the “Privacy and security” section, select “Content settings.”
6. Scroll down to find the “Microphone” option and click on it.
7. Make sure the switch next to “Block sites from accessing your microphone” is turned off. This will allow websites to access your microphone.
8. You can also click on the “Ask before accessing” option if you want Chrome to prompt you for permission before a website can use your microphone.
9. Once you have made the necessary changes, close the Settings tab.
By following these steps, you should now have successfully enabled your microphone in Google Chrome.
Conclusion
The microphone is an essential device for capturing audio and transmitting it to various devices. It is commonly used in a wide range of applications, including communication, recording, broadcasting, and voice recognition.
Microphones come in various types, such as condenser microphones, dynamic microphones, and lavalier microphones, each with its own strengths and weaknesses. They can be connected to different devices, such as smartphones, laptops, cameras, and audio interfaces, depending on the intended use.
Properly enabling the microphone is crucial to ensure its functionality. If you’re experiencing issues accessing or using your microphone, there are a few steps you can take to troubleshoot. First, check that the microphone access is turned on in your device’s settings. On Android phones, this can be found under Settings > Security and privacy > Privacy. On Windows devices, go to Start > Settings > Privacy > Microphone.
Additionally, if you’re using a web browser like Google Chrome, you may need to check the browser’s settings to ensure microphone access is enabled. This can be done by clicking on the three-dot menu in the top right corner, selecting “Settings,” scrolling down to “Advanced,” and then clicking on “Content settings.” From there, make sure the switch next to “Microphone” is turned on.
It’s also worth noting that some devices and apps may have specific settings related to microphone access, so it’s important to explore the settings of the respective device or app if you’re encountering difficulties.
The microphone is a vital tool for capturing and transmitting audio, and ensuring its proper functionality by enabling microphone access can greatly enhance your audio recording and communication experiences.

