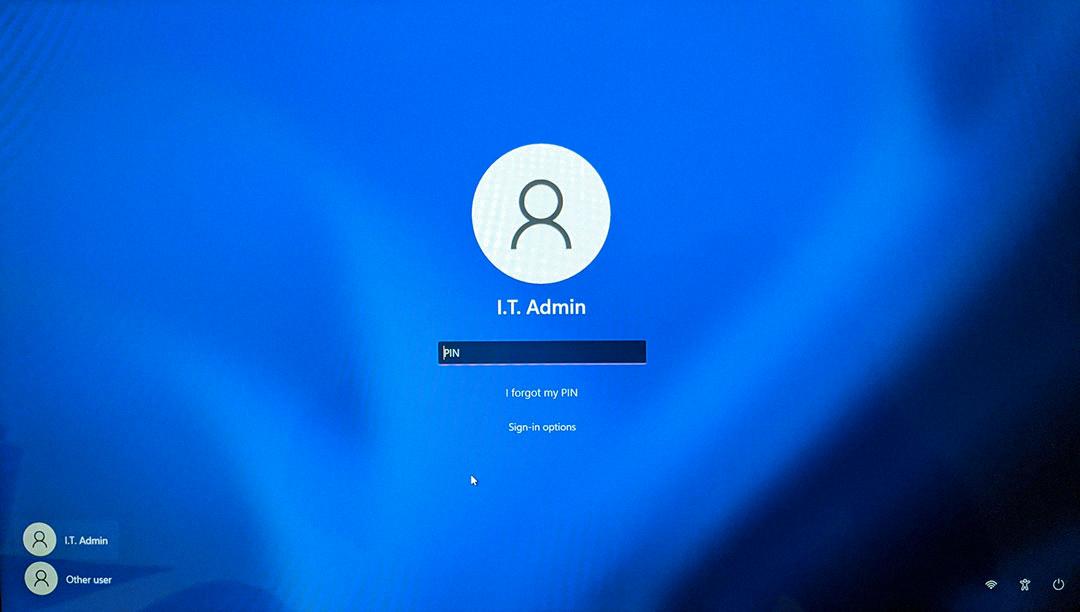
Windows 10 is a popular operating system known for its user-friendly interface and advanced features. One of the key functions of Windows 10 is the ability to add and remove user accounts. In this article, we will focus on removing a domain user from the login screen in Windows 10.
To remove a domain user from the login screen, follow these steps:
1. Start by opening the Start menu and navigating to the “Settings” option. Click on it to proceed.
2. In the Settings menu, locate and click on the “Accounts” option. This will open a new window with various account-related settings.
3. Look for the “Family & other users” section and click on it. Under the “Other users” category, you will find a list of all the accounts on your PC.
4. Find the account that you want to remove from the login screen and click on it. This will open a flyout with additional options.
5. Next to the “Account and data” section, you will see a “Remove” button. Click on it to remove the account from the login screen.
It’s important to note that removing a domain user from the login screen does not delete their Microsoft account. It simply removes their sign-in information from your PC.
In addition to removing the user from the login screen, you may also want to delete their profile from your computer. Here’s how you can do that:
1. Select the “Start” menu and navigate to the “Settings” option. Click on it to proceed.
2. In the Settings menu, search for “Advanced System settings” and click on the corresponding option. This will open the System Properties dialog box.
3. In the System Properties dialog box, you will find a section called “User Profiles”. Click on the “Settings” button within this section.
4. A new dialog box will appear, displaying a list of profiles on your system. Select the profile that you want to remove and click on the “Delete” button.
This will delete the selected user’s profile from your computer.
If you want to hide the last signed-in user on the login screen, you can make use of the Local Security Policy:
1. Press the Windows Key + R to open the Run dialog box. Type in “secpol.msc” and press Enter. This will open the Local Security Policy.
2. Expand the “Local Policies” section and click on “Security Options”.
3. Double-click on “Interactive logon: Don’t display last signed-in” in the list of security options.
4. In the properties window that appears, select the “Enabled” option and click on “Apply” and “OK”.
By following these steps, you can easily remove a domain user from the login screen in Windows 10. Remember to exercise caution when deleting user accounts or profiles, as it may result in loss of data associated with those accounts.
How Do I Remove A User From My Login Screen Windows 10?
To remove a user from the login screen in Windows 10, follow these steps:
1. Click on the Start button, usually located at the bottom left corner of the screen.
2. From the Start menu, click on “Settings,” which is represented by a gear icon.
3. In the Settings window, select “Accounts.”
4. Within the Accounts settings, click on “Family & other users.”
5. Under the “Other users” section, you will see a list of accounts on your PC. Locate the account you want to remove from the login screen.
6. Click on the account you want to remove, and a flyout menu will appear.
7. In the flyout menu, you will see the option “Account and data.” Click on it.
8. A new window will open, providing you with options related to the selected account. Locate the “Remove” button and click on it.
9. A confirmation prompt will appear, asking if you want to remove the account and its data. Confirm your decision by clicking “Yes.”
10. The account will now be removed from the login screen of your Windows 10 PC.
Please note that removing a user from the login screen does not delete their Microsoft account. It only removes their sign-in information from your specific PC.

How Do I Delete A Domain Profile In Windows 10?
To delete a domain profile in Windows 10, please follow these steps:
1. Click on the Start button and go to Settings.
2. In the Settings window, click on the System icon.
3. From the left-hand menu, select the “About” option.
4. Scroll down to the “Related settings” section and click on the “System info” link. This will open the System Properties window.
5. In the System Properties window, click on the “Advanced system settings” link located on the left side.
6. A new window named “System Properties” will open. Under the “User Profiles” section, click on the “Settings” button.
7. This will open the “User Profiles” window, displaying a list of profiles on your system.
8. Select the domain profile that you want to delete from the list.
9. Click on the “Delete” button to remove the selected domain profile.
10. A confirmation dialog box will appear, asking if you want to permanently delete the profile. Click on “Yes” to proceed.
11. Windows will now delete the domain profile and its associated files and settings.
Please note that deleting a domain profile requires administrative privileges. Make sure you are logged in as an administrator or have the necessary permissions to perform this action. It is also recommended to back up any important data associated with the profile before deleting it.
How Do I Not Show Users On Windows 10 Login?
To prevent the display of users on the Windows 10 login screen, you can modify the “Interactive logon: Don’t display last signed-in” setting in the Local Security Policy. Here are the steps to do it:
1. Press the Windows Key + R on your keyboard to open the Run dialog box.
2. Type “secpol.msc” in the Run dialog box and press Enter. This will open the Local Security Policy.
3. In the Local Security Policy window, expand the “Local Policies” folder.
4. Click on “Security Options” to view the available security options.
5. Scroll down the list of security options and locate “Interactive logon: Don’t display last signed-in”.
6. Double-click on “Interactive logon: Don’t display last signed-in” to open its properties.
7. In the properties window, select the “Enabled” option to enable this setting.
8. Click on “Apply” and then “OK” to save the changes.
By enabling this setting, the Windows 10 login screen will no longer display the last signed-in user. This can help enhance privacy and security by preventing unauthorized individuals from easily identifying the last user who logged in to the system.
Please note that modifying the Local Security Policy requires administrative privileges on your Windows 10 computer.
How Do I Remove A Domain Administrator From Windows 10?
To remove a domain administrator from Windows 10, follow these steps:
1. Click the magnifying glass icon located in the lower-left corner of your screen.
2. Type “Control Panel” into the Windows Search Bar and press Enter.
3. In the Control Panel window, change the view to “Small icons” if it’s not already selected. This will display all available options.
4. Scroll down and click on “User Accounts” from the list of options.
5. In the User Accounts window, click on “Manage another account” under the “Make changes to your account” section.
6. You’ll see a list of all the user accounts on your computer. Select the domain administrator account that you want to remove.
7. Once you’ve selected the account, a new window will open with various options related to that account.
8. Look for an option that says “Change the account type” or “Change account type” and click on it.
9. In the next window, you should see the current account type listed as “Administrator.” Click on the dropdown menu and select a different account type, such as “Standard User” or “Guest.” This will remove the administrator privileges from the account.
10. click on the “Change Account Type” or “Change” button to save the changes and remove the domain administrator from Windows 10.
It’s important to note that you need to have administrative access or credentials to perform these actions. If you don’t have the necessary permissions, you may need to contact your system administrator or IT department for assistance.
Conclusion
Windows 10 offers a variety of options for managing user accounts on your PC. Whether you want to remove an account from your PC or delete an administrator account, there are clear steps you can follow to accomplish these tasks.
To remove an account from your PC, you can go to the Family & other users section in the Settings menu. From there, you can select the account you want to remove and click on the Remove button. This will remove the sign-in information for that account from your PC, but it will not delete the person’s Microsoft account.
If you want to delete an administrator account, you can access the User Accounts section in the Control Panel. From there, you can choose the account you want to delete and click on the Delete button. This will remove the administrator privileges from that account.
Additionally, if you want to prevent the last signed-in user from being displayed on the sign-in screen, you can modify the Interactive logon settings in the Local Security Policy. By enabling the “Don’t display last signed-in” option, you can enhance the privacy and security of your PC.
Windows 10 provides a user-friendly interface and clear instructions for managing user accounts. By following these steps, you can easily remove or delete accounts on your PC to meet your specific needs.


